Search our FAQ for help
DRIVERfighter
Old drivers can cause lower performance and crashes. Some old drivers also represent a security risk.
Most PC crashes are caused by outdated or conflicting drivers. Older drivers can lead to system errors, crashes and slow performance.
Old and faulty drivers can result in blue screen crashes and other performance issues that can result in your hardware will not work properly, slow web surfing, slow PC startup, crashes, and slow computer performance.
Hardware manufacturers regularly update drivers, in many cases to correct conflicts, stability, and performance issues. DRIVERfighter will scan your computer, find your old drivers and create a list where you can see the new drivers available and you can then choose which drivers you want DRIVERfighter to download and install on your PC.
No, Windows update only updates your Windows installation and does not update important drivers for your motherboard, Bluetooth drivers, video card drivers, Ethernet drivers etc.
You can try a free scan for updated drivers with DRIVERfighter. After that you can choose to purchase DRIVERfighter and have all your drivers updated and use the software on a regular basis. Download the free trial and do a scan here: http://www.spamfighter.com/DRIVERfighter
More than 100.000 drivers from Epson, Nvidia, Intel, Dlink, Lenovo, Asus, Brother, Okidata, Konica, HP, Toshiba, Acer and many others are supported.
Your license key can be used on one PC.

Manual Activation
*Open DRIVERfighter
*Choose “Account” in the left menu
*Type in your product key
*Click the “Add product Key” button. Your key will now be active
To buy DRIVERfighter, please do the following:
1. Open DRIVERfighter by locating the program Start – All Programs – Fighters – DRIVERfighter – DRIVERfighter.
2. Choose “Account” in the left menu.
3. Click on the green “Purchase Full Version” button.
4. You will be transferred to our website where you can buy a valid key.
5. Make sure you add your new product key to the program.
Locating just 10+ updated drivers can be very tiresome and you will always have the risk of finding drivers that are actually not the newest versions.
If you experience that your monitor settings are reset after driver update you need to set your monitor settings again by going to your monitor settings in Windows.
The reason this happens is most likely that Windows was not able to keep the settings during the driver update and therefore they were reset.
We strongly suggest that you close all other programs before updating your drivers and that you do not use your computer during the update as this could make programs or even hardware fail.
If you see this error in DRIVERfighter when you try to update your drivers: Unable to create system restore point, error code: 2147754754
Please go to Start -> Control Panel -> Administrative Tools -> Services
Enable the service named “Microsoft Software Shadow Copy Protection Service“. If it is disabled, set it back to “Manual”.
Then make sure that the System Restore feature is enabled on your computer:
How to activate system restore on your computer
For Windows 7:
1. Go to Start
2. Click “Control Panel”
3. Click “System and Security”
4. Click “System”
5. Chose “System Protection”
6. Choose your System Drive (most likely drive C: (System))
7. Click “Configure”
8. Chose the “Restore system settings and previous versions of files”
9. Click “OK”
Your System Restore is now active.
For Windows VISTA:
1. Click “Start” button
2. Click “Control Panel”
3. Click “System and Maintenance”
4. Clicking “System”.
5. In the left pane, click System Protection. If you are prompted for an administrator password or confirmation, type the password or provide confirmation.
6. To turn on System Protection for a hard disk, select the check box next to the disk, and then click “OK”.
For Windows XP:
1. Click “Start”
2. Right-click “My Computer”
3. Click “Properties”.
4. In the System Properties dialog box, click the “System Restore” tab.
3. Click to clear the “Turn off System Restore” check box. Or, click the “Turn off System Restore on all drives” check box.
4. Click OK.
After a few moments, the System Properties dialog box closes.
If yo see this error code in the error message: Error code: 2147754754, then you need to follow THIS GUIDE
This is how to activate your System restore:
For Windows 7:
1. Go to Start
2. Click “Control Panel”
3. Click “System and Security”
4. Click “System”
5. Chose “System Protection”
6. Choose your System Drive (most likely drive C: (System))
7. Click “Configure”
8. Chose the “Restore system settings and previous versions of files”
9. Click “OK”
Your System Restore is now active.
For Windows VISTA:
1. Click “Start” button
2. Click “Control Panel”
3. Click “System and Maintenance”
4. Clicking “System”.
5. In the left pane, click System Protection. If you are prompted for an administrator password or confirmation, type the password or provide confirmation.
6. To turn on System Protection for a hard disk, select the check box next to the disk, and then click “OK”.
For Windows XP:
1. Click “Start”
2. Right-click “My Computer”
3. Click “Properties”.
4. In the System Properties dialog box, click the “System Restore” tab.
5. Click to clear the “Turn off System Restore” check box. Or, click the “Turn off System Restore on all drives” check box.
6. Click OK.
After a few moments, the System Properties dialog box closes.
To uninstall DRIVERfighter, please do the following:
Go to Start -> Settings -> Control Panel -> Add/Remove Programs.
Locate DRIVERfighter in the list, select it and click on the “Remove” button.
Click on “Control Panel“
Click on “System and Security“
Click on “Security and Maintenance“
Click on “Recovery“
Clock on “Configure System restore“
Clock on your main drive (C:)(system)
Click on “Configure“
Click on “Turn on system protection“
Click “Apply” and “ok“
The system restore is now active and you can use DRIVERfighter.
DRIVERfighter - General
Old drivers can cause lower performance and crashes. Some old drivers also represent a security risk.
Most PC crashes are caused by outdated or conflicting drivers. Older drivers can lead to system errors, crashes and slow performance.
Old and faulty drivers can result in blue screen crashes and other performance issues that can result in your hardware will not work properly, slow web surfing, slow PC startup, crashes, and slow computer performance.
Hardware manufacturers regularly update drivers, in many cases to correct conflicts, stability, and performance issues. DRIVERfighter will scan your computer, find your old drivers and create a list where you can see the new drivers available and you can then choose which drivers you want DRIVERfighter to download and install on your PC.
No, Windows update only updates your Windows installation and does not update important drivers for your motherboard, Bluetooth drivers, video card drivers, Ethernet drivers etc.
You can try a free scan for updated drivers with DRIVERfighter. After that you can choose to purchase DRIVERfighter and have all your drivers updated and use the software on a regular basis. Download the free trial and do a scan here: http://www.spamfighter.com/DRIVERfighter
More than 100.000 drivers from Epson, Nvidia, Intel, Dlink, Lenovo, Asus, Brother, Okidata, Konica, HP, Toshiba, Acer and many others are supported.
Your license key can be used on one PC.
Manual Activation
*Open DRIVERfighter
*Choose “Account” in the left menu
*Type in your product key
*Click the “Add product Key” button. Your key will now be active
To buy DRIVERfighter, please do the following:
1. Open DRIVERfighter by locating the program Start – All Programs – Fighters – DRIVERfighter – DRIVERfighter.
2. Choose “Account” in the left menu.
3. Click on the green “Purchase Full Version” button.
4. You will be transferred to our website where you can buy a valid key.
5. Make sure you add your new product key to the program.
Locating just 10+ updated drivers can be very tiresome and you will always have the risk of finding drivers that are actually not the newest versions.
If you experience that your monitor settings are reset after driver update you need to set your monitor settings again by going to your monitor settings in Windows.
The reason this happens is most likely that Windows was not able to keep the settings during the driver update and therefore they were reset.
We strongly suggest that you close all other programs before updating your drivers and that you do not use your computer during the update as this could make programs or even hardware fail.
If you see this error in DRIVERfighter when you try to update your drivers: Unable to create system restore point, error code: 2147754754
Please go to Start -> Control Panel -> Administrative Tools -> Services
Enable the service named “Microsoft Software Shadow Copy Protection Service“. If it is disabled, set it back to “Manual”.
Then make sure that the System Restore feature is enabled on your computer:
How to activate system restore on your computer
For Windows 7:
1. Go to Start
2. Click “Control Panel”
3. Click “System and Security”
4. Click “System”
5. Chose “System Protection”
6. Choose your System Drive (most likely drive C: (System))
7. Click “Configure”
8. Chose the “Restore system settings and previous versions of files”
9. Click “OK”
Your System Restore is now active.
For Windows VISTA:
1. Click “Start” button
2. Click “Control Panel”
3. Click “System and Maintenance”
4. Clicking “System”.
5. In the left pane, click System Protection. If you are prompted for an administrator password or confirmation, type the password or provide confirmation.
6. To turn on System Protection for a hard disk, select the check box next to the disk, and then click “OK”.
For Windows XP:
1. Click “Start”
2. Right-click “My Computer”
3. Click “Properties”.
4. In the System Properties dialog box, click the “System Restore” tab.
3. Click to clear the “Turn off System Restore” check box. Or, click the “Turn off System Restore on all drives” check box.
4. Click OK.
After a few moments, the System Properties dialog box closes.
If yo see this error code in the error message: Error code: 2147754754, then you need to follow THIS GUIDE
This is how to activate your System restore:
For Windows 7:
1. Go to Start
2. Click “Control Panel”
3. Click “System and Security”
4. Click “System”
5. Chose “System Protection”
6. Choose your System Drive (most likely drive C: (System))
7. Click “Configure”
8. Chose the “Restore system settings and previous versions of files”
9. Click “OK”
Your System Restore is now active.
For Windows VISTA:
1. Click “Start” button
2. Click “Control Panel”
3. Click “System and Maintenance”
4. Clicking “System”.
5. In the left pane, click System Protection. If you are prompted for an administrator password or confirmation, type the password or provide confirmation.
6. To turn on System Protection for a hard disk, select the check box next to the disk, and then click “OK”.
For Windows XP:
1. Click “Start”
2. Right-click “My Computer”
3. Click “Properties”.
4. In the System Properties dialog box, click the “System Restore” tab.
5. Click to clear the “Turn off System Restore” check box. Or, click the “Turn off System Restore on all drives” check box.
6. Click OK.
After a few moments, the System Properties dialog box closes.
To uninstall DRIVERfighter, please do the following:
Go to Start -> Settings -> Control Panel -> Add/Remove Programs.
Locate DRIVERfighter in the list, select it and click on the “Remove” button.
Click on “Control Panel“
Click on “System and Security“
Click on “Security and Maintenance“
Click on “Recovery“
Clock on “Configure System restore“
Clock on your main drive (C:)(system)
Click on “Configure“
Click on “Turn on system protection“
Click “Apply” and “ok“
The system restore is now active and you can use DRIVERfighter.
FULL-DISKfighter
FULL-DISKfighter will help you find any duplicate files you may have on your computer. Most computers have duplicate files, it can be pictures or documents that are saved in different folders, but are the same files. With a scan for duplicate files you will be able to see where the files are placed and you are able to delete the duplicates you choose. By clicking on the link under “Path” you will open the location where the files are placed.
However, please be very careful what you delete as once deleted it is gone and no way to recreate it. So be sure what you deleted and dont delete your email files. Always have a BACK-UP!
To uninstall FULL-DISKfighter, please do the following:
Go to Start -> Settings -> Control Panel -> Add/Remove Programs
Locate FULL-DISKfighter in the list, select it and click on the „Remove“ button
Open your FULL-DISKfighter menu from “Start -> All Programs -> Fighters -> FULL-DISKfighter -> FULL-DISKfighter” Click on “User ID” in the lower right corner of your FULL-DISKfighter menu. You will get a Popup where you can see your UserID.
Yes. The trial version can be downloaded here and it will for free provide cleaning of 25 files
Manual Activation
*Open your FULL-DISKfighter program
*Click on “License“ in the menu
*Enter your product key – You can find it on the invoice you received from us
*Click on “Add Product Key“
You should always make sure that you are not removing any files that you need. FULL-DISKfighter helps you find any file and gives you an easy overview to decide what files you want to remove and clean.
However, please be very careful what you delete as once deleted it is gone and no way to recreate it. So be sure what you deleted and dont delete your email files. Always have a BACK-UP!
Over time your harddisk becomes cluttered and fragmented. It’s a bit like a messy sock drawer where nothing is in place. The disk organizer reorganizes the drawer as to say and reunites fragmented files so your computer can run more efficiently.
When FULL-DISKfighter investigates your system for unnecessary files it may encounter files that could be removed, but when the actually clean happens some of the files are locked by the system.
This is impossible to check and predict this will occur before the program actually starts trying to remove them.
The reason the files are locked could be because you have a program open that may not use the particular temporary file, but this has temporary locked it anyway.
Don’t worry if you have a few files left that you are not able to remove, it should be very few anyway.
It is a good idea to close all programs before scanning.
FULL-DISKfighter is Hard Disk optimizer tool that cleans out Junk files and unnecessary files from your Hard Disk. FULL-DISKfighter organizes and defrags the rest of the files so that when your computer accesses files, it is faster and easier. In addition, you can easily get an overview of Duplicated or Large files that enables you to organize your files such as pictures in folders. Please remember don’t delete files if you don’t know what they are as once they are deleted they are gone, so always have a Back-Up. The Quick Scan feature in FULL-DISKfighter will not delete files that are important in your system.SLOW-PCfighter is a program the cleans your Windows Registry and a Start-Up Manager.
A PC´s registry needs to be cleaned once in a while as it gets cluttered with various entries collected overtime such as installing and uninstalling programs and many other behaviors.
Once you have run SLOW-PCfighter it will clean your PC´s registry and will improve your computers performance and start-up process aimes to be faster.Please note that FULL-DISKfighter and SLOW-PCfighter does NOT do the same thing and one of the programs does not substitute the other, but based on your issue you may need either one or both
FULL-DISKfighter - General
FULL-DISKfighter will help you find any duplicate files you may have on your computer. Most computers have duplicate files, it can be pictures or documents that are saved in different folders, but are the same files. With a scan for duplicate files you will be able to see where the files are placed and you are able to delete the duplicates you choose. By clicking on the link under “Path” you will open the location where the files are placed.
However, please be very careful what you delete as once deleted it is gone and no way to recreate it. So be sure what you deleted and dont delete your email files. Always have a BACK-UP!
To uninstall FULL-DISKfighter, please do the following:
Go to Start -> Settings -> Control Panel -> Add/Remove Programs
Locate FULL-DISKfighter in the list, select it and click on the „Remove“ button
Open your FULL-DISKfighter menu from “Start -> All Programs -> Fighters -> FULL-DISKfighter -> FULL-DISKfighter” Click on “User ID” in the lower right corner of your FULL-DISKfighter menu. You will get a Popup where you can see your UserID.
Yes. The trial version can be downloaded here and it will for free provide cleaning of 25 files
Manual Activation
*Open your FULL-DISKfighter program
*Click on “License“ in the menu
*Enter your product key – You can find it on the invoice you received from us
*Click on “Add Product Key“
You should always make sure that you are not removing any files that you need. FULL-DISKfighter helps you find any file and gives you an easy overview to decide what files you want to remove and clean.
However, please be very careful what you delete as once deleted it is gone and no way to recreate it. So be sure what you deleted and dont delete your email files. Always have a BACK-UP!
Over time your harddisk becomes cluttered and fragmented. It’s a bit like a messy sock drawer where nothing is in place. The disk organizer reorganizes the drawer as to say and reunites fragmented files so your computer can run more efficiently.
When FULL-DISKfighter investigates your system for unnecessary files it may encounter files that could be removed, but when the actually clean happens some of the files are locked by the system.
This is impossible to check and predict this will occur before the program actually starts trying to remove them.
The reason the files are locked could be because you have a program open that may not use the particular temporary file, but this has temporary locked it anyway.
Don’t worry if you have a few files left that you are not able to remove, it should be very few anyway.
It is a good idea to close all programs before scanning.
FULL-DISKfighter is Hard Disk optimizer tool that cleans out Junk files and unnecessary files from your Hard Disk. FULL-DISKfighter organizes and defrags the rest of the files so that when your computer accesses files, it is faster and easier. In addition, you can easily get an overview of Duplicated or Large files that enables you to organize your files such as pictures in folders. Please remember don’t delete files if you don’t know what they are as once they are deleted they are gone, so always have a Back-Up. The Quick Scan feature in FULL-DISKfighter will not delete files that are important in your system.SLOW-PCfighter is a program the cleans your Windows Registry and a Start-Up Manager.
A PC´s registry needs to be cleaned once in a while as it gets cluttered with various entries collected overtime such as installing and uninstalling programs and many other behaviors.
Once you have run SLOW-PCfighter it will clean your PC´s registry and will improve your computers performance and start-up process aimes to be faster.Please note that FULL-DISKfighter and SLOW-PCfighter does NOT do the same thing and one of the programs does not substitute the other, but based on your issue you may need either one or both
FULL-DISKfighter - General - Mac
Should you want to uninstall FULL-DISKfighter Mac please follow this procedure
1. Go to you Applications folder.
2. Find FULL-DISKfighter.
3. Drag FULL-DISKfighter to the Trash.
Once the file is deleted, it is no longer available on your Mac, however, if you are using Time Machine (or a third-party back-up software), then you are able to restore the file from these back-ups. If you have not got a back-up solution running, then we regret the file is no longer available.
Yes, like our PC version of this product, the first 25 file cleans are free, after that you will need to purchase the product to clean any more.
Each scan finds different items, and only you can make the decision if you should delete them (or not) from your system, and as such, it is not safe to just blindly delete files.
In particular, the File Finder scan is designed to find files over a certain size (default is 50 MB) for you to investigate what is taking up space on your hard disk, and it is permissible that many (if not all) of those files you might want to keep, but we present them for you to investigate further.
Once all scans have completed, you can do one of two things. If you’re only interested in the results of one scan, click on that Scan icon (for instance, duplicate scan is the middle icon) and review results for that scan and clean as appropriate. OR you can get an overview of all scans by clicking the magnifying glass icon in the scan results area. This will take you to an overview of each scan, so you can decide which areas to direct your attention to for review and clean.
FULL-DISKfighter Mac uses threads to speed up scanning by doing the scans concurrently, sometimes it may take a while for all of the threads to report back that they have stopped, until this happens, the scans appear to still be working. They will stop after a short delay.
If you have already downloaded the FULL-DISKfighter Mac DMG file (if not, go here to get it:
http://www.spamfighter.com/FULL-DISKfighter/Functions/Download-Mac.asp),
then find the DMG file, double-click it, and it will mount on your system, now drag FULL-DISKfigher Mac from the DMG file to your Applications folder.
It is now installed on your system.
Go to your Applications folder, select the FULL-DISKfighter program icon and double-click it to start FULL-DISKfigher Mac. As it’s the first time you are using the product, the product will auto-scan your system. You can turn auto-scanning off if you wish for future use.
Make sure FULL-DISKfighter Mac is running. From the FULL-DISKfighter menu (upper left of screen, from the menu bar), select FULL-DISKfighter -> Registration. A dialog box will appear for you to put the license key into.
FULL-DISKfighter Mac can be purchased from our website, here:
https://payment.spamfighter.com/Payment_Choose_Product_New_FDMAC.asp
As with all scans, the decision to delete, or not, any files that FULL-DISKfighter Mac lists as Junk, Duplicate, and especially in File Finder, must be up to the user of the machine on which the scan is being run. In some instances duplicates might NEED to exist, and therefore none are pre-selected for deletion.
There are three main scans that FULL-DISKfighter for Mac (Beta) undertakes: Junk Scan – that looks for un-needed systems files, potentially un-needed language files and potentially un-needed program components; Duplicate Scan – that scans for duplicate files on your computer; and Files Finder – which scans for files over a certain size, defined by you. Once scans have completed, you can click on the icon for each scan to be presented with the results of the scan, which then allows you to select which files that you wish to delete.
Click the help icon (marked with a question mark), and on screen help will appear to guide you. If you know what you want to do, for instance, do a duplicate scan, then click on the duplicate scan icon on the products main user interface. Now you can scan for duplicates from the Duplicate Scan page. OR, initiate all scans by clicking on the scan button.
The scan time for FULL-DISKfighter is dependent on both how big your hard disk drive is, and how many files you have. If you have a lot of data and a large hard disk, this might take some time. Most scans will be completed in less than 20 minutes (and often much, much faster), but the savings you can make in hard disk space make the wait well worth the while.
Please click on the FULL-DISKfighter menu, (or the preferences cog in the FULL-DISKfighter user interface), and de-select “Auto Scan on launch” check box. Any currently running scan can be cancelled by clicking the “X” in the scan notification area.
If you have purchased a license key for FUL-DISKfighter, we would have emailed you the key for the product to the email address you used in the purchase process. Please check that email account (it might take a short time to turn up), and also check your spam folder (as occasionally these emails can get filtered). If you still have not received your key after 24 hours, please contact our support folks on support@spamfighter.com
Have you inserted the license key sent to the email address you used when making the purchase? To do so, Click on the FULL-DISKfighter Menu, select Registration, now insert you License Key into the dialog box that is titled “Please enter your product key”.
If you’ve downloaded FULL-DISKfighter Mac from the SPAMfighter website, and you have not purchased a license, then the product is in Trial Mode, and will only clean 25 files. Please purchase a license to make FULL-DISKfighter Mac do a full clean of your Mac.
After cleaning, click on the magnifying glass icon in the scan overview area (where it tells you how big your cleaning results can be), this will take you to the overview of results page. Or, if you wish to review only the results of a particular scan directly, click on the scan icon to go directly to results that can be selected for cleaning.
This scan is designed to show which files are taking up space on your system. The default scan will show files over 50 MB in size. In the File Finder results view, you can use the slider at the top right of the results window to select a different size by which to sort – if you want to review smaller or larger files only. In many cases you may wish to keep the files listed, but this view allows you to investigate what is taking up space on your hard drive, and we’ve found that oftentimes you’ll be surprised what files take up the most space, and with this view you can now review them to see if you wish to keep such large files or not.
In the duplicate scan results window, where the “1” ribbon is showing, simply click above or below the ribbon to indicate which file should be the original for the purposes of deleting duplicates.
No. We present files that can be deleted, and in the Junk Scan, can safely be deleted. In other scans, we present duplicates and large files taking up space on your system, but only you can know which files you wish to keep (in duplicates we pre-select the oldest file as the file to keep, but this may not be what you need) and you should therefore choose which files to delete or keep.
FULL-DISKfighter - MAC
Should you want to uninstall FULL-DISKfighter Mac please follow this procedure
1. Go to you Applications folder.
2. Find FULL-DISKfighter.
3. Drag FULL-DISKfighter to the Trash.
Once the file is deleted, it is no longer available on your Mac, however, if you are using Time Machine (or a third-party back-up software), then you are able to restore the file from these back-ups. If you have not got a back-up solution running, then we regret the file is no longer available.
Yes, like our PC version of this product, the first 25 file cleans are free, after that you will need to purchase the product to clean any more.
Each scan finds different items, and only you can make the decision if you should delete them (or not) from your system, and as such, it is not safe to just blindly delete files.
In particular, the File Finder scan is designed to find files over a certain size (default is 50 MB) for you to investigate what is taking up space on your hard disk, and it is permissible that many (if not all) of those files you might want to keep, but we present them for you to investigate further.
Once all scans have completed, you can do one of two things. If you’re only interested in the results of one scan, click on that Scan icon (for instance, duplicate scan is the middle icon) and review results for that scan and clean as appropriate. OR you can get an overview of all scans by clicking the magnifying glass icon in the scan results area. This will take you to an overview of each scan, so you can decide which areas to direct your attention to for review and clean.
FULL-DISKfighter Mac uses threads to speed up scanning by doing the scans concurrently, sometimes it may take a while for all of the threads to report back that they have stopped, until this happens, the scans appear to still be working. They will stop after a short delay.
If you have already downloaded the FULL-DISKfighter Mac DMG file (if not, go here to get it:
http://www.spamfighter.com/FULL-DISKfighter/Functions/Download-Mac.asp),
then find the DMG file, double-click it, and it will mount on your system, now drag FULL-DISKfigher Mac from the DMG file to your Applications folder.
It is now installed on your system.
Go to your Applications folder, select the FULL-DISKfighter program icon and double-click it to start FULL-DISKfigher Mac. As it’s the first time you are using the product, the product will auto-scan your system. You can turn auto-scanning off if you wish for future use.
Make sure FULL-DISKfighter Mac is running. From the FULL-DISKfighter menu (upper left of screen, from the menu bar), select FULL-DISKfighter -> Registration. A dialog box will appear for you to put the license key into.
FULL-DISKfighter Mac can be purchased from our website, here:
https://payment.spamfighter.com/Payment_Choose_Product_New_FDMAC.asp
As with all scans, the decision to delete, or not, any files that FULL-DISKfighter Mac lists as Junk, Duplicate, and especially in File Finder, must be up to the user of the machine on which the scan is being run. In some instances duplicates might NEED to exist, and therefore none are pre-selected for deletion.
There are three main scans that FULL-DISKfighter for Mac (Beta) undertakes: Junk Scan – that looks for un-needed systems files, potentially un-needed language files and potentially un-needed program components; Duplicate Scan – that scans for duplicate files on your computer; and Files Finder – which scans for files over a certain size, defined by you. Once scans have completed, you can click on the icon for each scan to be presented with the results of the scan, which then allows you to select which files that you wish to delete.
Click the help icon (marked with a question mark), and on screen help will appear to guide you. If you know what you want to do, for instance, do a duplicate scan, then click on the duplicate scan icon on the products main user interface. Now you can scan for duplicates from the Duplicate Scan page. OR, initiate all scans by clicking on the scan button.
The scan time for FULL-DISKfighter is dependent on both how big your hard disk drive is, and how many files you have. If you have a lot of data and a large hard disk, this might take some time. Most scans will be completed in less than 20 minutes (and often much, much faster), but the savings you can make in hard disk space make the wait well worth the while.
Please click on the FULL-DISKfighter menu, (or the preferences cog in the FULL-DISKfighter user interface), and de-select “Auto Scan on launch” check box. Any currently running scan can be cancelled by clicking the “X” in the scan notification area.
If you have purchased a license key for FUL-DISKfighter, we would have emailed you the key for the product to the email address you used in the purchase process. Please check that email account (it might take a short time to turn up), and also check your spam folder (as occasionally these emails can get filtered). If you still have not received your key after 24 hours, please contact our support folks on support@spamfighter.com
Have you inserted the license key sent to the email address you used when making the purchase? To do so, Click on the FULL-DISKfighter Menu, select Registration, now insert you License Key into the dialog box that is titled “Please enter your product key”.
If you’ve downloaded FULL-DISKfighter Mac from the SPAMfighter website, and you have not purchased a license, then the product is in Trial Mode, and will only clean 25 files. Please purchase a license to make FULL-DISKfighter Mac do a full clean of your Mac.
After cleaning, click on the magnifying glass icon in the scan overview area (where it tells you how big your cleaning results can be), this will take you to the overview of results page. Or, if you wish to review only the results of a particular scan directly, click on the scan icon to go directly to results that can be selected for cleaning.
This scan is designed to show which files are taking up space on your system. The default scan will show files over 50 MB in size. In the File Finder results view, you can use the slider at the top right of the results window to select a different size by which to sort – if you want to review smaller or larger files only. In many cases you may wish to keep the files listed, but this view allows you to investigate what is taking up space on your hard drive, and we’ve found that oftentimes you’ll be surprised what files take up the most space, and with this view you can now review them to see if you wish to keep such large files or not.
In the duplicate scan results window, where the “1” ribbon is showing, simply click above or below the ribbon to indicate which file should be the original for the purposes of deleting duplicates.
No. We present files that can be deleted, and in the Junk Scan, can safely be deleted. In other scans, we present duplicates and large files taking up space on your system, but only you can know which files you wish to keep (in duplicates we pre-select the oldest file as the file to keep, but this may not be what you need) and you should therefore choose which files to delete or keep.
Sales
To access the product keys and assign them to the users, please click here.
If you’re asked to log in to the SPAMfighter community, please log in to the community using the account mentioned on the invoice under “user login”.
If not, just fill in the invoice number and the user login. If you do not have a user login, but only a login key, please enter that instead and leave the box for ‘user login’ empty.
From there just follow the instructions given.
Yes it is. Download SPAMfighter from here and when you install it, use the email address you used when you first installed SPAMfighter.
You probably haven’t used the product key we sent you. Look in the invoice you received and follow the easy guide.
If you have activated the key once, but reinstalled SPAMfighter afterwards using another username (aka e-mail address), please do the following:
* Download this program.
* Close Outlook/Express
* Run the program
* Click on “Remove the current login and relogin”
* Login with your email address and your password
* Open Outlook/Express and everything should work ok
If you cannot remember your password, get it here.
You probably haven’t used the product key we sent you. Look in the invoice you received and follow the easy guide.
To activate SPAMfighter PRO, please do the following:
* Go to the SPAMfighter toolbar in your Outlook/Express.
* Select “More” -> “Options”
* In the left hand side of the new window, chose “Account”.
* Select “Enter Product Key” in the right window.
* Enter the product key – You can find it on the invoice we sent you.
* Click on “Activate” to save your product key.
If there is a red line below all or part of the product key and the “activate” button is not clickable, it means there is an error in typing your product key. Please correct it and try again!
Restart your mail client and you’ll have SPAMfighter Pro.
You will receive an invoice with your SPAMfighter PRO product key right after you pay, and you can activate it immediately.
To activate the license please call 888 248 4794 for US toll-free guidance in native English.
Manually activation
*Open your email program (Outlook, Outlook Express, Windows Mail or Thunderbird).
*Click More -> Enter Product Key in your SPAMfighter toolbar
*Add your product key that you received with your invoice
*Click Add Product key to save your product key
Restart your email program and SPAMfighter will be upgraded to the Pro version.
SPAMfighter Standard is 100 % free for home use.
When you first install SPAMfighter, you get SPAMfighter Pro free of charge for 30 days.
After 30 days, home users automatically convert to the free SPAMfighter Standard, and users in professional/educational/governmental environments must buy SPAMfighter Pro or uninstall.
No don’t do that. If you already have the program installed, just use the product key as explained in the invoice and you will automatically be upgraded to the full version for the period you’ve paid for.
For all sales related questions, please contact our sales team.
Download the latest version of SPAMfighter here and install the software.
Yes, you probably can.
If you have a website and want to set up an affiliate account with us, you can get started nice and easy, and earn a 30% commission of each sale you make. If you want to do that or just know more, please take a look here.
You can buy SPAMfighter Pro directly from us through our web site click here. You can also contact one of our resellers; you can find their contact info here.
If your computer doesn’t allow cookies you can’t buy the license online.
Please go to your browser
* Select “Tools” -> “Internet options” -> “General” -> Temporary Internet Files – “Settings” -> Check for newer versions of stored page = “Automatically”
* Choose “OK” Twice
* Select “Tools” > “Internet option” > “Privacy” and select “Medium”
* Restart your Internet Browser and you should be OK.If this doesn’t solve your problem, then you’re welcome to send an e-mail to sales@spamfighter.com including your costumer details and which product you’re trying to purchase, then we’ll be happy to process your order manually.
A license is valid for one computer. Thus, if you have 3 computers, you must buy 3 licenses.
SPAMfighter Standard is free to use if you are a home user. If you want to use SPAMfighter in a professional/educational/governmental environment, you must use SPAMfighter Pro.
SPAMfighter Standard will insert a footer/signature in all your outgoing emails with a message that your mail is protected by SPAMfighter. In your Outlook interface there will also be a small text message/commercial. With SPAMfighter Pro you will also have access to premium support, allowing for faster response times to your questions. Finally, only with SPAMfighter Pro you will be able to have more than 100 people in your Blacklist/Whitelist.
You can see the full list of differences here, where you also buy SPAMfighter PRO.
SPAMfighter Standard is 100% free for home use.
If you want to use SPAMfighter in a professional/educational/governmental environment, you must use SPAMfighter Pro. A 1-year SPAMfighter Pro license costs 29$ (price depends on currency). This is an annual fee, and there is no automatic charge to your credit card! You can also get a discount on higher volume purchases.
After downloading, you can buy SPAMfighter Pro here.
SPAMfighter Standard is free for home use only! For use in a professional/educational/governmental environment you must use SPAMfighter Pro.
SPAMfighter Standard is a nice tool and it’s sufficient for most home users. But if you want these benefits:* Get Premium Support (typically same day response to support emails)
* use more then one mail account in your email client
* Get rid of the SPAMfighter footer in your emails
* Get rid of the small commercial in your email client
* Have more than 100 people in your Blacklist/Whitelist
then SPAMfighter Pro is for you.
In addition to this, you are able to support the “War Against Spam” by making it possible for us to hire more programmers, to make SPAMfighter an even better tool.
Buy SPAMfighter Pro here.
Ohhh yes you can 🙂
There is a good discount if you buy more than 5 licenses. You can find more information on this page.
If you have any questions, please contact our sales team.
If you prefer to pay by international bank transfer or by sending us a cheque, at the end of the purchasing process under payment method choose “bank transfer”. Your order will then be sent to us and we will look at your application as soon as possible and get back to you.
Please note!
* It can take up to 3 days before we have processed your request.
* Most banks charge a fee for international bank transfers – please check with your local bank before you request an invoice.
You can buy a license here.
Yes we do. You can pay by credit card (Visa, MasterCard, American Express and more) and Paypal on our secure encrypted payment server. We use SSL, the same security used in home banking and other secure environments.
No, certainly not. If you have one SPAMfighter Pro license on your machine, it will cover all your email addresses on that machine.
We accept the following currencies: USD, EURO, GBP, CAD, AUD, JPY, CHF, SEK, NOK, DKR, ISK, NZD and HKD.
Sales - Have bought a license
You will receive an invoice with your SPAMfighter PRO product key right after you pay, and you can activate it immediately.
To activate the license please call 888 248 4794 for US toll-free guidance in native English.
Manually activation
*Open your email program (Outlook, Outlook Express, Windows Mail or Thunderbird).
*Click More -> Enter Product Key in your SPAMfighter toolbar
*Add your product key that you received with your invoice
*Click Add Product key to save your product key
Restart your email program and SPAMfighter will be upgraded to the Pro version.
You probably haven’t used the product key we sent you. Look in the invoice you received and follow the easy guide.
To activate SPAMfighter PRO, please do the following:
* Go to the SPAMfighter toolbar in your Outlook/Express.
* Select “More” -> “Options”
* In the left hand side of the new window, chose “Account”.
* Select “Enter Product Key” in the right window.
* Enter the product key – You can find it on the invoice we sent you.
* Click on “Activate” to save your product key.
If there is a red line below all or part of the product key and the “activate” button is not clickable, it means there is an error in typing your product key. Please correct it and try again!
Restart your mail client and you’ll have SPAMfighter Pro.
You probably haven’t used the product key we sent you. Look in the invoice you received and follow the easy guide.
If you have activated the key once, but reinstalled SPAMfighter afterwards using another username (aka e-mail address), please do the following:
* Download this program.
* Close Outlook/Express
* Run the program
* Click on “Remove the current login and relogin”
* Login with your email address and your password
* Open Outlook/Express and everything should work ok
If you cannot remember your password, get it here.
Yes it is. Download SPAMfighter from here and when you install it, use the email address you used when you first installed SPAMfighter.
To access the product keys and assign them to the users, please click here.
If you’re asked to log in to the SPAMfighter community, please log in to the community using the account mentioned on the invoice under “user login”.
If not, just fill in the invoice number and the user login. If you do not have a user login, but only a login key, please enter that instead and leave the box for ‘user login’ empty.
From there just follow the instructions given.
Yes, you probably can.
If you have a website and want to set up an affiliate account with us, you can get started nice and easy, and earn a 30% commission of each sale you make. If you want to do that or just know more, please take a look here.
Download the latest version of SPAMfighter here and install the software.
No don’t do that. If you already have the program installed, just use the product key as explained in the invoice and you will automatically be upgraded to the full version for the period you’ve paid for.
For all sales related questions, please contact our sales team.
Sales - Upgrading to PRO
If your computer doesn’t allow cookies you can’t buy the license online.
Please go to your browser
* Select “Tools” -> “Internet options” -> “General” -> Temporary Internet Files – “Settings” -> Check for newer versions of stored page = “Automatically”
* Choose “OK” Twice
* Select “Tools” > “Internet option” > “Privacy” and select “Medium”
* Restart your Internet Browser and you should be OK.If this doesn’t solve your problem, then you’re welcome to send an e-mail to sales@spamfighter.com including your costumer details and which product you’re trying to purchase, then we’ll be happy to process your order manually.
We accept the following currencies: USD, EURO, GBP, CAD, AUD, JPY, CHF, SEK, NOK, DKR, ISK, NZD and HKD.
No, certainly not. If you have one SPAMfighter Pro license on your machine, it will cover all your email addresses on that machine.
Yes we do. You can pay by credit card (Visa, MasterCard, American Express and more) and Paypal on our secure encrypted payment server. We use SSL, the same security used in home banking and other secure environments.
If you prefer to pay by international bank transfer or by sending us a cheque, at the end of the purchasing process under payment method choose “bank transfer”. Your order will then be sent to us and we will look at your application as soon as possible and get back to you.
Please note!
* It can take up to 3 days before we have processed your request.
* Most banks charge a fee for international bank transfers – please check with your local bank before you request an invoice.
You can buy a license here.
Ohhh yes you can 🙂
There is a good discount if you buy more than 5 licenses. You can find more information on this page.
If you have any questions, please contact our sales team.
SPAMfighter Standard is free for home use only! For use in a professional/educational/governmental environment you must use SPAMfighter Pro.
SPAMfighter Standard is a nice tool and it’s sufficient for most home users. But if you want these benefits:* Get Premium Support (typically same day response to support emails)
* use more then one mail account in your email client
* Get rid of the SPAMfighter footer in your emails
* Get rid of the small commercial in your email client
* Have more than 100 people in your Blacklist/Whitelist
then SPAMfighter Pro is for you.
In addition to this, you are able to support the “War Against Spam” by making it possible for us to hire more programmers, to make SPAMfighter an even better tool.
Buy SPAMfighter Pro here.
SPAMfighter Standard is 100% free for home use.
If you want to use SPAMfighter in a professional/educational/governmental environment, you must use SPAMfighter Pro. A 1-year SPAMfighter Pro license costs 29$ (price depends on currency). This is an annual fee, and there is no automatic charge to your credit card! You can also get a discount on higher volume purchases.
After downloading, you can buy SPAMfighter Pro here.
SPAMfighter Standard is free to use if you are a home user. If you want to use SPAMfighter in a professional/educational/governmental environment, you must use SPAMfighter Pro.
SPAMfighter Standard will insert a footer/signature in all your outgoing emails with a message that your mail is protected by SPAMfighter. In your Outlook interface there will also be a small text message/commercial. With SPAMfighter Pro you will also have access to premium support, allowing for faster response times to your questions. Finally, only with SPAMfighter Pro you will be able to have more than 100 people in your Blacklist/Whitelist.
You can see the full list of differences here, where you also buy SPAMfighter PRO.
A license is valid for one computer. Thus, if you have 3 computers, you must buy 3 licenses.
SPAMfighter Standard is 100 % free for home use.
When you first install SPAMfighter, you get SPAMfighter Pro free of charge for 30 days.
After 30 days, home users automatically convert to the free SPAMfighter Standard, and users in professional/educational/governmental environments must buy SPAMfighter Pro or uninstall.
You can buy SPAMfighter Pro directly from us through our web site click here. You can also contact one of our resellers; you can find their contact info here.
SLOW-PCfighter
Open your SLOW-PCfighter menu from “Start -> All Programs -> Fighters -> SLOW-PCfighter -> SLOW-PCfighter” Click on “User ID” in the lower right corner of your SLOW-PCfighter menu. You will get a Popup where you can see your UserID.
When you click on the “Repair” button, a backup file will be created automatically. Then when you click on the “Restore” button, a restore point will show.
To buy SLOW-PCfighter, please do the following:
Go to the SLOW-PCfighter client
Click on „Register now“ down in the left corner
Click on „Purchase Online“
Manual Activation
*Open your SLOW-PCfighter program
*Click on the orange button “Register now” in the menu
*Enter your product key – You can find it on the invoice you received from us
*Click on “Activate Now”
Our licence agreement allows our users to use one licence on one machine only.
You can click on the “Update” link in the upper right corner on your SLOW-PCfighter menu and your SLOW-PCfighter will check for updates.
In order to do this open your SLOW-PCfighter from Start -> All Programs -> Fighters -> SLOW-PCfighter -> SLOW-PCfighter.
To get your licence key number please go to http://www.spamfighter.com/SLOW-PCfighter/support_default.asp , fill in the form and we will send you your licence key via email.
However, SLOW-PCfighter will usually recognize your computer as a Registered user if you have registered it once.
You can download our free trial here
SLOW-PCfighter will scan your computer and find all errors and you can fix 25 of them totally for free.
This happens when you run the trial scan. SLOW-PCfighter finds hundreds of errors but is fixing only 25 of them.
The email address that is displayed in SLOW-PCfighter’s “My Account” does not come from SLOW-PCfighter. It comes from another SPAMfighter program that you installed on your computer: SPAMfighter PRO, VIRUSfighter or SPYWAREfighter. To change the email address, please change it from one of those programs.
SLOW-PCfighter is a program that cleans your Windows Registry and a Start-Up Manager.
A PC´s registry needs to be cleaned once in a while as it gets cluttered with various entries collected overtime such as installing and uninstalling programs and many other behaviors.
Once you have run SLOW-PCfighter it will clean your PC´s registry and will improve your computers performance and start-up process aimes to be faster.
FULL-DISKfighter is Hard Disk optimizer tool that cleans out Junk files and unnecessary files from your Hard Disk. FULL-DISKfighter organizes and defrags the rest of the files so that when your computer accesses files, it is faster and easier. In addition, you can easily get an overview of Duplicated or Large files that enables you to organize your files such as pictures in folders. Please remember don”t delete files if you don’t know what they are as once they are deleted they are gone, so always have a Back-Up. The Quick Scan feature in FULL-DISKfighter will not delete files that are important in your system.
Please note that SLOW-PCfighter and FULL-DISKfighter does NOT do the same thing and one of the programs does not substitute the other, but based on your issue you may need either one or both
It can be becourse you have another program running on your computer that is “holding” on to a file on your computer or has created a temporary file that SLOW-PCfighter can not scan or repair.
Try to deactivate your antivirus software and close all programs running on your computer and then scan again with SLOW-PCfighter, you should also stop the programs you have in your system tray (lower right corner on your screen)It can also be that you have some Malware on your computer that is not possible for SLOW-PCfighter to remove. We suggest that you try to scan and clean your computer with Malwarebytes software Download the free version here
Click the help icon (marked with a question mark), and on screen help will appear to guide you. If you know what you want to do, for instance, do a duplicate scan, then click on the duplicate scan icon on the products main user interface. Now you can scan for duplicates from the Duplicate Scan page. OR, initiate all scans by clicking on the scan button.
SLOW-PC fighter finds and fixes the errors . Some programs unfortunately might recreate the same invalid entries that were removed in the first scan and SLOW-PCfighter will therefore find them again in your system.
There is no need to be worried though as just a small number of errors may reappear after being removed by SLOW-PCfighter. To get a rid of the errors you will need to find the program that is recreating them.
yes you can. Open your SLOW-PCfighter from Start -> All Programs -> Fighters -> SLOW-PCfighter -> SLOW-PCfighter. Click on “settings” and “Manage Schedule”, click on the “Manage” button. Choose the start time and how often you want your scan to run.
SLOW-PCfighter will start up at the time you choose and run a scan on your computer.
To restore your registry please do the following:
Go to your SLOW-PCfighter client
Click on the “Restore“ button
Select a restore point and click on the „Restore“ button
You can manage what you would like SLOW-PCfighter to scan from your SLOW-PCfighter menu. Click on “Scan for Errors” and choose which ones you want to skip.
In the “Startup Manager” menu you can uncheck applications that you do not want to have scanned in your start up.
During a scan of your computer you will be able to see what keys and files SLOW-PCfighter has found and will delete, you can choose to ignore specific Registry items. Click on the “+” sign left of each Category and a list of found Registry issues is shown. You can see the ignore list under “Settings -> Ignore list” in your SLOW-PCfighter menu, from here you can also Un-Ignore at any time.
The Registry is stored in several files. The exact names and locations of these files depend on the version of Window you are using. They are all stored on your local computer though.
You can edit the Registry by using Microsoft’s Registry Editor (Regedit.exe or Regedt32.exe). If you use the Registry Editor incorrectly, you can cause serious problems and you may need to reinstall your windows again. Microsoft does not guarantee that errors caused by using Registry Editor incorrectly can be resolved again. Use the Registry Editor at your own risk.
Registry errors can prevent your system from running smooth or starting up correctly. When ever you open ANY program, install a new program or uninstall a program, signatures from that program are stored in the Registry and this builds up. When Windows starts it has to go through the registry and the more information there is, the SLOWER your computer gets. SLOW-PCfighter is a tool that you can use safely and easily to delete unused signatures (keys), detect and repair the Registry errors and potentially prevent serious problems and performance issues on your Computer. Without regular Registry tuning, it is possible that your computer will not function normally, in fact it may even crash or not to be able to start up at some point.
Windows Registry is a database which stores settings and options for the operating system for Microsoft Windows. It contains critical and important information and settings for hardware, software, users, and preferences of the PC. The average Registry will have hundreds or thousands of pieces of information read from and written to it every day.
You can try a free scan with SLOW-PCfighter and have 25 errors fixed totally for free. After that you can choose to purchase SLOW-PCfighter, have all errors in your registry fixed and have it scanned and cleaned on regular basis or to uninstall the program.
To uninstall the program, please do the following:
Go to Start -> Settings -> Control Panel -> Add/Remove Programs
Locate SLOW-PCfighter in the list, select it and click on the „Remove“ button
SLOW-PCfighter - Buying and Installation
You can download our free trial here
SLOW-PCfighter will scan your computer and find all errors and you can fix 25 of them totally for free.
To get your licence key number please go to http://www.spamfighter.com/SLOW-PCfighter/support_default.asp , fill in the form and we will send you your licence key via email.
However, SLOW-PCfighter will usually recognize your computer as a Registered user if you have registered it once.
You can click on the “Update” link in the upper right corner on your SLOW-PCfighter menu and your SLOW-PCfighter will check for updates.
In order to do this open your SLOW-PCfighter from Start -> All Programs -> Fighters -> SLOW-PCfighter -> SLOW-PCfighter.
Our licence agreement allows our users to use one licence on one machine only.
Manual Activation
*Open your SLOW-PCfighter program
*Click on the orange button “Register now” in the menu
*Enter your product key – You can find it on the invoice you received from us
*Click on “Activate Now”
To buy SLOW-PCfighter, please do the following:
Go to the SLOW-PCfighter client
Click on „Register now“ down in the left corner
Click on „Purchase Online“
When you click on the “Repair” button, a backup file will be created automatically. Then when you click on the “Restore” button, a restore point will show.
Open your SLOW-PCfighter menu from “Start -> All Programs -> Fighters -> SLOW-PCfighter -> SLOW-PCfighter” Click on “User ID” in the lower right corner of your SLOW-PCfighter menu. You will get a Popup where you can see your UserID.
SLOW-PCfighter - General
Click the help icon (marked with a question mark), and on screen help will appear to guide you. If you know what you want to do, for instance, do a duplicate scan, then click on the duplicate scan icon on the products main user interface. Now you can scan for duplicates from the Duplicate Scan page. OR, initiate all scans by clicking on the scan button.
To uninstall the program, please do the following:
Go to Start -> Settings -> Control Panel -> Add/Remove Programs
Locate SLOW-PCfighter in the list, select it and click on the „Remove“ button
You can try a free scan with SLOW-PCfighter and have 25 errors fixed totally for free. After that you can choose to purchase SLOW-PCfighter, have all errors in your registry fixed and have it scanned and cleaned on regular basis or to uninstall the program.
Windows Registry is a database which stores settings and options for the operating system for Microsoft Windows. It contains critical and important information and settings for hardware, software, users, and preferences of the PC. The average Registry will have hundreds or thousands of pieces of information read from and written to it every day.
Registry errors can prevent your system from running smooth or starting up correctly. When ever you open ANY program, install a new program or uninstall a program, signatures from that program are stored in the Registry and this builds up. When Windows starts it has to go through the registry and the more information there is, the SLOWER your computer gets. SLOW-PCfighter is a tool that you can use safely and easily to delete unused signatures (keys), detect and repair the Registry errors and potentially prevent serious problems and performance issues on your Computer. Without regular Registry tuning, it is possible that your computer will not function normally, in fact it may even crash or not to be able to start up at some point.
You can edit the Registry by using Microsoft’s Registry Editor (Regedit.exe or Regedt32.exe). If you use the Registry Editor incorrectly, you can cause serious problems and you may need to reinstall your windows again. Microsoft does not guarantee that errors caused by using Registry Editor incorrectly can be resolved again. Use the Registry Editor at your own risk.
The Registry is stored in several files. The exact names and locations of these files depend on the version of Window you are using. They are all stored on your local computer though.
You can manage what you would like SLOW-PCfighter to scan from your SLOW-PCfighter menu. Click on “Scan for Errors” and choose which ones you want to skip.
In the “Startup Manager” menu you can uncheck applications that you do not want to have scanned in your start up.
During a scan of your computer you will be able to see what keys and files SLOW-PCfighter has found and will delete, you can choose to ignore specific Registry items. Click on the “+” sign left of each Category and a list of found Registry issues is shown. You can see the ignore list under “Settings -> Ignore list” in your SLOW-PCfighter menu, from here you can also Un-Ignore at any time.
To restore your registry please do the following:
Go to your SLOW-PCfighter client
Click on the “Restore“ button
Select a restore point and click on the „Restore“ button
yes you can. Open your SLOW-PCfighter from Start -> All Programs -> Fighters -> SLOW-PCfighter -> SLOW-PCfighter. Click on “settings” and “Manage Schedule”, click on the “Manage” button. Choose the start time and how often you want your scan to run.
SLOW-PCfighter will start up at the time you choose and run a scan on your computer.
SLOW-PC fighter finds and fixes the errors . Some programs unfortunately might recreate the same invalid entries that were removed in the first scan and SLOW-PCfighter will therefore find them again in your system.
There is no need to be worried though as just a small number of errors may reappear after being removed by SLOW-PCfighter. To get a rid of the errors you will need to find the program that is recreating them.
This happens when you run the trial scan. SLOW-PCfighter finds hundreds of errors but is fixing only 25 of them.
It can be becourse you have another program running on your computer that is “holding” on to a file on your computer or has created a temporary file that SLOW-PCfighter can not scan or repair.
Try to deactivate your antivirus software and close all programs running on your computer and then scan again with SLOW-PCfighter, you should also stop the programs you have in your system tray (lower right corner on your screen)It can also be that you have some Malware on your computer that is not possible for SLOW-PCfighter to remove. We suggest that you try to scan and clean your computer with Malwarebytes software Download the free version here
SLOW-PCfighter is a program that cleans your Windows Registry and a Start-Up Manager.
A PC´s registry needs to be cleaned once in a while as it gets cluttered with various entries collected overtime such as installing and uninstalling programs and many other behaviors.
Once you have run SLOW-PCfighter it will clean your PC´s registry and will improve your computers performance and start-up process aimes to be faster.
FULL-DISKfighter is Hard Disk optimizer tool that cleans out Junk files and unnecessary files from your Hard Disk. FULL-DISKfighter organizes and defrags the rest of the files so that when your computer accesses files, it is faster and easier. In addition, you can easily get an overview of Duplicated or Large files that enables you to organize your files such as pictures in folders. Please remember don”t delete files if you don’t know what they are as once they are deleted they are gone, so always have a Back-Up. The Quick Scan feature in FULL-DISKfighter will not delete files that are important in your system.
Please note that SLOW-PCfighter and FULL-DISKfighter does NOT do the same thing and one of the programs does not substitute the other, but based on your issue you may need either one or both
The email address that is displayed in SLOW-PCfighter’s “My Account” does not come from SLOW-PCfighter. It comes from another SPAMfighter program that you installed on your computer: SPAMfighter PRO, VIRUSfighter or SPYWAREfighter. To change the email address, please change it from one of those programs.
SPAMfighter
Your 10 day trail period has ended and your SPAMfighter has been downgraded to the free standard version.
If you use SPAMfighter in a company or wish to remove the text and add you need to upgrade to SPAMfighter PRO. You can buy SPAMfighter PRO here
If you are using the client version of SPAMfighter and it is not filtering your emails then it might be because you are using IMAP to get your mails which SPAMfighter doesnt support.
To check if you use IMAP please follow the guide here
To deactivate the junk e-mail folder, please do this: Go to Action -> Junk E-mail -> Junk E-mail Options
Select “No Automatic Filtering.” and click on “OK
The problem is that Outlook looks through all folders for unread emails which includes the SPAMfighter folder. You need to tell Outlook to not search the SPAMfighter folder for unread emails. To do this, please follow these steps: Right click on “Unread mail” in the “Search Folders”
Choose “Customize this search folder”
Click on “Browse”
Remove the checkmark from the top folder (normally Personal folders) and put a checkmark on all folders below the root folder except the SPAMfighter folder. Now it should not look in the SPAMfighter folder for unread emails.
It is because of Service Pack 3 for Office 2002/Office XP
Do following:
*Close Outlook
*Go to Start -> All Programs -> SPAMfighter -> Repair SPAMfighter
*Open Outlook and everything should be running now.
Your SPAMfighter folder is to the left under “Personal Folders”.
In Outlook 2000 / 2002/ XP:
Go to your panel and choose “View” and activate “Folder list”.
In Outlook 2003:
Go to your panel and choose “Go” -> “Folder list (Ctrl+6)”
In Outlook Express:
Go to your panel and choose “View” and “Layout” and click “Folder list”.
This is coursed by Windows update, you can read more about it on their website: http://support.microsoft.com/kb/935448/en-us
Even when you have SPAMfighter installed, you will still receive some spam mails. SPAMfighter filters around 90% of all spam automatically.
You can help make SPAMfighter even better by reporting the spam mails we miss to the SPAMfighter Server. To do this, simply select the email and click on block in the SPAMfighter toolbar.
The email will be moved to the SPAMfighter folder and reported to our server.
SPAMfighter doesn´t change your attachments.
Please read more about it here:
* http://support.microsoft.com/kb/q138053/
* http://office.microsoft.com/en-us/assistance/HP011164871033.aspx
Your 10 day trail period has ended and your SPAMfighter has been downgraded to the free standard version.
If you use SPAMfighter in a company or wish to remove the text and add you need to upgrade to SPAMfighter PRO. You can buy SPAMfighter PRO here
Your 10-day free trial of the SPAMfighter PRO has expired and you have now been downgraded to the free SPAMfighter Standard.
That means you’ve been limited to only having 5 addresses in your blacklist/ whitelist for example. If you’re using SPAMfighter in a business and/or want more entries, please buy a SPAMfighter PRO license, which can contain the number of addresses you need.
To change your e-mail address, please do the following:
* click on “More” and then “Options” in your SPAMfighter toolbar in your email client.
* SPAMfighter will open up.
* Click on “Account” in the left side.
* click on “Account Settings” and add your new email in the “Change Your Email” field
* Click “Change” and you are done.
To unsubscribe from the SPAMfighter mailing list please click here.
Please remember, that if you continue to use or reregister SPAMfighter, you will receive our emails again automatically.
SPAMfighter doesn’t delete any emails. They are moved to a folder named “SPAMfighter” in the root of your mail box. Many people uses the standard installation which only shows the Outlook panel in the left side of Outlook. To see the SPAMfighter folder you’ll have to open the folder pane. Both windows can be enabled and disabled from the drop down window “View” in top of Outlook.When you use the folder pane, you can create a shortcut in the Outlook panel if you prefer to use this.
In order to use SPAMfighter with Gmail you need to have a Gmail account.• Log in to your Google Mail account.
• Click Settings at the top of any Google Mail page.
• Click Forwarding and POP in the orange Mail Settings box. • Select Enable POP for all mail or Enable POP for mail that arrives from now on.
• Choose the action that you would like your Google Mail messages to take after they are accessed with POP.
You are now ready to set up your Outlook. To create and configure a new Gmail e-mail account in the Outlook software:
1. Launch the Microsoft Outlook software.
2. Click the Tools menu, then click E-mail Accounts.
3. Choose the Add a new e-mail account option by clicking it, then click the Next button.
4. Choose the POP3 option by clicking it, and then click the Next button.
5. In the Your Name box, type your name as you wish it to appear on outgoing e-mail.
6. In the E-mail Address box, type your Gmail e-mail address, for example, yourmaile@Gmail.com.
7. In the User Name box, type your Gmail email, for example, yourmail@Gmail.com.
8. In the Password box, type your Gmail password.
9. In the Incoming mail server (POP3) box, type: pop.googlemail.com.
10. In the Outgoing mail server (SMTP) box, type smtp.googlemail.com.
11. Click the More Settings button.
12. Click the Outgoing Server tab.
13. Click the My outgoing server requires authentication box to place a check mark in it.
14. Choose the Use same settings as my incoming mail server option by clicking it, then click the Advanced tab.15. In the Incoming server (POP3) box, type 995
Check the This server requires an encrypted connection (SSL)
16. In the Outgoing mail (SMTP) box, type 465 or 25.
Check the This server requires an encrypted connection (SSL)17. Click the Next button.
18. Click the Finish button.
In order to use a Yahoo mail account with POP3 you need to have a Yahoo Plus account.
You need to setup your Yahoo email to use POP3 first. Go to your Yahoo webmail (Yahoo.com) open your email with your username and password.
Click on Options and Mail Options. Click on POP and Forwarding in the menu and then Set up or edit POP & forward.
Check the Web & POP access. You are now ready to set up your Outlook.
To create and configure a new Yahoo e-mail account in the Outlook software:
1. Launch the Microsoft Outlook software.
2. Click the Tools menu, and then click E-mail Accounts.
3. Choose the Add a new e-mail account option by clicking it, then click the Next button.
4. Choose the POP3 option by clicking it, and then click the Next button.
5. In the Your Name box, type your name as you wish it to appear on outgoing e-mail.
6. In the E-mail Address box, type your Yahoo e-mail address, for example, yourmail@yahoo.com.
7. In the User Name box, type your Yahoo email, for example,yourmail@yahoo.com.
8. In the Password box, type your Yahoo password.
9. In the Incoming mail server (POP3) box, type:plus.pop.mail.yahoo.com.
10. In the Outgoing mail server (SMTP) box, typeplus.smtp.mail.yahoo.com.
11. Click the More Settings button.
12. Click the Outgoing Server tab.
13. Click the My outgoing server requires authentication box to place a check mark in it.
14. Choose the Use same settings as my incoming mail server option by clicking it, then click the Advanced tab.
15. In the Incoming server (POP3) box, type995
Check the This server requires an encrypted connection (SSL)
16. In the Outgoing mail (SMTP) box, type465.
Check the This server requires an encrypted connection (SSL)
Note: In the Delivery section click the Leave a copy of each message on the server box to place a check mark in it, and then click the OK button.
16. Click the Next button.
17. Click the Finish button
After the AOL or AIM e-mail account is set up, the Outlook software must be correctly configured to connect to the AOL or AIM service.To create and configure a new AOL or AIM e-mail account in the Outlook software:
1. Launch the Microsoft Outlook software.
2. Click the Tools menu, then clickE-mail Accounts.
3. Choose the Add a new e-mail account option by clicking it, then click the Next button.
4. Choose the POP3 option by clicking it, then click the Next button.
5. In the Your Name: box, type your name as you wish it to appear on outgoing e-mail.
6. In the E-mail Address: box, type your AOL or AIM e-mail address, for example, yourmail@aol.com or yourmail@aim.com.
7. In the User Name: box, type your AOL or AIM screen name, for example, yourmail.
8. In the Password: box, type your AOL or AIM password.
9. In the Incoming mail server (POP3): box, type: pop.aol.com or pop.aim.comNote: Click the Leave a copy of each message on the server box to place a check mark in it.
10. In the Outgoing mail server (SMTP): box, type smtp.aol.com or smtp.aim.com.
11. Click the More Settings button.
12. Click the Outgoing Server tab.
13. Click the My outgoing server requires authentication box to place a check mark in it.
14. Choose the Use same settings as my incoming mail server option by clicking it, then click the Advanced tab.
15. In the Outgoing mail (SMTP): box, type 587.Note: In the Delivery section click the Leave a copy of each message on the server box to place a check mark in it, then click the OK button.
16. Click the Next button.
17. Click the Finish button.
Please follow these steps to install SPAMfighter:
– Download SPAMfighter here
– Click on the “Download SPAMfighter” button
– Save spamfighter.exe, etc. on your desktop
– When you have downloaded it, double click on the SPAMfighter icon on your desktop and follow the installation guide.
Download and install the latest version of SPAMfighter here.
You can update your Outlook here
http://update.microsoft.com/microsoftupdate/v6/default.aspx?ln=en-us
Just choose the fast option
Unfortunately we are unable to prevent the “New Mail Icon” from appearing, even though only spam was received.
We are working on a solution, but unfortunately it is not so easy to solve.
I f the SPAMfighter folder has been deleted, you can get it back by restarting Outlook.
If that doesn”t help, your SPAMfighter folder must have been moved into another folder.
Try to look in every folder you have to see if it was accidentally put there.
If you find it, click and drag it to “Personal folders”.
If you can”t find it, create a new folder called “SPAMfighter-1” folder (don”t call it “SPAMfighter”)
Go to: More -> Options -> Client Settings -> Outlook 2000/2002/2003 -> Select
Choose the folder you have created and press “OK” -> “OK”
Restart Outlook and the spam should go into your new SPAMfighter-1 folder from now on.
It sounds like Outlook has deactivated SPAMfighter.
To solve the problem. Please do this: (Outlook 2000)
* Close Outlook
* Choose Start -> Programs -> Spamfighter -> Settings
* Close the “Configuration tools”
Open Outlook and your toolbar should be back.
To solve the problem. Please do this: (Outlook 2002, XP,2003)
* Press “Help” from the Outlook drop down menu in the top of Outlook and select “About Microsoft Outlook”.
* A window pops up with a button called “Disabled Items”.
* Press the button and a list of programs Outlook has disabled will appear.
If SPAMfighter is on the list:
* Select it and press the “Enable” button.
Close all windows and restart Outlook and SPAMfighter should work again.
If not, please contact our support department.
If this didn”t work then it could be caused by a windows service pack, then please try this:
In Outlook go to “Tools” -> “Options” -> “Other” -> “Advanced Options” -> “COM Add-Ins”
Is the SPAMfighter add-in available?
If SPAMfighter doesn”t appear on the list, please add this file and afterwards restart Outlook:
C:Program FilesSPAMfighterClientsOutlookSFOL0000.dll
If SPAMfighter appears on the list, try to remove the checkmark and click on “OK”.
Go back to “COM Add-Ins” and put the checkmark back and click on “OK”.
Now restart Outlook and SPAMfighter should be back.
If it doesn”t, please close Outlook and press the Windows Start button and choose Run and copy this string into the field and press ok:
regsvr32 “C:Program FilesSPAMfighterClientsOutlookSFOL0000.dll”
Restart Outlook, if the toolbar isn”t there, please try the first part again, by add the dll-file to the COM Add-Ins.
This problem is not caused by SPAMfighter. Microsoft has an answer to your problem in their knowledgebase. Please take a look here: http://support.microsoft.com/kb/177054/en-us
In order to have SPAMfighter filter your Hotmail emails, you need to have to receive your email in an email program like Outlook, Outlook Express, Windows Mail, Windows Live Mail or Thunderbird.
You can set up your email program to receive emails from your Hotmail account. Use the following settings in your email program to add your Hotmail to it.
Hotmail POP3 settings:
*POP server: pop3.live.com (Port 995)
*POP SSL required? Yes
*User name: Your Windows Live ID, for example yourname@hotmail.com
*Password: The password you usually use to sign in to Hotmail or Windows Live
*SMTP server: smtp.live.com (Port 25)
*Authentication required? Yes (this matches your POP username and password)
*TLS/SSL required? Yes
If you have not already installed SPAMfighter you should do this now. Download and install SPAMfighter from here
After the AOL or AIM e-mail account is set up, the Outlook software must be correctly configured to connect to the AOL or AIM service.To create and configure a new AOL or AIM e-mail account in the Outlook Express software:
1. Launch the Microsoft Outlook Express software.
2. Click the Tools menu, then Accounts.
3. Choose the Add option and then mail option.
4. Type in a Display name (the name you want for this account, For example AOL)
5. Type in your AOL email address. For example yourmail@aol.com
6. Choose POP3 in the dropdown.
7. Incoming mail should be: pop.aol.com or pop.aim.com (depending on what domain you have at the end of your email address)
8. In the Outgoing mail server (SMTP): box, type smtp.aol.com or smtp.aim.com
9. In the Account Name box, type your AOL or AIM mail address, for example, yourmail@aol.com.
10. In the Password box, type your AOL or AIM password.10. Go to Tools and accounts, click on your new AOL or AIM account and choose Properties.
11. Click the My server requires authentication box to place a check mark in it and click Apply.
12. Click on the Advanced tap.
13. In the Outgoing mail (SMTP) box, type 587. Click Apply.Note: In the Delivery section click the Leave a copy of each message on the server box to place a check mark in it, then click the Apply button.
16. Click the OK button and you are done and ready to send and receive emails via your AOL or AIM mail address.
In order to use SPAMfighter with Gmail you need to have a Gmail account.• Log in to your Google Mail account.
• Click Settings at the top of any Google Mail page.
• Click Forwarding and POP in the orange Mail Settings box. • Select Enable POP for all mail or Enable POP for mail that arrives from now on.
• Choose the action that you would like your Google Mail messages to take after they are accessed with POP.
You are now ready to set up your Outlook Express. Add your Gmail mail to your Outlook Express software.To create and configure a new Gmail e-mail account in the Outlook Express software:
1. Launch the Microsoft Outlook Express software.
2. Click the Tools menu, then Accounts.
3. Choose the Add option and then mail option.
4. Type in a Display name (the name you want for this account, For example Gmail)
5. Type in your Gmail email address. For example yourmail@Gmail.com
6. Choose POP3 in the dropdown.
7. Incoming mail should be: pop.googlemail.com
8. In the Outgoing mail server (SMTP): box, type smtp.googlemail.com
9. In the Account Name box, type your Gmail mail address, for example, yourmail@Gmail.com.
10. In the Password box, type your Gmail password. Click Next and then Finish. 11. Go to Tools and accounts, click on your new Gmail account and choose Properties.
12. Click the Servers tap and then check the My server requires authentication box to place a check mark in it and click Apply.
13. Click on the Advanced tap.
14. In the Incoming server (POP3) box, type 995
Check the This server requires an encrypted connection (SSL)
15. In the Outgoing mail (SMTP) box, type 465 or 25.
Check the This server requires an encrypted connection (SSL)
16. Click the OK button and you are done and ready to send and receive emails via your Gmail mail address.
Your 10 day trail period has ended and your SPAMfighter has been downgraded to the free standard version.
If you use SPAMfighter in a company or wish to remove the text and add you need to upgrade to SPAMfighter PRO.
Download and install the latest version of SPAMfighter from here
Open your SPAMfighter menu from “Start -> All Programs -> Fighters -> SPAMfighter -> SPAMfighter” Click on “User ID” in the lower right corner of your SPAMfighter menu. You will get a Popup where you can see your UserID.
SPAMfighter needs to be online when you open Outlook Express. Please try to connect to the internet before you open Outlook Express and see if this solves the problem.
If you use message rules in Outlook Express to sort your email to different folders, SPAMfighter can’t take action and scan for spam. The reason is that Outlook Express lets the message rules run BEFORE SPAMfighter begins making it so SPAMfighter can only scan the inbox. If you want to clean the other folders, please use “More” -> “Clean Folder” in the SPAMfighter toolbar.
If SPAMfighter doesn’t start/load before Outlook Express fetches your e-mails, SPAMfighter won’t filter your spam mails. Please try this and see if this solves your problem:
In Outlook Express go to: Tools -> Options -> General.
Remove the checkmark from “Send and receive messages at start-up”When you have removed the checkmark from “Send and receive messages at start-up” you must manually click on the Send/receive button to download emails.
It helps a lot to turn your Outlook Express preview pane on or off, so the spammers can’t see that you read the mails they send you. To do it, you simply have to add a button to your toolbar. Here’s how:1. Right-click the Toolbar in Outlook Express and select Customize from the menu.2. Scroll down the “Available toolbar buttons” list until you find a button labelled “Preview.” Click the button (to select it) and then click the “Add” button to add it to your toolbar.3. Close the screen and click the Preview pane button on your toolbar to turn the preview pane on and off.
SPAMfighter doesn’t move any emails to the deleted items folder so it sounds like you have added the email address to Outlook Express’s “Blocked Senders List”, please check it here: In Outlook Express go to: Tools -> Message Rules -> Blocked Senders List.
This problem is not caused by SPAMfighter. It is a security setting in Outlook Express which you can read more about here: http://support.microsoft.com/kb/329570/en-us
In order to use a Yahoo mail account with POP3 you need to have a Yahoo Plus account.You need to setup your Yahoo email to use POP3 first. Go to your Yahoo webmail (Yahoo.com) open your email with your username and password.
Click on Options and Mail Options. Click on POP and Forwarding in the menu and then Set up or edit POP & forward.
Check the Web & POP access. You are now ready to set up your Outlook Express.To create and configure a new Yahoo e-mail account in the Outlook Express software:
1. Launch the Microsoft Outlook Express software.
2. Click the Tools menu, then Accounts.
3. Choose the Add option and then mail option.
4. Type in a Display name (the name you want for this account, For example Yahoo)
5. Type in your Yahoo email address. For example yourmail@yahoo.com
6. Choose POP3 in the dropdown.
7. Incoming mail should be: plus.pop.mail.yahoo.com
8. In the Outgoing mail server (SMTP): box, type plus.smtp.mail.yahoo.com
9. In the Account Name box, type your Yahoo mail address, for example, yourmail@yahoo.com.
10. In the Password box, type your Yahoo password. Click Next and then Finish. 11. Go to Tools and accounts, click on your new Yahoo account and choose Properties.
12. Click the Servers tap and then check the My server requires authentication box to place a check mark in it and click Apply.
13. Click on the Advanced tap.
14. In the Incoming server (POP3) box, type 995
Check the This server requires an encrypted connection (SSL)
15. In the Outgoing mail (SMTP) box, type 465.
Check the This server requires an encrypted connection (SSL)Note: In the Delivery section click the Leave a copy of each message on the server box to place a check mark in it, and then click the Apply button.
15. Click the OK button and you are done and ready to send and receive emails via your Yahoo mail address.
No. This is due to security reasons.
Manual Activation
Open your email program (Outlook, Outlook Express, Windows Mail or Thunderbird).
Click More -> Enter Product Key in your SPAMfighter toolbar
Add your product key that you received with your invoice
Click Add Product key to save your product key
Restart your email program and SPAMfighter will be upgraded to the Pro version.
No, SPAMfighter will only protect your inbox against spam and phishing mails.
We recommend www.VIRUSfighter.com for an effective antivirus program, and www.spamfighter.com/spywarefighter for a good anti-spyware program.
You need all 3 programs to be protected against internet threats.
If your Email Client such as Outlook/Express/Windows Mail/Thunderbird shows a SPAMfighter toolbar, and if the spam mails you received after the installation are moved to the SPAMfighter folder, SPAMfighter is working for you.
Please follow these steps to install SPAMfighter:
– Download SPAMfighter here
– Click on the “Start Download Now” button
– Save spamfighter.exe, etc. on your desktop
– When you have downloaded it, double click on the SPAMfighter icon on your desktop and follow the installation guide.
Windows XP -> Windows 7 uninstall guide
*Close your Email program
*Go to: Start-> Control Panel -> Add/Remove Programs.
*Locate SPAMfighter and clickUninstall/Change and follow the guide.
Windows 8 uninstall Guide
* Close your Email Program
*Go to: Charm menu -> Settings ->Control Panel ->Uninstall aProgram.
*Locate SPAMfighter and click Uninstall/Change and follow the guide.
SPAMfighter Exchange Module uninstallation
* Locate programs -> SPAMfighter -> and choose uninstallation
Some people do experience problems with downloading from the website, but you can try an alternative server Here
This is caused by an error in the registration database of your Windows installation.
To solve this problem all you have to do is follow Microsofts guide here
SPAMfighter - Installation
No. This is due to security reasons.
This is caused by an error in the registration database of your Windows installation.
To solve this problem all you have to do is follow Microsofts guide here
Some people do experience problems with downloading from the website, but you can try an alternative server Here
Windows XP -> Windows 7 uninstall guide
*Close your Email program
*Go to: Start-> Control Panel -> Add/Remove Programs.
*Locate SPAMfighter and clickUninstall/Change and follow the guide.
Windows 8 uninstall Guide
* Close your Email Program
*Go to: Charm menu -> Settings ->Control Panel ->Uninstall aProgram.
*Locate SPAMfighter and click Uninstall/Change and follow the guide.
SPAMfighter Exchange Module uninstallation
* Locate programs -> SPAMfighter -> and choose uninstallation
Please follow these steps to install SPAMfighter:
– Download SPAMfighter here
– Click on the “Start Download Now” button
– Save spamfighter.exe, etc. on your desktop
– When you have downloaded it, double click on the SPAMfighter icon on your desktop and follow the installation guide.
If your Email Client such as Outlook/Express/Windows Mail/Thunderbird shows a SPAMfighter toolbar, and if the spam mails you received after the installation are moved to the SPAMfighter folder, SPAMfighter is working for you.
No, SPAMfighter will only protect your inbox against spam and phishing mails.
We recommend www.VIRUSfighter.com for an effective antivirus program, and www.spamfighter.com/spywarefighter for a good anti-spyware program.
You need all 3 programs to be protected against internet threats.
SPAMfighter - Login, Password, etc.
Your 10 day trail period has ended and your SPAMfighter has been downgraded to the free standard version.
If you use SPAMfighter in a company or wish to remove the text and add you need to upgrade to SPAMfighter PRO.
Download and install the latest version of SPAMfighter from here
Open your SPAMfighter menu from “Start -> All Programs -> Fighters -> SPAMfighter -> SPAMfighter” Click on “User ID” in the lower right corner of your SPAMfighter menu. You will get a Popup where you can see your UserID.
Manual Activation
Open your email program (Outlook, Outlook Express, Windows Mail or Thunderbird).
Click More -> Enter Product Key in your SPAMfighter toolbar
Add your product key that you received with your invoice
Click Add Product key to save your product key
Restart your email program and SPAMfighter will be upgraded to the Pro version.
SPAMfighter - Outlook
Your SPAMfighter folder is to the left under “Personal Folders”.
In Outlook 2000 / 2002/ XP:
Go to your panel and choose “View” and activate “Folder list”.
In Outlook 2003:
Go to your panel and choose “Go” -> “Folder list (Ctrl+6)”
In Outlook Express:
Go to your panel and choose “View” and “Layout” and click “Folder list”.
If you are using the client version of SPAMfighter and it is not filtering your emails then it might be because you are using IMAP to get your mails which SPAMfighter doesnt support.
To check if you use IMAP please follow the guide here
To deactivate the junk e-mail folder, please do this: Go to Action -> Junk E-mail -> Junk E-mail Options
Select “No Automatic Filtering.” and click on “OK
The problem is that Outlook looks through all folders for unread emails which includes the SPAMfighter folder. You need to tell Outlook to not search the SPAMfighter folder for unread emails. To do this, please follow these steps: Right click on “Unread mail” in the “Search Folders”
Choose “Customize this search folder”
Click on “Browse”
Remove the checkmark from the top folder (normally Personal folders) and put a checkmark on all folders below the root folder except the SPAMfighter folder. Now it should not look in the SPAMfighter folder for unread emails.
It is because of Service Pack 3 for Office 2002/Office XP
Do following:
*Close Outlook
*Go to Start -> All Programs -> SPAMfighter -> Repair SPAMfighter
*Open Outlook and everything should be running now.
This is coursed by Windows update, you can read more about it on their website: http://support.microsoft.com/kb/935448/en-us
Even when you have SPAMfighter installed, you will still receive some spam mails. SPAMfighter filters around 90% of all spam automatically.
You can help make SPAMfighter even better by reporting the spam mails we miss to the SPAMfighter Server. To do this, simply select the email and click on block in the SPAMfighter toolbar.
The email will be moved to the SPAMfighter folder and reported to our server.
SPAMfighter doesn´t change your attachments.
Please read more about it here:
* http://support.microsoft.com/kb/q138053/
* http://office.microsoft.com/en-us/assistance/HP011164871033.aspx
SPAMfighter doesn’t delete any emails. They are moved to a folder named “SPAMfighter” in the root of your mail box. Many people uses the standard installation which only shows the Outlook panel in the left side of Outlook. To see the SPAMfighter folder you’ll have to open the folder pane. Both windows can be enabled and disabled from the drop down window “View” in top of Outlook.When you use the folder pane, you can create a shortcut in the Outlook panel if you prefer to use this.
In order to use SPAMfighter with Gmail you need to have a Gmail account.• Log in to your Google Mail account.
• Click Settings at the top of any Google Mail page.
• Click Forwarding and POP in the orange Mail Settings box. • Select Enable POP for all mail or Enable POP for mail that arrives from now on.
• Choose the action that you would like your Google Mail messages to take after they are accessed with POP.
You are now ready to set up your Outlook. To create and configure a new Gmail e-mail account in the Outlook software:
1. Launch the Microsoft Outlook software.
2. Click the Tools menu, then click E-mail Accounts.
3. Choose the Add a new e-mail account option by clicking it, then click the Next button.
4. Choose the POP3 option by clicking it, and then click the Next button.
5. In the Your Name box, type your name as you wish it to appear on outgoing e-mail.
6. In the E-mail Address box, type your Gmail e-mail address, for example, yourmaile@Gmail.com.
7. In the User Name box, type your Gmail email, for example, yourmail@Gmail.com.
8. In the Password box, type your Gmail password.
9. In the Incoming mail server (POP3) box, type: pop.googlemail.com.
10. In the Outgoing mail server (SMTP) box, type smtp.googlemail.com.
11. Click the More Settings button.
12. Click the Outgoing Server tab.
13. Click the My outgoing server requires authentication box to place a check mark in it.
14. Choose the Use same settings as my incoming mail server option by clicking it, then click the Advanced tab.15. In the Incoming server (POP3) box, type 995
Check the This server requires an encrypted connection (SSL)
16. In the Outgoing mail (SMTP) box, type 465 or 25.
Check the This server requires an encrypted connection (SSL)17. Click the Next button.
18. Click the Finish button.
In order to use a Yahoo mail account with POP3 you need to have a Yahoo Plus account.
You need to setup your Yahoo email to use POP3 first. Go to your Yahoo webmail (Yahoo.com) open your email with your username and password.
Click on Options and Mail Options. Click on POP and Forwarding in the menu and then Set up or edit POP & forward.
Check the Web & POP access. You are now ready to set up your Outlook.
To create and configure a new Yahoo e-mail account in the Outlook software:
1. Launch the Microsoft Outlook software.
2. Click the Tools menu, and then click E-mail Accounts.
3. Choose the Add a new e-mail account option by clicking it, then click the Next button.
4. Choose the POP3 option by clicking it, and then click the Next button.
5. In the Your Name box, type your name as you wish it to appear on outgoing e-mail.
6. In the E-mail Address box, type your Yahoo e-mail address, for example, yourmail@yahoo.com.
7. In the User Name box, type your Yahoo email, for example,yourmail@yahoo.com.
8. In the Password box, type your Yahoo password.
9. In the Incoming mail server (POP3) box, type:plus.pop.mail.yahoo.com.
10. In the Outgoing mail server (SMTP) box, typeplus.smtp.mail.yahoo.com.
11. Click the More Settings button.
12. Click the Outgoing Server tab.
13. Click the My outgoing server requires authentication box to place a check mark in it.
14. Choose the Use same settings as my incoming mail server option by clicking it, then click the Advanced tab.
15. In the Incoming server (POP3) box, type995
Check the This server requires an encrypted connection (SSL)
16. In the Outgoing mail (SMTP) box, type465.
Check the This server requires an encrypted connection (SSL)
Note: In the Delivery section click the Leave a copy of each message on the server box to place a check mark in it, and then click the OK button.
16. Click the Next button.
17. Click the Finish button
After the AOL or AIM e-mail account is set up, the Outlook software must be correctly configured to connect to the AOL or AIM service.To create and configure a new AOL or AIM e-mail account in the Outlook software:
1. Launch the Microsoft Outlook software.
2. Click the Tools menu, then clickE-mail Accounts.
3. Choose the Add a new e-mail account option by clicking it, then click the Next button.
4. Choose the POP3 option by clicking it, then click the Next button.
5. In the Your Name: box, type your name as you wish it to appear on outgoing e-mail.
6. In the E-mail Address: box, type your AOL or AIM e-mail address, for example, yourmail@aol.com or yourmail@aim.com.
7. In the User Name: box, type your AOL or AIM screen name, for example, yourmail.
8. In the Password: box, type your AOL or AIM password.
9. In the Incoming mail server (POP3): box, type: pop.aol.com or pop.aim.comNote: Click the Leave a copy of each message on the server box to place a check mark in it.
10. In the Outgoing mail server (SMTP): box, type smtp.aol.com or smtp.aim.com.
11. Click the More Settings button.
12. Click the Outgoing Server tab.
13. Click the My outgoing server requires authentication box to place a check mark in it.
14. Choose the Use same settings as my incoming mail server option by clicking it, then click the Advanced tab.
15. In the Outgoing mail (SMTP): box, type 587.Note: In the Delivery section click the Leave a copy of each message on the server box to place a check mark in it, then click the OK button.
16. Click the Next button.
17. Click the Finish button.
It sounds like Outlook has deactivated SPAMfighter.
To solve the problem. Please do this: (Outlook 2000)
* Close Outlook
* Choose Start -> Programs -> Spamfighter -> Settings
* Close the “Configuration tools”
Open Outlook and your toolbar should be back.
To solve the problem. Please do this: (Outlook 2002, XP,2003)
* Press “Help” from the Outlook drop down menu in the top of Outlook and select “About Microsoft Outlook”.
* A window pops up with a button called “Disabled Items”.
* Press the button and a list of programs Outlook has disabled will appear.
If SPAMfighter is on the list:
* Select it and press the “Enable” button.
Close all windows and restart Outlook and SPAMfighter should work again.
If not, please contact our support department.
If this didn”t work then it could be caused by a windows service pack, then please try this:
In Outlook go to “Tools” -> “Options” -> “Other” -> “Advanced Options” -> “COM Add-Ins”
Is the SPAMfighter add-in available?
If SPAMfighter doesn”t appear on the list, please add this file and afterwards restart Outlook:
C:Program FilesSPAMfighterClientsOutlookSFOL0000.dll
If SPAMfighter appears on the list, try to remove the checkmark and click on “OK”.
Go back to “COM Add-Ins” and put the checkmark back and click on “OK”.
Now restart Outlook and SPAMfighter should be back.
If it doesn”t, please close Outlook and press the Windows Start button and choose Run and copy this string into the field and press ok:
regsvr32 “C:Program FilesSPAMfighterClientsOutlookSFOL0000.dll”
Restart Outlook, if the toolbar isn”t there, please try the first part again, by add the dll-file to the COM Add-Ins.
I f the SPAMfighter folder has been deleted, you can get it back by restarting Outlook.
If that doesn”t help, your SPAMfighter folder must have been moved into another folder.
Try to look in every folder you have to see if it was accidentally put there.
If you find it, click and drag it to “Personal folders”.
If you can”t find it, create a new folder called “SPAMfighter-1” folder (don”t call it “SPAMfighter”)
Go to: More -> Options -> Client Settings -> Outlook 2000/2002/2003 -> Select
Choose the folder you have created and press “OK” -> “OK”
Restart Outlook and the spam should go into your new SPAMfighter-1 folder from now on.
Unfortunately we are unable to prevent the “New Mail Icon” from appearing, even though only spam was received.
We are working on a solution, but unfortunately it is not so easy to solve.
You can update your Outlook here
http://update.microsoft.com/microsoftupdate/v6/default.aspx?ln=en-us
Just choose the fast option
SPAMfighter - Outlook Express
SPAMfighter needs to be online when you open Outlook Express. Please try to connect to the internet before you open Outlook Express and see if this solves the problem.
If you use message rules in Outlook Express to sort your email to different folders, SPAMfighter can’t take action and scan for spam. The reason is that Outlook Express lets the message rules run BEFORE SPAMfighter begins making it so SPAMfighter can only scan the inbox. If you want to clean the other folders, please use “More” -> “Clean Folder” in the SPAMfighter toolbar.
If SPAMfighter doesn’t start/load before Outlook Express fetches your e-mails, SPAMfighter won’t filter your spam mails. Please try this and see if this solves your problem:
In Outlook Express go to: Tools -> Options -> General.
Remove the checkmark from “Send and receive messages at start-up”When you have removed the checkmark from “Send and receive messages at start-up” you must manually click on the Send/receive button to download emails.
It helps a lot to turn your Outlook Express preview pane on or off, so the spammers can’t see that you read the mails they send you. To do it, you simply have to add a button to your toolbar. Here’s how:1. Right-click the Toolbar in Outlook Express and select Customize from the menu.2. Scroll down the “Available toolbar buttons” list until you find a button labelled “Preview.” Click the button (to select it) and then click the “Add” button to add it to your toolbar.3. Close the screen and click the Preview pane button on your toolbar to turn the preview pane on and off.
SPAMfighter doesn’t move any emails to the deleted items folder so it sounds like you have added the email address to Outlook Express’s “Blocked Senders List”, please check it here: In Outlook Express go to: Tools -> Message Rules -> Blocked Senders List.
This problem is not caused by SPAMfighter. It is a security setting in Outlook Express which you can read more about here: http://support.microsoft.com/kb/329570/en-us
This problem is not caused by SPAMfighter. Microsoft has an answer to your problem in their knowledgebase. Please take a look here: http://support.microsoft.com/kb/177054/en-us
In order to use SPAMfighter with Gmail you need to have a Gmail account.• Log in to your Google Mail account.
• Click Settings at the top of any Google Mail page.
• Click Forwarding and POP in the orange Mail Settings box. • Select Enable POP for all mail or Enable POP for mail that arrives from now on.
• Choose the action that you would like your Google Mail messages to take after they are accessed with POP.
You are now ready to set up your Outlook Express. Add your Gmail mail to your Outlook Express software.To create and configure a new Gmail e-mail account in the Outlook Express software:
1. Launch the Microsoft Outlook Express software.
2. Click the Tools menu, then Accounts.
3. Choose the Add option and then mail option.
4. Type in a Display name (the name you want for this account, For example Gmail)
5. Type in your Gmail email address. For example yourmail@Gmail.com
6. Choose POP3 in the dropdown.
7. Incoming mail should be: pop.googlemail.com
8. In the Outgoing mail server (SMTP): box, type smtp.googlemail.com
9. In the Account Name box, type your Gmail mail address, for example, yourmail@Gmail.com.
10. In the Password box, type your Gmail password. Click Next and then Finish. 11. Go to Tools and accounts, click on your new Gmail account and choose Properties.
12. Click the Servers tap and then check the My server requires authentication box to place a check mark in it and click Apply.
13. Click on the Advanced tap.
14. In the Incoming server (POP3) box, type 995
Check the This server requires an encrypted connection (SSL)
15. In the Outgoing mail (SMTP) box, type 465 or 25.
Check the This server requires an encrypted connection (SSL)
16. Click the OK button and you are done and ready to send and receive emails via your Gmail mail address.
In order to use a Yahoo mail account with POP3 you need to have a Yahoo Plus account.You need to setup your Yahoo email to use POP3 first. Go to your Yahoo webmail (Yahoo.com) open your email with your username and password.
Click on Options and Mail Options. Click on POP and Forwarding in the menu and then Set up or edit POP & forward.
Check the Web & POP access. You are now ready to set up your Outlook Express.To create and configure a new Yahoo e-mail account in the Outlook Express software:
1. Launch the Microsoft Outlook Express software.
2. Click the Tools menu, then Accounts.
3. Choose the Add option and then mail option.
4. Type in a Display name (the name you want for this account, For example Yahoo)
5. Type in your Yahoo email address. For example yourmail@yahoo.com
6. Choose POP3 in the dropdown.
7. Incoming mail should be: plus.pop.mail.yahoo.com
8. In the Outgoing mail server (SMTP): box, type plus.smtp.mail.yahoo.com
9. In the Account Name box, type your Yahoo mail address, for example, yourmail@yahoo.com.
10. In the Password box, type your Yahoo password. Click Next and then Finish. 11. Go to Tools and accounts, click on your new Yahoo account and choose Properties.
12. Click the Servers tap and then check the My server requires authentication box to place a check mark in it and click Apply.
13. Click on the Advanced tap.
14. In the Incoming server (POP3) box, type 995
Check the This server requires an encrypted connection (SSL)
15. In the Outgoing mail (SMTP) box, type 465.
Check the This server requires an encrypted connection (SSL)Note: In the Delivery section click the Leave a copy of each message on the server box to place a check mark in it, and then click the Apply button.
15. Click the OK button and you are done and ready to send and receive emails via your Yahoo mail address.
After the AOL or AIM e-mail account is set up, the Outlook software must be correctly configured to connect to the AOL or AIM service.To create and configure a new AOL or AIM e-mail account in the Outlook Express software:
1. Launch the Microsoft Outlook Express software.
2. Click the Tools menu, then Accounts.
3. Choose the Add option and then mail option.
4. Type in a Display name (the name you want for this account, For example AOL)
5. Type in your AOL email address. For example yourmail@aol.com
6. Choose POP3 in the dropdown.
7. Incoming mail should be: pop.aol.com or pop.aim.com (depending on what domain you have at the end of your email address)
8. In the Outgoing mail server (SMTP): box, type smtp.aol.com or smtp.aim.com
9. In the Account Name box, type your AOL or AIM mail address, for example, yourmail@aol.com.
10. In the Password box, type your AOL or AIM password.10. Go to Tools and accounts, click on your new AOL or AIM account and choose Properties.
11. Click the My server requires authentication box to place a check mark in it and click Apply.
12. Click on the Advanced tap.
13. In the Outgoing mail (SMTP) box, type 587. Click Apply.Note: In the Delivery section click the Leave a copy of each message on the server box to place a check mark in it, then click the Apply button.
16. Click the OK button and you are done and ready to send and receive emails via your AOL or AIM mail address.
In order to have SPAMfighter filter your Hotmail emails, you need to have to receive your email in an email program like Outlook, Outlook Express, Windows Mail, Windows Live Mail or Thunderbird.
You can set up your email program to receive emails from your Hotmail account. Use the following settings in your email program to add your Hotmail to it.
Hotmail POP3 settings:
*POP server: pop3.live.com (Port 995)
*POP SSL required? Yes
*User name: Your Windows Live ID, for example yourname@hotmail.com
*Password: The password you usually use to sign in to Hotmail or Windows Live
*SMTP server: smtp.live.com (Port 25)
*Authentication required? Yes (this matches your POP username and password)
*TLS/SSL required? Yes
If you have not already installed SPAMfighter you should do this now. Download and install SPAMfighter from here
SPAMfighter - Thunderbird
To unsubscribe from the SPAMfighter mailing list please click here.
Please remember, that if you continue to use or reregister SPAMfighter, you will receive our emails again automatically.
To change your e-mail address, please do the following:
* click on “More” and then “Options” in your SPAMfighter toolbar in your email client.
* SPAMfighter will open up.
* Click on “Account” in the left side.
* click on “Account Settings” and add your new email in the “Change Your Email” field
* Click “Change” and you are done.
Your 10-day free trial of the SPAMfighter PRO has expired and you have now been downgraded to the free SPAMfighter Standard.
That means you’ve been limited to only having 5 addresses in your blacklist/ whitelist for example. If you’re using SPAMfighter in a business and/or want more entries, please buy a SPAMfighter PRO license, which can contain the number of addresses you need.
Your 10 day trail period has ended and your SPAMfighter has been downgraded to the free standard version.
If you use SPAMfighter in a company or wish to remove the text and add you need to upgrade to SPAMfighter PRO. You can buy SPAMfighter PRO here
Please follow these steps to install SPAMfighter:
– Download SPAMfighter here
– Click on the “Download SPAMfighter” button
– Save spamfighter.exe, etc. on your desktop
– When you have downloaded it, double click on the SPAMfighter icon on your desktop and follow the installation guide.
Download and install the latest version of SPAMfighter here.
Your 10 day trail period has ended and your SPAMfighter has been downgraded to the free standard version.
If you use SPAMfighter in a company or wish to remove the text and add you need to upgrade to SPAMfighter PRO. You can buy SPAMfighter PRO here
SPAMfighter Exchange Module
Yes, SPAMfighter Exchange Module version 5 will filter incoming, outgoing and internal e-mails for spam. SEM have invividual filters that can be applied to outgoing mails.
The requirements are that you are using Exchange server 2007 and later versions of Exchange Server.
Read more about filtering of incoming mails by SEM here.
When emails are redirected to another email address directly from Exchange, they are sent to your other email address before they are stored in your Exchange, and thus SPAMfighter does not have the opportunity to filter them.
Please remove the forwarding from Exchange and use instead this method:1) Open the SEM Administration Module on the server and go to “Mailboxes” -> “Mailboxes”
2) Locate the mailbox in cause
3) Click the small configuration icon to the right of the mailbox
4) Choose “POP3” as primary mail protocol
5) Click “Save changes” follow by “Close”
In Outlook, click “Tools” -> “Rules and Alerts” -> “New rule” -> “Start from blank rule” -> “Check messages when they arrive”.Create a new blank rule with the following properties: * Sent to people or distribution list (select your email address)
* Forward it to people… (add your second email address)
* Except if the subject contains specific words (enter these characters: ** SPAM **)
* Stop processing more rulesCreate another blank rule with the following properties: * Check messages when they arrive
* With specific words in the subject (add the characters: ** SPAM **)
* Move it to the specified folder (Choose SPAMfighter)
* Stop processing more rulesIn step two above, please make sure that you select “With specific words in the SUBJECT”, not body. When you select “stop processing more rules”, the rule will run server-side and will be executed when an email is received, even if Outlook is not running. If the rule is marked as “client-side” in the Rules list, then please edit your rule and uncheck the option “on this machine only”. These rules need to run server-side to be effective.
If you receive many emails that appear to have been sent by yourself, then you can help prevent spoofed emails by removing your own domain(s) from the Domain whitelist.
In the Administration module, go to “Configuration” > “Policies”. Click the “Configure policy” button next to your policy. Then click the “Configure filter” button next to “SPAMfighter Sender Filter”. Remove your own domain name from the Domain whitelist, and your own email address from the Email Address whitelist.
If you have questions or need help on doing this, SPAMfighter Support Department are always ready to help – just write an email to semsupport@spamfighter.com
Go to “Configuration” -> “Usergroups” and click the “Edit” button next to your group.
Under “Default state”, uncheck the SPAMfighter and Virusfighter checkbox, so that the filters are not enabled by default for new mailboxes.
Yes – you can redirected spam to a dedicated mailbox. You can configure SEM to redirect spam to another mailbox through the Administration Module (under “Configuration” > “Policies”)
If an email is determined to be spam, SEM moves the message to a folder named SPAMfighter in the users mailbox. If the folder does not exist, it will be recreated automatically. The move process is transactional and will rollback if it fails.
The administrator can change the anti-spam policy to delete spam mails, redirect them to a dedicated mailbox, or use a Quarantine that will keep the spam on the server for a set number of days.
Please use your normal Windows credentials to login (domain/username and password).Alternatively, you can try to access the Administration page through the link marked “Solution Administrator”.
Please check in Active Directory that an account named “SPAMfighterService” is created, and that it a mailbox has been created in Exchange for the account.The user account needs to be member of the following usergroups:Administrators
Exchange Servers
Organization ManagementGo on your server to “Start” -> “All programs” -> “SPAMfighter Exchange Module” -> “Configuration” -> “Exchange Integration Manager”.Click the “Service status” tab. Click the button next to “Stop SPAMfighter Exchange Module service”.Click the “Service account” tab. Make sure that the name of the user account “SPAMfighterService” is written correctly. Enter the password correctly. Make sure that the proper domain is selected. Then click the “Confirm” button.Go back to the “Service status” tab and click the button next to “Start SPAMfighter Exchange Module service”.Then go to the “Integration” tab and click the button next to “Remove integration into Exchange”, then click the button next to “Add integration into Exchange”.If you still have difficulties, please use the support form to contact the support team.
The SPAMfighter Exchange Module uses the following ports:
Anti-spam community: UDP/TCP 2409: servers.backend.spamfighter.com
SEM Administration page (and SEM client toolbar for Outlook): TCP 5000
SEM communication between the Administration page and the server: TCP 5001
License and update: TCP 80 to:
http://login.spamfighter.com
http://update.spamfighter.com
http://download.dk.spamfighter.com
http://download.spamfighter.com
Read all about Microsoft .NET Framework here
SPAMfighter is a Microsoft Gold Certified Partner and SEM is certified by VeriTest® for “Windows 2003”, “SQL Server 2005”, “Web services” and “.net connected” certified.
Yes it can. SEM works with most common Antivirus software. Since SEM is integrated in the Exchange Server, it does not impact on the functionality of any Antivirus software.SEM also integrates fully with VIRUSfighter for Exchange – an addon product for SEM.
Yes, using the administration interface, you can easily disable spam filtering on a single mailbox.
SEM creates a unique irreversible signature for each email and its elements, and sends the signatures to the SPAMfighter Server for processing. The server then returns a score determining if the message is spam or not. The original mail message never leaves the server during SEM filtering.
SEM can support between 5 – 50.000 email accounts.
SEM gives you the highest level of confidentiality. Your email privacy and security are our top priority. Legitimate email on the server is never transmitted or shared with anyone – your legitimate email never leaves your server. Only a few encrypted blocks of data encoded with MD5 (a one way encryption algorithm also called a checksum) and the unique URLs are sent to the SPAMfighter Server.
SPAMfighter Exchange Server Module seamlessly integrates with Microsoft Exchange Server which makes the solution very fast.
As an email arrives and the Exchange Server routes it to its addressees, SEM makes a unique signature for each message and sends it to the SPAMfighter Server for evaluation. If the SPAMfighter Server determines that a message is spam, it notifies SEM and the spam mail is moved to the users’ spam folder.
SPAMfighter Exchange Server Module also offers reporting, so administrators can review statistics on how many messages SEM has filtered, how many users are enabled and more.
In addition, SEM is simple to use for end users as spam is automatically moved to the spam folder. While SEM simplifies administration and keeps software and configuration off the employee’s desktop, it also provides individual control for end users if the administrators decide they want this.
Since SEM utilizes the Exchange server interface, emails are not deleted but only moved. If SEM should unexpectedly fail during the analysis, processing or redirection of a mail item, the transaction will be rolled back and the system remain intact.
If the SEM installation fails, there will have been no interaction with the Exchange Server hence it has no impact on your configuration.
SEM sends installation details at registration, login information when running and email compiled hash values when testing e-mails. SEM never sends information sensitive to the network. Also all information sent and received is validated to avoid tampering.
No, certainly not!
The worst case scenario is that the installation fails (not likely!) and SEM lets spam through to the users. In other words, the users receive the spam they are used to receiving. On top of that, SEM is very easy to uninstall completely, but our guess is that you wont want to after trying it out.
Bottom line, you can safely install the free trial and test it as much as you want without worrying about down time or other complications.
Yes we have, take a look here. (PDF document)
Take a look at our price list here.
Yes you can. You can test the full version of SEM for 30 days free of charge at no obligations. Download it here.
SEM supports Microsoft Exchange Server 2000, 2003, 2007, 2010 and 2013.
Operating System
Microsoft Windows Server 2000 or newer
Email Server
Microsoft Exchange Server 2000 or newer
SPAMfighter Exchange Module - Before Installing SEM
Since SEM utilizes the Exchange server interface, emails are not deleted but only moved. If SEM should unexpectedly fail during the analysis, processing or redirection of a mail item, the transaction will be rolled back and the system remain intact.
SPAMfighter is a Microsoft Gold Certified Partner and SEM is certified by VeriTest® for “Windows 2003”, “SQL Server 2005”, “Web services” and “.net connected” certified.
Yes it can. SEM works with most common Antivirus software. Since SEM is integrated in the Exchange Server, it does not impact on the functionality of any Antivirus software.SEM also integrates fully with VIRUSfighter for Exchange – an addon product for SEM.
Yes, using the administration interface, you can easily disable spam filtering on a single mailbox.
If an email is determined to be spam, SEM moves the message to a folder named SPAMfighter in the users mailbox. If the folder does not exist, it will be recreated automatically. The move process is transactional and will rollback if it fails.
The administrator can change the anti-spam policy to delete spam mails, redirect them to a dedicated mailbox, or use a Quarantine that will keep the spam on the server for a set number of days.
SEM creates a unique irreversible signature for each email and its elements, and sends the signatures to the SPAMfighter Server for processing. The server then returns a score determining if the message is spam or not. The original mail message never leaves the server during SEM filtering.
SEM can support between 5 – 50.000 email accounts.
SEM gives you the highest level of confidentiality. Your email privacy and security are our top priority. Legitimate email on the server is never transmitted or shared with anyone – your legitimate email never leaves your server. Only a few encrypted blocks of data encoded with MD5 (a one way encryption algorithm also called a checksum) and the unique URLs are sent to the SPAMfighter Server.
SPAMfighter Exchange Server Module seamlessly integrates with Microsoft Exchange Server which makes the solution very fast.
As an email arrives and the Exchange Server routes it to its addressees, SEM makes a unique signature for each message and sends it to the SPAMfighter Server for evaluation. If the SPAMfighter Server determines that a message is spam, it notifies SEM and the spam mail is moved to the users’ spam folder.
SPAMfighter Exchange Server Module also offers reporting, so administrators can review statistics on how many messages SEM has filtered, how many users are enabled and more.
In addition, SEM is simple to use for end users as spam is automatically moved to the spam folder. While SEM simplifies administration and keeps software and configuration off the employee’s desktop, it also provides individual control for end users if the administrators decide they want this.
If the SEM installation fails, there will have been no interaction with the Exchange Server hence it has no impact on your configuration.
SEM sends installation details at registration, login information when running and email compiled hash values when testing e-mails. SEM never sends information sensitive to the network. Also all information sent and received is validated to avoid tampering.
No, certainly not!
The worst case scenario is that the installation fails (not likely!) and SEM lets spam through to the users. In other words, the users receive the spam they are used to receiving. On top of that, SEM is very easy to uninstall completely, but our guess is that you wont want to after trying it out.
Bottom line, you can safely install the free trial and test it as much as you want without worrying about down time or other complications.
Yes we have, take a look here. (PDF document)
Take a look at our price list here.
Yes you can. You can test the full version of SEM for 30 days free of charge at no obligations. Download it here.
SEM supports Microsoft Exchange Server 2000, 2003, 2007, 2010 and 2013.
Operating System
Microsoft Windows Server 2000 or newer
Email Server
Microsoft Exchange Server 2000 or newer
SPAMfighter Exchange Module - Installing SEM
Read all about Microsoft .NET Framework here
The SPAMfighter Exchange Module uses the following ports:
Anti-spam community: UDP/TCP 2409: servers.backend.spamfighter.com
SEM Administration page (and SEM client toolbar for Outlook): TCP 5000
SEM communication between the Administration page and the server: TCP 5001
License and update: TCP 80 to:
http://login.spamfighter.com
http://update.spamfighter.com
http://download.dk.spamfighter.com
http://download.spamfighter.com
Please check in Active Directory that an account named “SPAMfighterService” is created, and that it a mailbox has been created in Exchange for the account.The user account needs to be member of the following usergroups:Administrators
Exchange Servers
Organization ManagementGo on your server to “Start” -> “All programs” -> “SPAMfighter Exchange Module” -> “Configuration” -> “Exchange Integration Manager”.Click the “Service status” tab. Click the button next to “Stop SPAMfighter Exchange Module service”.Click the “Service account” tab. Make sure that the name of the user account “SPAMfighterService” is written correctly. Enter the password correctly. Make sure that the proper domain is selected. Then click the “Confirm” button.Go back to the “Service status” tab and click the button next to “Start SPAMfighter Exchange Module service”.Then go to the “Integration” tab and click the button next to “Remove integration into Exchange”, then click the button next to “Add integration into Exchange”.If you still have difficulties, please use the support form to contact the support team.
Please use your normal Windows credentials to login (domain/username and password).Alternatively, you can try to access the Administration page through the link marked “Solution Administrator”.
SPAMfighter Exchange Module - Using SEM
Yes – you can redirected spam to a dedicated mailbox. You can configure SEM to redirect spam to another mailbox through the Administration Module (under “Configuration” > “Policies”)
Go to “Configuration” -> “Usergroups” and click the “Edit” button next to your group.
Under “Default state”, uncheck the SPAMfighter and Virusfighter checkbox, so that the filters are not enabled by default for new mailboxes.
If you receive many emails that appear to have been sent by yourself, then you can help prevent spoofed emails by removing your own domain(s) from the Domain whitelist.
In the Administration module, go to “Configuration” > “Policies”. Click the “Configure policy” button next to your policy. Then click the “Configure filter” button next to “SPAMfighter Sender Filter”. Remove your own domain name from the Domain whitelist, and your own email address from the Email Address whitelist.
If you have questions or need help on doing this, SPAMfighter Support Department are always ready to help – just write an email to semsupport@spamfighter.com
When emails are redirected to another email address directly from Exchange, they are sent to your other email address before they are stored in your Exchange, and thus SPAMfighter does not have the opportunity to filter them.
Please remove the forwarding from Exchange and use instead this method:1) Open the SEM Administration Module on the server and go to “Mailboxes” -> “Mailboxes”
2) Locate the mailbox in cause
3) Click the small configuration icon to the right of the mailbox
4) Choose “POP3” as primary mail protocol
5) Click “Save changes” follow by “Close”
In Outlook, click “Tools” -> “Rules and Alerts” -> “New rule” -> “Start from blank rule” -> “Check messages when they arrive”.Create a new blank rule with the following properties: * Sent to people or distribution list (select your email address)
* Forward it to people… (add your second email address)
* Except if the subject contains specific words (enter these characters: ** SPAM **)
* Stop processing more rulesCreate another blank rule with the following properties: * Check messages when they arrive
* With specific words in the subject (add the characters: ** SPAM **)
* Move it to the specified folder (Choose SPAMfighter)
* Stop processing more rulesIn step two above, please make sure that you select “With specific words in the SUBJECT”, not body. When you select “stop processing more rules”, the rule will run server-side and will be executed when an email is received, even if Outlook is not running. If the rule is marked as “client-side” in the Rules list, then please edit your rule and uncheck the option “on this machine only”. These rules need to run server-side to be effective.
Yes, SPAMfighter Exchange Module version 5 will filter incoming, outgoing and internal e-mails for spam. SEM have invividual filters that can be applied to outgoing mails.
The requirements are that you are using Exchange server 2007 and later versions of Exchange Server.
Read more about filtering of incoming mails by SEM here.
SPAMfighter HMG - General
Yes, you can. As long as you have your own domain name, you can have your mail filtered for spam. This will also filter spam emails received on your mobile phone.
You won”t be able to use the SPAMfighter Hosted Mail Gateway. We recommend that you use instead SPAMfighter PRO
With the SPAMfighter Hosted Mail Gateway, it does not matter what type of mail server you have. As long as you have your own domain name, we can filter your emails.
Then you will have to contact your IT provider. If your domain is hosted in several places, then contact the one responsible for your name servers (DNS).
Our smallest customers use it for 10 accounts and the largest we have worked with is more than 200.000 accounts.
When somebody sends an email to an email address on your domain, it will first reach SPAMfighter. We filter your spam according to the rules that you defined. Then, we redirect your email to your existing mail server. You will download your email normally. There are no changes needed in your Outlook.
Before we set up your SPAMfighter Hosted Mail Gateway account, please confirm that you will be able to modify the MX records for the domains listed, in order to redirect the email traffic through our filter. Once it has been processed by us, it will be forwarded to the original destination.
This is the only change that needs to be done to enable filtering from SPAMfighter. After you sign up for a trial, you will receive a unique address that you need to enter in the control panel where you manage the options for your domain name.
In the control panel for your domain name, you will see information related to the A-record and the MX-record. Do not change the A-record. Instead, change the MX-record. read about the MX Record here. Alternatively, you can ask for help from your IT solution provider.
You can calculate the price here
You can sign up for a 30 days free trial here
SPAMfighter Hosted Mail Gateway
Yes, you can. As long as you have your own domain name, you can have your mail filtered for spam. This will also filter spam emails received on your mobile phone.
You won”t be able to use the SPAMfighter Hosted Mail Gateway. We recommend that you use instead SPAMfighter PRO
With the SPAMfighter Hosted Mail Gateway, it does not matter what type of mail server you have. As long as you have your own domain name, we can filter your emails.
Then you will have to contact your IT provider. If your domain is hosted in several places, then contact the one responsible for your name servers (DNS).
Our smallest customers use it for 10 accounts and the largest we have worked with is more than 200.000 accounts.
When somebody sends an email to an email address on your domain, it will first reach SPAMfighter. We filter your spam according to the rules that you defined. Then, we redirect your email to your existing mail server. You will download your email normally. There are no changes needed in your Outlook.
Before we set up your SPAMfighter Hosted Mail Gateway account, please confirm that you will be able to modify the MX records for the domains listed, in order to redirect the email traffic through our filter. Once it has been processed by us, it will be forwarded to the original destination.
This is the only change that needs to be done to enable filtering from SPAMfighter. After you sign up for a trial, you will receive a unique address that you need to enter in the control panel where you manage the options for your domain name.
In the control panel for your domain name, you will see information related to the A-record and the MX-record. Do not change the A-record. Instead, change the MX-record. read about the MX Record here. Alternatively, you can ask for help from your IT solution provider.
You can calculate the price here
You can sign up for a 30 days free trial here
SPAMfighter Mail Gateway
SPAMfighter Mail Gateway is a “store-and-forward” SMTP server – which means it will accept incoming e-mails instead, scan the e-mail, and route the e-mail on to another SMTP server. During the installation – or on any point in time afterwards – configuration of where to route e-mails can be configured. Due to this “store-and-forward” (i.e. gateway) concept – an existing SMTP server must exist.
SPAMfighter Mail Gateway sends installation details regarding registration, login-information and e-mail compiled hash-values, when e-mails are being tested. SPAMfighter Mail Gateway will never send sensitive information to the net. All information that is sent and received is validated in order to avoid manipulation.
SPAMfighter Mail Gateway needs to have access to the internet, but SPAMfighter Mail Gateway only needs access to UDP/2409 to servers.backend.spamfighter.com and TCP/2409 to http://login.spamfighter.com. To be able to receive automatic updates access to TCP/80 to http://www.spamfighter.com is needed, but not an absolute requirement. This makes it possible for the system administrator to secure the network by being able to close all other connections other than the ones listed.
SPAMfighter Mail Gateway works with Windows 2000 or newer and in Windows virtual environments (VMWare, Virtual Server, Hyper V etc.)
Yes, with the help of our administration module, it is easy to deactivate the spam filtering on a single mailbox.
Spam mails can automatically be quarantined, deleted, prefixed, marked or for example routed to a special e-mail folder or all of the above.
SPAMfighter Mail Gateway has numerous ways of determining whether or not an e-mail is spam or not. The most significant way is by creating a unique signature for each e-mail and its elements, and sends this signature to the SPAMfighter server for evaluation. Afterwards, the server returns a score with the decision if the message is spam or not. The original e-mail never leaves the server under SPAMfighter Mail Gateway filtering.
SPAMfighter Mail Gateway gives you the hightest degree of confidentiality. Your e-mail security and privacy is our top priority. Legitimate e-mail on the server is never sent further or shared with anyone – your legitimate e-mails will never leave your server. Only a few blocks of encrypted data and the unique web address are sent to the SPAMfighter server.
SPAMfighter Mail Gateway - Installation
SPAMfighter Mail Gateway needs to have access to the internet, but SPAMfighter Mail Gateway only needs access to UDP/2409 to servers.backend.spamfighter.com and TCP/2409 to http://login.spamfighter.com. To be able to receive automatic updates access to TCP/80 to http://www.spamfighter.com is needed, but not an absolute requirement. This makes it possible for the system administrator to secure the network by being able to close all other connections other than the ones listed.
SPAMfighter Mail Gateway works with Windows 2000 or newer and in Windows virtual environments (VMWare, Virtual Server, Hyper V etc.)
SPAMfighter Mail Gateway - Login and Security
SPAMfighter Mail Gateway is a “store-and-forward” SMTP server – which means it will accept incoming e-mails instead, scan the e-mail, and route the e-mail on to another SMTP server. During the installation – or on any point in time afterwards – configuration of where to route e-mails can be configured. Due to this “store-and-forward” (i.e. gateway) concept – an existing SMTP server must exist.
SPAMfighter Mail Gateway sends installation details regarding registration, login-information and e-mail compiled hash-values, when e-mails are being tested. SPAMfighter Mail Gateway will never send sensitive information to the net. All information that is sent and received is validated in order to avoid manipulation.
Yes, with the help of our administration module, it is easy to deactivate the spam filtering on a single mailbox.
Spam mails can automatically be quarantined, deleted, prefixed, marked or for example routed to a special e-mail folder or all of the above.
SPAMfighter Mail Gateway has numerous ways of determining whether or not an e-mail is spam or not. The most significant way is by creating a unique signature for each e-mail and its elements, and sends this signature to the SPAMfighter server for evaluation. Afterwards, the server returns a score with the decision if the message is spam or not. The original e-mail never leaves the server under SPAMfighter Mail Gateway filtering.
SPAMfighter Mail Gateway gives you the hightest degree of confidentiality. Your e-mail security and privacy is our top priority. Legitimate e-mail on the server is never sent further or shared with anyone – your legitimate e-mails will never leave your server. Only a few blocks of encrypted data and the unique web address are sent to the SPAMfighter server.
SPYWAREfighter
Please do the following, if you want to uninstall SPYWAREfighter:
• Go to Start > Control Panel > Add or Remove Programs
• Locate SPYWAREfighter on the list of programs
• Highlight SPYWAREfighter and click ‘Remove’ afterwardsSPYWAREfighter will now present you with the proper tools for uninstalling.• Choose Remove > Next > Remove
SPYWAREfighter is now uninstalled from your system.
Manual Activation
*Go to Start -> All Programs -> Fighters -> SPYWAREfighter -> SPYWAREfighter
This will open your SPYWAREfighter program
*Click on “Account” in the left menu
*Enter the product key shown on your invoice and click the Add Product Key button.After this please try to update your SPYWAREfighter to be sure you have the latest updates.
Please do the following, if you want to install SPYWAREfighter:• Click on this link: Download
• Download SPYWAREfighter
• Open the installation file, which you just downloaded.
• Choose your prefered language
• Agree to our term of use, and click “Next”
• Choose where you want to save SPYWAREfighter. Leave this be if you have no preferences. Click “Next”.
• Fill in your E-mail address
• Click “Install”
• A little black icon resembling a detective will appear in your lower right corner, when SPYWAREfighter has finished installing. You can also access SPYWAREfighter by right-clicking this icon.
Please do the following, if you want to change your E-mail address in SPYWAREfighter:* Press Start > All Programs > Fighters > SPYWAREfighter > SPYWAREfighter
Your SPYWAREfighter program will now open
* Click on ‘Account’, in the vertical menu, on the left-hand side.
* click on “Account Settings”.
* Type in your new email address and click on ‘change’Your E-mail address has now been changed.
No, SPYWAREfighter will not protect you against viruses. SPYWAREfighter will protect you against unsolicited programs. Spyware, adware, etc.
You need an anti-virus program as well, if you want to obtain proper protection. We can recommend our own VIRUSfighter, since it makes the perfect addition in the fight against PC threats.
You can try VIRUSfighter 30 days for free. The newest version is available for download at our website.
To unsubscribe from emails sent from SPYWAREfighter click here
Please remember, you will resubmit to our emails, if you continue to use or re-register SPYWAREfighter.
Open your SPYWAREfighter menu from “Start -> All Programs -> Fighters -> SPYWAREfighter -> SPYWAREfighter” Click on “User ID” in the lower right corner of your SPYWAREfighter menu. You will get a Popup where you can see your UserID.
SPYWAREfighter - General
Please do the following, if you want to change your E-mail address in SPYWAREfighter:* Press Start > All Programs > Fighters > SPYWAREfighter > SPYWAREfighter
Your SPYWAREfighter program will now open
* Click on ‘Account’, in the vertical menu, on the left-hand side.
* click on “Account Settings”.
* Type in your new email address and click on ‘change’Your E-mail address has now been changed.
No, SPYWAREfighter will not protect you against viruses. SPYWAREfighter will protect you against unsolicited programs. Spyware, adware, etc.
You need an anti-virus program as well, if you want to obtain proper protection. We can recommend our own VIRUSfighter, since it makes the perfect addition in the fight against PC threats.
You can try VIRUSfighter 30 days for free. The newest version is available for download at our website.
To unsubscribe from emails sent from SPYWAREfighter click here
Please remember, you will resubmit to our emails, if you continue to use or re-register SPYWAREfighter.
Open your SPYWAREfighter menu from “Start -> All Programs -> Fighters -> SPYWAREfighter -> SPYWAREfighter” Click on “User ID” in the lower right corner of your SPYWAREfighter menu. You will get a Popup where you can see your UserID.
SPYWAREfighter - Installation and Login
Please do the following, if you want to uninstall SPYWAREfighter:
• Go to Start > Control Panel > Add or Remove Programs
• Locate SPYWAREfighter on the list of programs
• Highlight SPYWAREfighter and click ‘Remove’ afterwardsSPYWAREfighter will now present you with the proper tools for uninstalling.• Choose Remove > Next > Remove
SPYWAREfighter is now uninstalled from your system.
Manual Activation
*Go to Start -> All Programs -> Fighters -> SPYWAREfighter -> SPYWAREfighter
This will open your SPYWAREfighter program
*Click on “Account” in the left menu
*Enter the product key shown on your invoice and click the Add Product Key button.After this please try to update your SPYWAREfighter to be sure you have the latest updates.
Please do the following, if you want to install SPYWAREfighter:• Click on this link: Download
• Download SPYWAREfighter
• Open the installation file, which you just downloaded.
• Choose your prefered language
• Agree to our term of use, and click “Next”
• Choose where you want to save SPYWAREfighter. Leave this be if you have no preferences. Click “Next”.
• Fill in your E-mail address
• Click “Install”
• A little black icon resembling a detective will appear in your lower right corner, when SPYWAREfighter has finished installing. You can also access SPYWAREfighter by right-clicking this icon.
VIRUSfighter
A new and very malicious ransomware virus is spreading on the internet. Previously it was only found on dodgy sites like porn or illegal download pages. Not it has unfortunately also begun to populate on normal sites and on pages with videos being played.
But, luckily with a little work it can be removed
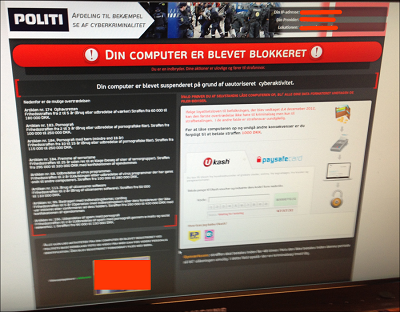
The first thing one notice is that a webcam picture of you has been taken. This is very disturbing to see but fear not this will not be displayed anywhere. This is just a way for the perpetrators to scare you to pay.
Not all sites where the virus is placed are helpful in closing them down. This makes it very difficult for the police, FBI and investigators to shut them down. These scam artists are furthermore almost impossible to find.
Removing the Ukash Virus
Although there are reports of different kinds of Ukash virus, this guide should help most people out there who have been infected by this horrible virus. Please read through the entire guide before starting.
1. Close down your computer with a hard reboot (pressing down on the OFF button).
2. Remove or turn of any wireless or internet cable connection.
3. Startup your computer while pressing down F8 to activate Safe Mode options (a few computers like Medion you might have to press something else).
4. When in the Safe Mode Options menu choose: “Restart in Safe mode with COMMAND PROMPT (very important).
5. You will see a Command Line when your Windows has booted in Safe Mode (there is a chance you have to login with your Windows password first).
6. In the command line window, write: RSTRUI.EXE which will prompt the Windows Restore function to open.
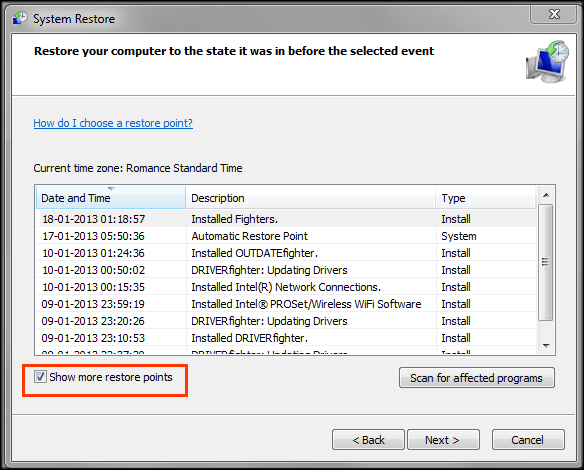
1. Choose a Restore file from a time you know your computer was working properly (to be safe go at least a couple of days back).
2. Windows will not restore itself. This might take up to 20-30 minutes depending on size.
3. Now you have to clean the virus leftovers when your Windows is backed up.
4. Download and install the free ChicaPC-Shield and do a scan to find any leftover threats.
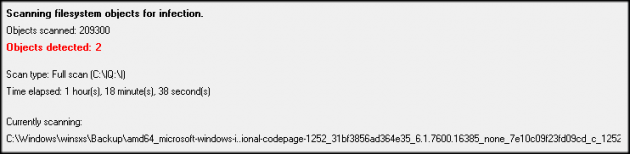
ProgramDataDSGSDGDSGDSGW.PAD (Exploit.Drop.GSA) -> Quarantined and deleted successfully.
Users(yourname)AppDataRoamingMicrosoftWindowsStartMenuProgramsStartup unctf.lnk (Trojan.Ransom.SUGen)
If you are lucky enough there will be no leftovers since the restoration cleared everything. However in most cases there will be files to clean.
1. After your reboot you might experience a popup with a random file name like “wgsdhsagss.exe” or something related, which says “can not be found”. This is nothing to be worried about. You can manually find this reference in the Registry or use SLOW-PCfighter to remove these entries.
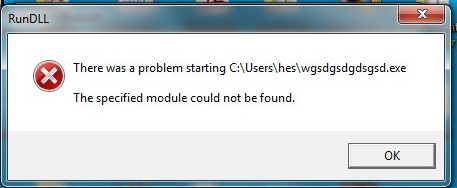
NB. Your antivirus or spyware program might have been turned off and the signature database deleted from the system. Just reinstall the product and you are good to go.
We hope this guide helped you get the best of the virus and cross our fingers you are more careful in the future.
Open your VIRUSfighter menu from “Start -> All Programs -> Fighters -> VIRUSfighter -> VIRUSfighter” Click on “User ID” in the lower right corner of your VIRUSfighter menu. You will get a Popup where you can see your UserID.
SPYWAREfighter only scans for viruses if VIRUSfighter is installed. If VIRUSfighter is installed, then customers are STRONGLY recommended NOT to have another antivirus installed. But, if you are using JUST SPYWAREfighter, then yes, you can install another antivirus software (and are strongly recommended to do so.)
VIRUSfighter only scans for spyware (as an option) when SPYWAREfighter is installed, as part of our “suite” presentation of installed SPAMfighter software, so you need both products to protect you from viruses and spyware.
For stability reasons, SPYWAREfighter and VIRUSfighter are integrated when installed together, so updating one will update both.
This is a known issue: restart VIRUSfighter and select “Scan” from the user interface, and the scan information will be shown. Functionality is not impaired, but the user interface issue will be fixed in the next version of products.
For stability reasons, SPYWAREfighter and VIRUSfighter are integrated when installed together, so during uninstall of one, the other is stopped, however, once the uninstall is completed, the scan will continue.
This means that there is an update for your VIRUSfighter and we recommend that you click it to update VIRUSfighter to the latest version.
You may want to stop the real-time scanner when you perform system maintenance tasks. When you stop the real-time scanner, it will not start again in the current session unless you do it manually, after a reboot of your computer real-time scanner will be activated again.
You can stop/start the real-time scanner by right clicking the VIRUSfighter icon in the system tray and choose Deactivate real-time scanning, you can activate it here again.You can also deactivate this from your menu in VIRUSfighter, From Start -> All Programs -> Fighters -> VIRUSfighter -> VIRUSfighter -> Settings -> Protection Settings -> Deactivate real-time scanner.
You need to download it from our website and install it.
To activate VIRUSfighter, please do this:
Go to Start -> All Programs -> Fighters -> VIRUSfighter -> VIRUSfighter
Click Account -> Renew VIRUSfighter.
Enter the product key shown on your invoice and click the Add Product Key button.
After this please try to update your VIRUSfighter to be sure you have the latest updates.
To install VIRUSfighter:
* Download VIRUSfighter here
* Save it on your e.g. desktop
* When it is done then double click on the .exe file, and follow the installation.
Go to Start -> All Programs -> Fighters -> VIRUSfighter -> VIRUSfighter. This will open the VIRUSfighter program.
Click on Settings -> Scan Settings.
If you want to add any extensions you can do so adding it to the “Add your own filetypes by typing extension here” field and click “Add”.
To update your VIRUSfighter, please do the following:
Go to Start -> All Programs -> Fighters -> VIRUSfighter -> VIRUSfighter.
Your VIRUSfighter program will open.
Click on “Update” in the lower right corner of the program.
You can also right click the VIRUSfighter icon in your system tray and choose Check for the latest updates
VIRUSfighter is free for 30 days. After the 30 day trial, you can choose if you would like to purchase VIRUSfighter PRO or uninstall. If you continue to use VIRUSfighter without purchasing a license, you will no longer be able to receive updates and will not be protected against the latest threats.
Most likely you have installed VIRUSfighter over an existing anti-virus application, which was not automatically removed by the system during the installation. Please uninstall any other antivirus software you may have on your computer.
Manual Activation
*Go to Start -> All Programs -> Fighters -> VIRUSfighter -> VIRUSfighter
This will open your VIRUSfighter program
*Click on “Account” in the left menu
*Enter the product key shown on your invoice and click the Add Product Key button.After this please try to update your VIRUSfighter to be sure you have the latest updates.
To unsubscribe from emails sent from VIRUSfighter please click here.
Please remember, you will resubmit to our emails, if you continue to use or re-register VIRUSfighter.
You should uninstall or deactivate your other anti-virus software before installing VIRUSfighter.
Having two active anti-virus programs could give you problems and even crash your computer.To do this, go to: Start Menu > Control Panel > Add/Remove Programs. Choose your anti-virus software and click on Remove.
Answer
How do I uninstall VIRUSfighter?To uninstall VIRUSfighter, please do the following:
* Go to: Start -> Settings -> Control Panel -> Add/Remove Programs.
* Locate VIRUSfighter and click Change/Remove and follow the guide.
VIRUSfighter - General
This means that there is an update for your VIRUSfighter and we recommend that you click it to update VIRUSfighter to the latest version.
For stability reasons, SPYWAREfighter and VIRUSfighter are integrated when installed together, so during uninstall of one, the other is stopped, however, once the uninstall is completed, the scan will continue.
This is a known issue: restart VIRUSfighter and select “Scan” from the user interface, and the scan information will be shown. Functionality is not impaired, but the user interface issue will be fixed in the next version of products.
For stability reasons, SPYWAREfighter and VIRUSfighter are integrated when installed together, so updating one will update both.
VIRUSfighter only scans for spyware (as an option) when SPYWAREfighter is installed, as part of our “suite” presentation of installed SPAMfighter software, so you need both products to protect you from viruses and spyware.
SPYWAREfighter only scans for viruses if VIRUSfighter is installed. If VIRUSfighter is installed, then customers are STRONGLY recommended NOT to have another antivirus installed. But, if you are using JUST SPYWAREfighter, then yes, you can install another antivirus software (and are strongly recommended to do so.)
Open your VIRUSfighter menu from “Start -> All Programs -> Fighters -> VIRUSfighter -> VIRUSfighter” Click on “User ID” in the lower right corner of your VIRUSfighter menu. You will get a Popup where you can see your UserID.
A new and very malicious ransomware virus is spreading on the internet. Previously it was only found on dodgy sites like porn or illegal download pages. Not it has unfortunately also begun to populate on normal sites and on pages with videos being played.
But, luckily with a little work it can be removed
The first thing one notice is that a webcam picture of you has been taken. This is very disturbing to see but fear not this will not be displayed anywhere. This is just a way for the perpetrators to scare you to pay.
Not all sites where the virus is placed are helpful in closing them down. This makes it very difficult for the police, FBI and investigators to shut them down. These scam artists are furthermore almost impossible to find.
Removing the Ukash Virus
Although there are reports of different kinds of Ukash virus, this guide should help most people out there who have been infected by this horrible virus. Please read through the entire guide before starting.
1. Close down your computer with a hard reboot (pressing down on the OFF button).
2. Remove or turn of any wireless or internet cable connection.
3. Startup your computer while pressing down F8 to activate Safe Mode options (a few computers like Medion you might have to press something else).
4. When in the Safe Mode Options menu choose: “Restart in Safe mode with COMMAND PROMPT (very important).
5. You will see a Command Line when your Windows has booted in Safe Mode (there is a chance you have to login with your Windows password first).
6. In the command line window, write: RSTRUI.EXE which will prompt the Windows Restore function to open.
1. Choose a Restore file from a time you know your computer was working properly (to be safe go at least a couple of days back).
2. Windows will not restore itself. This might take up to 20-30 minutes depending on size.
3. Now you have to clean the virus leftovers when your Windows is backed up.
4. Download and install the free ChicaPC-Shield and do a scan to find any leftover threats.
ProgramDataDSGSDGDSGDSGW.PAD (Exploit.Drop.GSA) -> Quarantined and deleted successfully.
Users(yourname)AppDataRoamingMicrosoftWindowsStartMenuProgramsStartup unctf.lnk (Trojan.Ransom.SUGen)
If you are lucky enough there will be no leftovers since the restoration cleared everything. However in most cases there will be files to clean.
1. After your reboot you might experience a popup with a random file name like “wgsdhsagss.exe” or something related, which says “can not be found”. This is nothing to be worried about. You can manually find this reference in the Registry or use SLOW-PCfighter to remove these entries.
NB. Your antivirus or spyware program might have been turned off and the signature database deleted from the system. Just reinstall the product and you are good to go.
We hope this guide helped you get the best of the virus and cross our fingers you are more careful in the future.
To unsubscribe from emails sent from VIRUSfighter please click here.
Please remember, you will resubmit to our emails, if you continue to use or re-register VIRUSfighter.
Manual Activation
*Go to Start -> All Programs -> Fighters -> VIRUSfighter -> VIRUSfighter
This will open your VIRUSfighter program
*Click on “Account” in the left menu
*Enter the product key shown on your invoice and click the Add Product Key button.After this please try to update your VIRUSfighter to be sure you have the latest updates.
Most likely you have installed VIRUSfighter over an existing anti-virus application, which was not automatically removed by the system during the installation. Please uninstall any other antivirus software you may have on your computer.
VIRUSfighter is free for 30 days. After the 30 day trial, you can choose if you would like to purchase VIRUSfighter PRO or uninstall. If you continue to use VIRUSfighter without purchasing a license, you will no longer be able to receive updates and will not be protected against the latest threats.
To update your VIRUSfighter, please do the following:
Go to Start -> All Programs -> Fighters -> VIRUSfighter -> VIRUSfighter.
Your VIRUSfighter program will open.
Click on “Update” in the lower right corner of the program.
You can also right click the VIRUSfighter icon in your system tray and choose Check for the latest updates
Go to Start -> All Programs -> Fighters -> VIRUSfighter -> VIRUSfighter. This will open the VIRUSfighter program.
Click on Settings -> Scan Settings.
If you want to add any extensions you can do so adding it to the “Add your own filetypes by typing extension here” field and click “Add”.
You may want to stop the real-time scanner when you perform system maintenance tasks. When you stop the real-time scanner, it will not start again in the current session unless you do it manually, after a reboot of your computer real-time scanner will be activated again.
You can stop/start the real-time scanner by right clicking the VIRUSfighter icon in the system tray and choose Deactivate real-time scanning, you can activate it here again.You can also deactivate this from your menu in VIRUSfighter, From Start -> All Programs -> Fighters -> VIRUSfighter -> VIRUSfighter -> Settings -> Protection Settings -> Deactivate real-time scanner.
You need to download it from our website and install it.
To activate VIRUSfighter, please do this:
Go to Start -> All Programs -> Fighters -> VIRUSfighter -> VIRUSfighter
Click Account -> Renew VIRUSfighter.
Enter the product key shown on your invoice and click the Add Product Key button.
After this please try to update your VIRUSfighter to be sure you have the latest updates.
VIRUSfighter - Installation
To install VIRUSfighter:
* Download VIRUSfighter here
* Save it on your e.g. desktop
* When it is done then double click on the .exe file, and follow the installation.
Answer
How do I uninstall VIRUSfighter?To uninstall VIRUSfighter, please do the following:
* Go to: Start -> Settings -> Control Panel -> Add/Remove Programs.
* Locate VIRUSfighter and click Change/Remove and follow the guide.
You should uninstall or deactivate your other anti-virus software before installing VIRUSfighter.
Having two active anti-virus programs could give you problems and even crash your computer.To do this, go to: Start Menu > Control Panel > Add/Remove Programs. Choose your anti-virus software and click on Remove.