Potražite pomoć u našim FAQ-ima
Trebate pomoć?
Ne možete pronaći odgovor koji tražite? Ne brinite, mi smo tu da pomognemo!
DRIVERfighter
If you see this error in DRIVERfighter when you try to update your drivers: Unable to create system restore point, error code: 2147754754
Please go to Start -> Control Panel -> Administrative Tools -> Services
Enable the service named “Microsoft Software Shadow Copy Protection Service“. If it is disabled, set it back to “Manual”.
Then make sure that the System Restore feature is enabled on your computer:
How to activate system restore on your computer
For Windows 7:
1. Go to Start
2. Click “Control Panel”
3. Click “System and Security”
4. Click “System”
5. Chose “System Protection”
6. Choose your System Drive (most likely drive C: (System))
7. Click “Configure”
8. Chose the “Restore system settings and previous versions of files”
9. Click “OK”
Your System Restore is now active.
For Windows VISTA:
1. Click “Start” button
2. Click “Control Panel”
3. Click “System and Maintenance”
4. Clicking “System”.
5. In the left pane, click System Protection. If you are prompted for an administrator password or confirmation, type the password or provide confirmation.
6. To turn on System Protection for a hard disk, select the check box next to the disk, and then click “OK”.
For Windows XP:
1. Click “Start”
2. Right-click “My Computer”
3. Click “Properties”.
4. In the System Properties dialog box, click the “System Restore” tab.
3. Click to clear the “Turn off System Restore” check box. Or, click the “Turn off System Restore on all drives” check box.
4. Click OK.
After a few moments, the System Properties dialog box closes.
If yo see this error code in the error message: Error code: 2147754754, then you need to follow THIS GUIDE
This is how to activate your System restore:
For Windows 7:
1. Go to Start
2. Click “Control Panel”
3. Click “System and Security”
4. Click “System”
5. Chose “System Protection”
6. Choose your System Drive (most likely drive C: (System))
7. Click “Configure”
8. Chose the “Restore system settings and previous versions of files”
9. Click “OK”
Your System Restore is now active.
For Windows VISTA:
1. Click “Start” button
2. Click “Control Panel”
3. Click “System and Maintenance”
4. Clicking “System”.
5. In the left pane, click System Protection. If you are prompted for an administrator password or confirmation, type the password or provide confirmation.
6. To turn on System Protection for a hard disk, select the check box next to the disk, and then click “OK”.
For Windows XP:
1. Click “Start”
2. Right-click “My Computer”
3. Click “Properties”.
4. In the System Properties dialog box, click the “System Restore” tab.
5. Click to clear the “Turn off System Restore” check box. Or, click the “Turn off System Restore on all drives” check box.
6. Click OK.
After a few moments, the System Properties dialog box closes.
To uninstall DRIVERfighter, please do the following:
Go to Start -> Settings -> Control Panel -> Add/Remove Programs.
Locate DRIVERfighter in the list, select it and click on the “Remove” button.
Click on “Control Panel“
Click on “System and Security“
Click on “Security and Maintenance“
Click on “Recovery“
Clock on “Configure System restore“
Clock on your main drive (C:)(system)
Click on “Configure“
Click on “Turn on system protection“
Click “Apply” and “ok“
The system restore is now active and you can use DRIVERfighter.
Old drivers can cause lower performance and crashes. Some old drivers also represent a security risk.
Most PC crashes are caused by outdated or conflicting drivers. Older drivers can lead to system errors, crashes and slow performance.
Old and faulty drivers can result in blue screen crashes and other performance issues that can result in your hardware will not work properly, slow web surfing, slow PC startup, crashes, and slow computer performance.
Hardware manufacturers regularly update drivers, in many cases to correct conflicts, stability, and performance issues. DRIVERfighter will scan your computer, find your old drivers and create a list where you can see the new drivers available and you can then choose which drivers you want DRIVERfighter to download and install on your PC.
No, Windows update only updates your Windows installation and does not update important drivers for your motherboard, Bluetooth drivers, video card drivers, Ethernet drivers etc.
You can try a free scan for updated drivers with DRIVERfighter. After that you can choose to purchase DRIVERfighter and have all your drivers updated and use the software on a regular basis. Download the free trial and do a scan here: http://www.spamfighter.com/DRIVERfighter
More than 100.000 drivers from Epson, Nvidia, Intel, Dlink, Lenovo, Asus, Brother, Okidata, Konica, HP, Toshiba, Acer and many others are supported.
Your license key can be used on one PC.

Manual Activation
*Open DRIVERfighter
*Choose “Account” in the left menu
*Type in your product key
*Click the “Add product Key” button. Your key will now be active
To buy DRIVERfighter, please do the following:
1. Open DRIVERfighter by locating the program Start – All Programs – Fighters – DRIVERfighter – DRIVERfighter.
2. Choose “Account” in the left menu.
3. Click on the green “Purchase Full Version” button.
4. You will be transferred to our website where you can buy a valid key.
5. Make sure you add your new product key to the program.
Locating just 10+ updated drivers can be very tiresome and you will always have the risk of finding drivers that are actually not the newest versions.
If you experience that your monitor settings are reset after driver update you need to set your monitor settings again by going to your monitor settings in Windows.
The reason this happens is most likely that Windows was not able to keep the settings during the driver update and therefore they were reset.
We strongly suggest that you close all other programs before updating your drivers and that you do not use your computer during the update as this could make programs or even hardware fail.
DRIVERfighter - General
If you see this error in DRIVERfighter when you try to update your drivers: Unable to create system restore point, error code: 2147754754
Please go to Start -> Control Panel -> Administrative Tools -> Services
Enable the service named “Microsoft Software Shadow Copy Protection Service“. If it is disabled, set it back to “Manual”.
Then make sure that the System Restore feature is enabled on your computer:
How to activate system restore on your computer
For Windows 7:
1. Go to Start
2. Click “Control Panel”
3. Click “System and Security”
4. Click “System”
5. Chose “System Protection”
6. Choose your System Drive (most likely drive C: (System))
7. Click “Configure”
8. Chose the “Restore system settings and previous versions of files”
9. Click “OK”
Your System Restore is now active.
For Windows VISTA:
1. Click “Start” button
2. Click “Control Panel”
3. Click “System and Maintenance”
4. Clicking “System”.
5. In the left pane, click System Protection. If you are prompted for an administrator password or confirmation, type the password or provide confirmation.
6. To turn on System Protection for a hard disk, select the check box next to the disk, and then click “OK”.
For Windows XP:
1. Click “Start”
2. Right-click “My Computer”
3. Click “Properties”.
4. In the System Properties dialog box, click the “System Restore” tab.
3. Click to clear the “Turn off System Restore” check box. Or, click the “Turn off System Restore on all drives” check box.
4. Click OK.
After a few moments, the System Properties dialog box closes.
If yo see this error code in the error message: Error code: 2147754754, then you need to follow THIS GUIDE
This is how to activate your System restore:
For Windows 7:
1. Go to Start
2. Click “Control Panel”
3. Click “System and Security”
4. Click “System”
5. Chose “System Protection”
6. Choose your System Drive (most likely drive C: (System))
7. Click “Configure”
8. Chose the “Restore system settings and previous versions of files”
9. Click “OK”
Your System Restore is now active.
For Windows VISTA:
1. Click “Start” button
2. Click “Control Panel”
3. Click “System and Maintenance”
4. Clicking “System”.
5. In the left pane, click System Protection. If you are prompted for an administrator password or confirmation, type the password or provide confirmation.
6. To turn on System Protection for a hard disk, select the check box next to the disk, and then click “OK”.
For Windows XP:
1. Click “Start”
2. Right-click “My Computer”
3. Click “Properties”.
4. In the System Properties dialog box, click the “System Restore” tab.
5. Click to clear the “Turn off System Restore” check box. Or, click the “Turn off System Restore on all drives” check box.
6. Click OK.
After a few moments, the System Properties dialog box closes.
To uninstall DRIVERfighter, please do the following:
Go to Start -> Settings -> Control Panel -> Add/Remove Programs.
Locate DRIVERfighter in the list, select it and click on the “Remove” button.
Click on “Control Panel“
Click on “System and Security“
Click on “Security and Maintenance“
Click on “Recovery“
Clock on “Configure System restore“
Clock on your main drive (C:)(system)
Click on “Configure“
Click on “Turn on system protection“
Click “Apply” and “ok“
The system restore is now active and you can use DRIVERfighter.
Old drivers can cause lower performance and crashes. Some old drivers also represent a security risk.
Most PC crashes are caused by outdated or conflicting drivers. Older drivers can lead to system errors, crashes and slow performance.
Old and faulty drivers can result in blue screen crashes and other performance issues that can result in your hardware will not work properly, slow web surfing, slow PC startup, crashes, and slow computer performance.
Hardware manufacturers regularly update drivers, in many cases to correct conflicts, stability, and performance issues. DRIVERfighter will scan your computer, find your old drivers and create a list where you can see the new drivers available and you can then choose which drivers you want DRIVERfighter to download and install on your PC.
No, Windows update only updates your Windows installation and does not update important drivers for your motherboard, Bluetooth drivers, video card drivers, Ethernet drivers etc.
You can try a free scan for updated drivers with DRIVERfighter. After that you can choose to purchase DRIVERfighter and have all your drivers updated and use the software on a regular basis. Download the free trial and do a scan here: http://www.spamfighter.com/DRIVERfighter
More than 100.000 drivers from Epson, Nvidia, Intel, Dlink, Lenovo, Asus, Brother, Okidata, Konica, HP, Toshiba, Acer and many others are supported.
Your license key can be used on one PC.
Manual Activation
*Open DRIVERfighter
*Choose “Account” in the left menu
*Type in your product key
*Click the “Add product Key” button. Your key will now be active
To buy DRIVERfighter, please do the following:
1. Open DRIVERfighter by locating the program Start – All Programs – Fighters – DRIVERfighter – DRIVERfighter.
2. Choose “Account” in the left menu.
3. Click on the green “Purchase Full Version” button.
4. You will be transferred to our website where you can buy a valid key.
5. Make sure you add your new product key to the program.
Locating just 10+ updated drivers can be very tiresome and you will always have the risk of finding drivers that are actually not the newest versions.
If you experience that your monitor settings are reset after driver update you need to set your monitor settings again by going to your monitor settings in Windows.
The reason this happens is most likely that Windows was not able to keep the settings during the driver update and therefore they were reset.
We strongly suggest that you close all other programs before updating your drivers and that you do not use your computer during the update as this could make programs or even hardware fail.
FULL-DISKfighter
Otvorite program pa kliknite na “Settings” (Postavke) u izborniku slijeva, potom kliknite na “Account settings” (Postavke računa) pa unesite svoju šifru i kliknite na “Add Product Key” (Dodaj šifru proizvoda). Sada se možete koristiti punom verzijom programa.
Uvijek se trebate pobrinuti za to da ne uklanjate datoteke koje su Vam potrebne. FULL-DISKfighter pomaže Vam u pronalaženju svih vrsta datoteka te Vam daje jednostavan pregled nad njima pa sami možete odlučiti koje Vam datoteke nisu potrebne i očistiti ih.
Da. Demo verziju možete ovdje preuzeti s interneta i ona će Vam omogućiti besplatno čišćenje 25 datoteka.
Tijekom vremena Vaš tvrdi disk postaje pretrpan i fragmentiran. Počinje naličiti neurednoj ladici s čarapama, u kojoj ništa nije na svom mjestu. Alat za organizaciju diska ponovno takoreći organizira tu ladicu i objedinjuje fragmentirane datoteke tako da vaše računalo može raditi učinkovitije.
Kada FULL-DISKfighter ispituje Vaš sustav u cilju pronalaženja nepotrebnih datoteka, moguće je da će naići na datoteke koje se, doduše, mogu ukloniti, ali nakon odvijanja stvarnog čišćenja sustav sam zaključava neke od tih datoteka.
To je nemoguće provjeriti prije nego što program zapravo započne s pokušajima njihovog uklanjanja.
Razlog takvom zaključavanju tih datoteka moglo bi biti to što Vam je otvoren neki program, koji se možda ne koristi baš tom privremenom datotekom, ali ju je svejedno privremeno zaključao.
Ne brinite ako Vam ostane nekoliko datoteka koje ne možete ukloniti, ionako bi ih trebalo biti vrlo malo.
Dobro bi bilo zatvoriti sve programe prije skeniranja.
FULL-DISKfighter - General
Otvorite program pa kliknite na “Settings” (Postavke) u izborniku slijeva, potom kliknite na “Account settings” (Postavke računa) pa unesite svoju šifru i kliknite na “Add Product Key” (Dodaj šifru proizvoda). Sada se možete koristiti punom verzijom programa.
Uvijek se trebate pobrinuti za to da ne uklanjate datoteke koje su Vam potrebne. FULL-DISKfighter pomaže Vam u pronalaženju svih vrsta datoteka te Vam daje jednostavan pregled nad njima pa sami možete odlučiti koje Vam datoteke nisu potrebne i očistiti ih.
Da. Demo verziju možete ovdje preuzeti s interneta i ona će Vam omogućiti besplatno čišćenje 25 datoteka.
Tijekom vremena Vaš tvrdi disk postaje pretrpan i fragmentiran. Počinje naličiti neurednoj ladici s čarapama, u kojoj ništa nije na svom mjestu. Alat za organizaciju diska ponovno takoreći organizira tu ladicu i objedinjuje fragmentirane datoteke tako da vaše računalo može raditi učinkovitije.
Kada FULL-DISKfighter ispituje Vaš sustav u cilju pronalaženja nepotrebnih datoteka, moguće je da će naići na datoteke koje se, doduše, mogu ukloniti, ali nakon odvijanja stvarnog čišćenja sustav sam zaključava neke od tih datoteka.
To je nemoguće provjeriti prije nego što program zapravo započne s pokušajima njihovog uklanjanja.
Razlog takvom zaključavanju tih datoteka moglo bi biti to što Vam je otvoren neki program, koji se možda ne koristi baš tom privremenom datotekom, ali ju je svejedno privremeno zaključao.
Ne brinite ako Vam ostane nekoliko datoteka koje ne možete ukloniti, ionako bi ih trebalo biti vrlo malo.
Dobro bi bilo zatvoriti sve programe prije skeniranja.
FULL-DISKfighter - General - Mac
FULL-DISKfighter Mac uses threads to speed up scanning by doing the scans concurrently, sometimes it may take a while for all of the threads to report back that they have stopped, until this happens, the scans appear to still be working. They will stop after a short delay.
Should you want to uninstall FULL-DISKfighter Mac please follow this procedure
1. Go to you Applications folder.
2. Find FULL-DISKfighter.
3. Drag FULL-DISKfighter to the Trash.
Once the file is deleted, it is no longer available on your Mac, however, if you are using Time Machine (or a third-party back-up software), then you are able to restore the file from these back-ups. If you have not got a back-up solution running, then we regret the file is no longer available.
Yes, like our PC version of this product, the first 25 file cleans are free, after that you will need to purchase the product to clean any more.
Each scan finds different items, and only you can make the decision if you should delete them (or not) from your system, and as such, it is not safe to just blindly delete files.
In particular, the File Finder scan is designed to find files over a certain size (default is 50 MB) for you to investigate what is taking up space on your hard disk, and it is permissible that many (if not all) of those files you might want to keep, but we present them for you to investigate further.
Once all scans have completed, you can do one of two things. If you’re only interested in the results of one scan, click on that Scan icon (for instance, duplicate scan is the middle icon) and review results for that scan and clean as appropriate. OR you can get an overview of all scans by clicking the magnifying glass icon in the scan results area. This will take you to an overview of each scan, so you can decide which areas to direct your attention to for review and clean.
If you have already downloaded the FULL-DISKfighter Mac DMG file (if not, go here to get it:
http://www.spamfighter.com/FULL-DISKfighter/Functions/Download-Mac.asp),
then find the DMG file, double-click it, and it will mount on your system, now drag FULL-DISKfigher Mac from the DMG file to your Applications folder.
It is now installed on your system.
Go to your Applications folder, select the FULL-DISKfighter program icon and double-click it to start FULL-DISKfigher Mac. As it’s the first time you are using the product, the product will auto-scan your system. You can turn auto-scanning off if you wish for future use.
Make sure FULL-DISKfighter Mac is running. From the FULL-DISKfighter menu (upper left of screen, from the menu bar), select FULL-DISKfighter -> Registration. A dialog box will appear for you to put the license key into.
FULL-DISKfighter Mac can be purchased from our website, here:
https://payment.spamfighter.com/Payment_Choose_Product_New_FDMAC.asp
As with all scans, the decision to delete, or not, any files that FULL-DISKfighter Mac lists as Junk, Duplicate, and especially in File Finder, must be up to the user of the machine on which the scan is being run. In some instances duplicates might NEED to exist, and therefore none are pre-selected for deletion.
Click the help icon (marked with a question mark), and on screen help will appear to guide you. If you know what you want to do, for instance, do a duplicate scan, then click on the duplicate scan icon on the products main user interface. Now you can scan for duplicates from the Duplicate Scan page. OR, initiate all scans by clicking on the scan button.
The scan time for FULL-DISKfighter is dependent on both how big your hard disk drive is, and how many files you have. If you have a lot of data and a large hard disk, this might take some time. Most scans will be completed in less than 20 minutes (and often much, much faster), but the savings you can make in hard disk space make the wait well worth the while.
Please click on the FULL-DISKfighter menu, (or the preferences cog in the FULL-DISKfighter user interface), and de-select “Auto Scan on launch” check box. Any currently running scan can be cancelled by clicking the “X” in the scan notification area.
If you have purchased a license key for FUL-DISKfighter, we would have emailed you the key for the product to the email address you used in the purchase process. Please check that email account (it might take a short time to turn up), and also check your spam folder (as occasionally these emails can get filtered). If you still have not received your key after 24 hours, please contact our support folks on support@spamfighter.com
There are three main scans that FULL-DISKfighter for Mac (Beta) undertakes: Junk Scan – that looks for un-needed systems files, potentially un-needed language files and potentially un-needed program components; Duplicate Scan – that scans for duplicate files on your computer; and Files Finder – which scans for files over a certain size, defined by you. Once scans have completed, you can click on the icon for each scan to be presented with the results of the scan, which then allows you to select which files that you wish to delete.
Have you inserted the license key sent to the email address you used when making the purchase? To do so, Click on the FULL-DISKfighter Menu, select Registration, now insert you License Key into the dialog box that is titled “Please enter your product key”.
If you’ve downloaded FULL-DISKfighter Mac from the SPAMfighter website, and you have not purchased a license, then the product is in Trial Mode, and will only clean 25 files. Please purchase a license to make FULL-DISKfighter Mac do a full clean of your Mac.
After cleaning, click on the magnifying glass icon in the scan overview area (where it tells you how big your cleaning results can be), this will take you to the overview of results page. Or, if you wish to review only the results of a particular scan directly, click on the scan icon to go directly to results that can be selected for cleaning.
This scan is designed to show which files are taking up space on your system. The default scan will show files over 50 MB in size. In the File Finder results view, you can use the slider at the top right of the results window to select a different size by which to sort – if you want to review smaller or larger files only. In many cases you may wish to keep the files listed, but this view allows you to investigate what is taking up space on your hard drive, and we’ve found that oftentimes you’ll be surprised what files take up the most space, and with this view you can now review them to see if you wish to keep such large files or not.
In the duplicate scan results window, where the “1” ribbon is showing, simply click above or below the ribbon to indicate which file should be the original for the purposes of deleting duplicates.
No. We present files that can be deleted, and in the Junk Scan, can safely be deleted. In other scans, we present duplicates and large files taking up space on your system, but only you can know which files you wish to keep (in duplicates we pre-select the oldest file as the file to keep, but this may not be what you need) and you should therefore choose which files to delete or keep.
FULL-DISKfighter - MAC
FULL-DISKfighter Mac uses threads to speed up scanning by doing the scans concurrently, sometimes it may take a while for all of the threads to report back that they have stopped, until this happens, the scans appear to still be working. They will stop after a short delay.
Should you want to uninstall FULL-DISKfighter Mac please follow this procedure
1. Go to you Applications folder.
2. Find FULL-DISKfighter.
3. Drag FULL-DISKfighter to the Trash.
Once the file is deleted, it is no longer available on your Mac, however, if you are using Time Machine (or a third-party back-up software), then you are able to restore the file from these back-ups. If you have not got a back-up solution running, then we regret the file is no longer available.
Yes, like our PC version of this product, the first 25 file cleans are free, after that you will need to purchase the product to clean any more.
Each scan finds different items, and only you can make the decision if you should delete them (or not) from your system, and as such, it is not safe to just blindly delete files.
In particular, the File Finder scan is designed to find files over a certain size (default is 50 MB) for you to investigate what is taking up space on your hard disk, and it is permissible that many (if not all) of those files you might want to keep, but we present them for you to investigate further.
Once all scans have completed, you can do one of two things. If you’re only interested in the results of one scan, click on that Scan icon (for instance, duplicate scan is the middle icon) and review results for that scan and clean as appropriate. OR you can get an overview of all scans by clicking the magnifying glass icon in the scan results area. This will take you to an overview of each scan, so you can decide which areas to direct your attention to for review and clean.
If you have already downloaded the FULL-DISKfighter Mac DMG file (if not, go here to get it:
http://www.spamfighter.com/FULL-DISKfighter/Functions/Download-Mac.asp),
then find the DMG file, double-click it, and it will mount on your system, now drag FULL-DISKfigher Mac from the DMG file to your Applications folder.
It is now installed on your system.
Go to your Applications folder, select the FULL-DISKfighter program icon and double-click it to start FULL-DISKfigher Mac. As it’s the first time you are using the product, the product will auto-scan your system. You can turn auto-scanning off if you wish for future use.
Make sure FULL-DISKfighter Mac is running. From the FULL-DISKfighter menu (upper left of screen, from the menu bar), select FULL-DISKfighter -> Registration. A dialog box will appear for you to put the license key into.
FULL-DISKfighter Mac can be purchased from our website, here:
https://payment.spamfighter.com/Payment_Choose_Product_New_FDMAC.asp
As with all scans, the decision to delete, or not, any files that FULL-DISKfighter Mac lists as Junk, Duplicate, and especially in File Finder, must be up to the user of the machine on which the scan is being run. In some instances duplicates might NEED to exist, and therefore none are pre-selected for deletion.
Click the help icon (marked with a question mark), and on screen help will appear to guide you. If you know what you want to do, for instance, do a duplicate scan, then click on the duplicate scan icon on the products main user interface. Now you can scan for duplicates from the Duplicate Scan page. OR, initiate all scans by clicking on the scan button.
The scan time for FULL-DISKfighter is dependent on both how big your hard disk drive is, and how many files you have. If you have a lot of data and a large hard disk, this might take some time. Most scans will be completed in less than 20 minutes (and often much, much faster), but the savings you can make in hard disk space make the wait well worth the while.
Please click on the FULL-DISKfighter menu, (or the preferences cog in the FULL-DISKfighter user interface), and de-select “Auto Scan on launch” check box. Any currently running scan can be cancelled by clicking the “X” in the scan notification area.
If you have purchased a license key for FUL-DISKfighter, we would have emailed you the key for the product to the email address you used in the purchase process. Please check that email account (it might take a short time to turn up), and also check your spam folder (as occasionally these emails can get filtered). If you still have not received your key after 24 hours, please contact our support folks on support@spamfighter.com
There are three main scans that FULL-DISKfighter for Mac (Beta) undertakes: Junk Scan – that looks for un-needed systems files, potentially un-needed language files and potentially un-needed program components; Duplicate Scan – that scans for duplicate files on your computer; and Files Finder – which scans for files over a certain size, defined by you. Once scans have completed, you can click on the icon for each scan to be presented with the results of the scan, which then allows you to select which files that you wish to delete.
Have you inserted the license key sent to the email address you used when making the purchase? To do so, Click on the FULL-DISKfighter Menu, select Registration, now insert you License Key into the dialog box that is titled “Please enter your product key”.
If you’ve downloaded FULL-DISKfighter Mac from the SPAMfighter website, and you have not purchased a license, then the product is in Trial Mode, and will only clean 25 files. Please purchase a license to make FULL-DISKfighter Mac do a full clean of your Mac.
After cleaning, click on the magnifying glass icon in the scan overview area (where it tells you how big your cleaning results can be), this will take you to the overview of results page. Or, if you wish to review only the results of a particular scan directly, click on the scan icon to go directly to results that can be selected for cleaning.
This scan is designed to show which files are taking up space on your system. The default scan will show files over 50 MB in size. In the File Finder results view, you can use the slider at the top right of the results window to select a different size by which to sort – if you want to review smaller or larger files only. In many cases you may wish to keep the files listed, but this view allows you to investigate what is taking up space on your hard drive, and we’ve found that oftentimes you’ll be surprised what files take up the most space, and with this view you can now review them to see if you wish to keep such large files or not.
In the duplicate scan results window, where the “1” ribbon is showing, simply click above or below the ribbon to indicate which file should be the original for the purposes of deleting duplicates.
No. We present files that can be deleted, and in the Junk Scan, can safely be deleted. In other scans, we present duplicates and large files taking up space on your system, but only you can know which files you wish to keep (in duplicates we pre-select the oldest file as the file to keep, but this may not be what you need) and you should therefore choose which files to delete or keep.
Sales
Naravno da ne. Ako na svom računalu imate jednu licenciju SPAMfighter Pro, ista će obuhvatiti sve vaše e-mail adrese na tom računalu.
Da, vjerojatno možete.
Ako imate svoju web stranicu i želite otvoriti račun podružnice kod nas, možete započeti lako i jednostavno i zaraditi proviziju od 30% od svake svoje prodaje. Želite li se okušati u tome ili jednostavno saznati više, molimo pogledajte ovdje.
S interneta preuzmite najnoviju verziju softvera SPAMfighter ovdje pa instalirajte softver. Kad se to od Vas zatraži, VAŽNO je da upotrijebite e-mail adresu i lozinku s kojima ste se registrirali po prvi put – u protivnom Vas nećemo moći prepoznati kao korisnika plaćene Pro verzije. Ako se ne sjećate svoje lozinke, dobit ćete je ovdje.
Nemojte to činiti. Ako ste već instalirali program, jednostavno upotrijebite šifru proizvoda na način objašnjen u računu i automatski ćete dobiti nadogradnju na punu verziju tijekom razdoblja za koje ste platili.
Za sva pitanja u svezi s prodajom molimo obratite se našem prodajnom timu.
Sales - Have bought a license
Da, vjerojatno možete.
Ako imate svoju web stranicu i želite otvoriti račun podružnice kod nas, možete započeti lako i jednostavno i zaraditi proviziju od 30% od svake svoje prodaje. Želite li se okušati u tome ili jednostavno saznati više, molimo pogledajte ovdje.
S interneta preuzmite najnoviju verziju softvera SPAMfighter ovdje pa instalirajte softver. Kad se to od Vas zatraži, VAŽNO je da upotrijebite e-mail adresu i lozinku s kojima ste se registrirali po prvi put – u protivnom Vas nećemo moći prepoznati kao korisnika plaćene Pro verzije. Ako se ne sjećate svoje lozinke, dobit ćete je ovdje.
Nemojte to činiti. Ako ste već instalirali program, jednostavno upotrijebite šifru proizvoda na način objašnjen u računu i automatski ćete dobiti nadogradnju na punu verziju tijekom razdoblja za koje ste platili.
Za sva pitanja u svezi s prodajom molimo obratite se našem prodajnom timu.
Sales - Upgrading to PRO
Naravno da ne. Ako na svom računalu imate jednu licenciju SPAMfighter Pro, ista će obuhvatiti sve vaše e-mail adrese na tom računalu.
SLOW-PCfighter
Nakon što kliknete na tipku “Repair” (Popravljanje), datoteka sa sigurnosnom kopijom automatski će se izraditi. A potom, kada kliknete na tipku “Restore” (Oporavak), pojavit će se točka oporavka.
Za oporavak registra molimo učinite sljedeće:
Otiđite na svoj SLOW-PCfighter klijent
Kliknite na tipku „Restore” (Oporavak)
Odaberite točku oporavka pa kliknite na tipku „Restore” (Oporavak)
Možete kliknuti na poveznicu “Update” (Nadogradnja) u gornjem desnom kutu na izborniku softvera SLOW-PCfighter i softver SLOW-PCfighter provjerit će ima li novijih nadogradnja.
Kako biste to učinili, otvorite svoj SLOW-PCfighter preko Start -> All Programs -> Fighters -> SLOW-PCfighter -> SLOW-PCfighter (Start -> Svi programi -> Fighters -> SLOW-PCfighter -> SLOW-PCfighter).
Možete preuzeti s interneta našu besplatnu verziju ovdje
SLOW-PCfighter skenirat će Vaše računalo i pronaći sve pogreške, a možete popraviti 25 njih posve besplatno.
SLOW-PCfighter je program kojim čistite registar sustava Windows i Menadžer pokretanja.
Registar osobnog računala potrebno je povremeno očistiti jer isti biva zatrpan različitim unosima prikupljenima tijekom vremena, kao što su programi za instalaciju i deinstalaciju i brojni drugi.
Kada jednom pokrenete SLOW-PCfighter, on će očistiti registar Vašeg osobnog računala i poboljšat će radnu uspješnost računala, a cilj je ubrzavanje procesa pokretanja.
FULL-DISKfighter je alat za optimizaciju tvrdog diska, koji čisti datoteke smeća i nepotrebne datoteke s Vašeg tvrdog diska. FULL-DISKfighter organizira i defragmentira ostatak datoteka tako da, kada Vaše računalo pristupi nekoj datoteci, to čini brže i lakše. Osim toga, možete lako dobiti pregled nad duplim ili velikim datotekama, što Vam omogućuje da organizirate svoje datoteke poput slika u mapama. Molimo zapamtite da ne brišete datoteke ako ne znate što one predstavljaju jer, kad ih jednom izbrišete, one posve nestaju pa se uvijek pobrinite za sigurnosnu kopiju. Značajka Brzog skeniranja u softveru FULL-DISKfighter neće izbrisati datoteke važne za Vaš sustav.
Molimo zapamtite da softveri SLOW-PCfighter i FULL-DISKfighter NE rade istu stvar te da jedan program nije nadomjestak za drugi, ali, ovisno o problemu koji imate, možda će Vam trebati samo jedan od njih ili oba.
Razlog tomu mogao bi biti taj što je na Vašem računalu pokrenut neki drugi program koji uporno “zadržava” neku datoteku na Vašem računalu ili koji je stvorio privremenu datoteku koju SLOW-PCfighter ne može skenirati ni popraviti.
Pokušajte deaktivirati svoj antivirusni softver pa zatvorite sve otvorene programe i potom pokušajte ponovno skenirati softverom SLOW-PCfighter, također biste trebali zaustavite i sve programe koje imate na traci sustava (u donjem desnom kutu zaslona).
Također je moguće da na svom računalu imate neki štetni softver koji SLOW-PCfighter ne može ukloniti. Preporučujemo Vam da svoje računalo skenirate i očistite softverom Malwarebytes. Preuzmite s interneta besplatnu verziju ovdje
To se događa kada pokrenete besplatno skeniranje. SLOW-PCfighter pronalazi na stotine pogrešaka, ali popravlja samo 25 njih.
SLOW-PC fighter pronalazi i popravlja pogreške. Nažalost, moguće je da će neki programi ponovno stvari iste nevažeće unose koji su uklonjeni tijekom prvog skeniranja tako da će ih SLOW-PCfighter ponovno pronaći u Vašem sustavu.
Međutim, nema razloga za zabrinutost jer se samo mali broj pogrešaka može ponovno pojaviti nakon što ih SLOW-PCfighter jedanput ukloni. Kako biste se zauvijek riješili tih pogrešaka, morat ćete pronaći program koji ih ponovno stvara.
Možete. Otvorite SLOW-PCfighter preko Start -> All Programs -> Fighters -> SLOW-PCfighter -> SLOW-PCfighter. Kliknite na “Settings” (Postavke) i “Manage Schedule” (Uredi raspored), pa kliknite na tipku “Manage” (uredi). Odaberite vrijeme početka te koliko često želite pokrenuti skeniranje.
SLOW-PCfighter pokrenut će se u trenutku koji ste sami odabrali i provest će skeniranje na vašem računalu.
Preuzmite s interneta i instalirajte SLOW-PCfighter ovdje
Sami određujete što želite da SLOW-PCfighter skenira preko izbornika softvera SLOW-PCfighter. Kliknite na “Scan for Errors” (Skeniraj i pronađi pogreške) pa odaberite koje želite preskočiti.
U izborniku “Startup Manager” (Menadžera pokretanja) možete maknuti križić s aplikacija za koje ne želite da se skeniraju tijekom pokretanja.
Tijekom skeniranja računala moći ćete vidjeti koje je ključeve i datoteke SLOW-PCfighter pronašao i izbrisao, možete odabrati ignorirati određene elemente u registru. Kliknite na znak “+” s lijeve strane svake kategorije i pojavit će se popis pronađenih problema u registru. Popis ignoriranja možete vidjeti pod “Settings -> Ignore list” (Postavke -> Popis ignoriranja) u izborniku softvera SLOW-PCfighter, a upravo ondje možete odabrati i poništavanje ignoriranja u bilo koje doba.
Registar je spremljen u nekoliko datoteka. Točni nazivi i lokacije tih datoteka ovise o verziji sustava Windows kojom se koristite. Međutim, sve su one spremljene na Vašem lokalnom disku.
Vi možete uređivati registar pomoću Microsoft’s Registry Editor (Regedit.exe ili Regedt32.exe). No, ako se tim urednikom registra (Registry Editor) koristite nepravilno, možete prouzročiti ozbiljne probleme, a možda ćete morati čak i ponovno instalirati svoj sustav Windows. Microsoft ne jamči da će se pogreške prouzročene nepravilnim korištenjem urednikom Registry Editor moći ponovno riješiti. Urednikom Registry Editor koristite se na vlastitu odgovornost.
Pogreške u registru mogu spriječiti neometan rad ili ispravno pokretanje Vašeg sustava. Svaki put kad god otvorite BILO KOJI program, instalirate novi program ili deinstalirate neki program, potpisi iz tog programa spremaju se u registar i to se nagomilava. Kada se sustav Windows pokreće, on mora proći kroz taj registar, a što je više informacija u njemu, to je SPORIJE Vaše računalo. SLOW-PCfighter je alat kojim se možete koristiti na siguran i jednostavan način za brisanje nekorištenih potpisa (ključeva), otkrivanje i popravljanje pogrešaka u registru te za potencijalno sprječavanje ozbiljnih problema i poteškoća s radnom uspješnošću na svom računalu. Bez redovnog čišćenja registra moguće je da vaše računalo neće normalno raditi, zapravo, čak bi moglo doći i do rušenja sustav ili do njegova nepokretanja u određenom trenutku.
Registar sustava Windows jest baza podataka u kojoj se spremaju postavke i opcije za operativni sustav Microsoft Windows. Isti sadržava ključne i važne informacije i postavke za hardver, softver, korisnike i preferencije osobnog računala. Prosječan registar obično ima na stotine ili na tisuće informacija iz kojih čita ili koje upisuje svakodnevno.
Možete isprobati besplatno skeniranje softverom SLOW-PCfighter i tako popraviti 25 pogrešaka posve besplatno. Nakon toga možete odabrati kupnju softvera SLOW-PCfighter, popraviti sve pogreške u svom registru te ga redovito skenirati i čistiti ili deinstalirati program.
Za deinstalaciju programa molimo učinite sljedeće:
Otiđite na Start -> Settings -> Control Panel -> Add/Remove Programs (Start -> Postavke -> Upravljačka ploča -> Dodavanje/uklanjanje programa)
Pronađite SLOW-PCfighter na popisu, odaberite ga pa kliknite na tipku „Remove” (Ukloni)
SLOW-PCfighter - Buying and Installation
Nakon što kliknete na tipku “Repair” (Popravljanje), datoteka sa sigurnosnom kopijom automatski će se izraditi. A potom, kada kliknete na tipku “Restore” (Oporavak), pojavit će se točka oporavka.
Možete preuzeti s interneta našu besplatnu verziju ovdje
SLOW-PCfighter skenirat će Vaše računalo i pronaći sve pogreške, a možete popraviti 25 njih posve besplatno.
Možete kliknuti na poveznicu “Update” (Nadogradnja) u gornjem desnom kutu na izborniku softvera SLOW-PCfighter i softver SLOW-PCfighter provjerit će ima li novijih nadogradnja.
Kako biste to učinili, otvorite svoj SLOW-PCfighter preko Start -> All Programs -> Fighters -> SLOW-PCfighter -> SLOW-PCfighter (Start -> Svi programi -> Fighters -> SLOW-PCfighter -> SLOW-PCfighter).
SLOW-PCfighter - General
Preuzmite s interneta i instalirajte SLOW-PCfighter ovdje
Za deinstalaciju programa molimo učinite sljedeće:
Otiđite na Start -> Settings -> Control Panel -> Add/Remove Programs (Start -> Postavke -> Upravljačka ploča -> Dodavanje/uklanjanje programa)
Pronađite SLOW-PCfighter na popisu, odaberite ga pa kliknite na tipku „Remove” (Ukloni)
Možete isprobati besplatno skeniranje softverom SLOW-PCfighter i tako popraviti 25 pogrešaka posve besplatno. Nakon toga možete odabrati kupnju softvera SLOW-PCfighter, popraviti sve pogreške u svom registru te ga redovito skenirati i čistiti ili deinstalirati program.
Registar sustava Windows jest baza podataka u kojoj se spremaju postavke i opcije za operativni sustav Microsoft Windows. Isti sadržava ključne i važne informacije i postavke za hardver, softver, korisnike i preferencije osobnog računala. Prosječan registar obično ima na stotine ili na tisuće informacija iz kojih čita ili koje upisuje svakodnevno.
Pogreške u registru mogu spriječiti neometan rad ili ispravno pokretanje Vašeg sustava. Svaki put kad god otvorite BILO KOJI program, instalirate novi program ili deinstalirate neki program, potpisi iz tog programa spremaju se u registar i to se nagomilava. Kada se sustav Windows pokreće, on mora proći kroz taj registar, a što je više informacija u njemu, to je SPORIJE Vaše računalo. SLOW-PCfighter je alat kojim se možete koristiti na siguran i jednostavan način za brisanje nekorištenih potpisa (ključeva), otkrivanje i popravljanje pogrešaka u registru te za potencijalno sprječavanje ozbiljnih problema i poteškoća s radnom uspješnošću na svom računalu. Bez redovnog čišćenja registra moguće je da vaše računalo neće normalno raditi, zapravo, čak bi moglo doći i do rušenja sustav ili do njegova nepokretanja u određenom trenutku.
Vi možete uređivati registar pomoću Microsoft’s Registry Editor (Regedit.exe ili Regedt32.exe). No, ako se tim urednikom registra (Registry Editor) koristite nepravilno, možete prouzročiti ozbiljne probleme, a možda ćete morati čak i ponovno instalirati svoj sustav Windows. Microsoft ne jamči da će se pogreške prouzročene nepravilnim korištenjem urednikom Registry Editor moći ponovno riješiti. Urednikom Registry Editor koristite se na vlastitu odgovornost.
Registar je spremljen u nekoliko datoteka. Točni nazivi i lokacije tih datoteka ovise o verziji sustava Windows kojom se koristite. Međutim, sve su one spremljene na Vašem lokalnom disku.
Sami određujete što želite da SLOW-PCfighter skenira preko izbornika softvera SLOW-PCfighter. Kliknite na “Scan for Errors” (Skeniraj i pronađi pogreške) pa odaberite koje želite preskočiti.
U izborniku “Startup Manager” (Menadžera pokretanja) možete maknuti križić s aplikacija za koje ne želite da se skeniraju tijekom pokretanja.
Tijekom skeniranja računala moći ćete vidjeti koje je ključeve i datoteke SLOW-PCfighter pronašao i izbrisao, možete odabrati ignorirati određene elemente u registru. Kliknite na znak “+” s lijeve strane svake kategorije i pojavit će se popis pronađenih problema u registru. Popis ignoriranja možete vidjeti pod “Settings -> Ignore list” (Postavke -> Popis ignoriranja) u izborniku softvera SLOW-PCfighter, a upravo ondje možete odabrati i poništavanje ignoriranja u bilo koje doba.
Za oporavak registra molimo učinite sljedeće:
Otiđite na svoj SLOW-PCfighter klijent
Kliknite na tipku „Restore” (Oporavak)
Odaberite točku oporavka pa kliknite na tipku „Restore” (Oporavak)
Možete. Otvorite SLOW-PCfighter preko Start -> All Programs -> Fighters -> SLOW-PCfighter -> SLOW-PCfighter. Kliknite na “Settings” (Postavke) i “Manage Schedule” (Uredi raspored), pa kliknite na tipku “Manage” (uredi). Odaberite vrijeme početka te koliko često želite pokrenuti skeniranje.
SLOW-PCfighter pokrenut će se u trenutku koji ste sami odabrali i provest će skeniranje na vašem računalu.
SLOW-PC fighter pronalazi i popravlja pogreške. Nažalost, moguće je da će neki programi ponovno stvari iste nevažeće unose koji su uklonjeni tijekom prvog skeniranja tako da će ih SLOW-PCfighter ponovno pronaći u Vašem sustavu.
Međutim, nema razloga za zabrinutost jer se samo mali broj pogrešaka može ponovno pojaviti nakon što ih SLOW-PCfighter jedanput ukloni. Kako biste se zauvijek riješili tih pogrešaka, morat ćete pronaći program koji ih ponovno stvara.
To se događa kada pokrenete besplatno skeniranje. SLOW-PCfighter pronalazi na stotine pogrešaka, ali popravlja samo 25 njih.
Razlog tomu mogao bi biti taj što je na Vašem računalu pokrenut neki drugi program koji uporno “zadržava” neku datoteku na Vašem računalu ili koji je stvorio privremenu datoteku koju SLOW-PCfighter ne može skenirati ni popraviti.
Pokušajte deaktivirati svoj antivirusni softver pa zatvorite sve otvorene programe i potom pokušajte ponovno skenirati softverom SLOW-PCfighter, također biste trebali zaustavite i sve programe koje imate na traci sustava (u donjem desnom kutu zaslona).
Također je moguće da na svom računalu imate neki štetni softver koji SLOW-PCfighter ne može ukloniti. Preporučujemo Vam da svoje računalo skenirate i očistite softverom Malwarebytes. Preuzmite s interneta besplatnu verziju ovdje
SLOW-PCfighter je program kojim čistite registar sustava Windows i Menadžer pokretanja.
Registar osobnog računala potrebno je povremeno očistiti jer isti biva zatrpan različitim unosima prikupljenima tijekom vremena, kao što su programi za instalaciju i deinstalaciju i brojni drugi.
Kada jednom pokrenete SLOW-PCfighter, on će očistiti registar Vašeg osobnog računala i poboljšat će radnu uspješnost računala, a cilj je ubrzavanje procesa pokretanja.
FULL-DISKfighter je alat za optimizaciju tvrdog diska, koji čisti datoteke smeća i nepotrebne datoteke s Vašeg tvrdog diska. FULL-DISKfighter organizira i defragmentira ostatak datoteka tako da, kada Vaše računalo pristupi nekoj datoteci, to čini brže i lakše. Osim toga, možete lako dobiti pregled nad duplim ili velikim datotekama, što Vam omogućuje da organizirate svoje datoteke poput slika u mapama. Molimo zapamtite da ne brišete datoteke ako ne znate što one predstavljaju jer, kad ih jednom izbrišete, one posve nestaju pa se uvijek pobrinite za sigurnosnu kopiju. Značajka Brzog skeniranja u softveru FULL-DISKfighter neće izbrisati datoteke važne za Vaš sustav.
Molimo zapamtite da softveri SLOW-PCfighter i FULL-DISKfighter NE rade istu stvar te da jedan program nije nadomjestak za drugi, ali, ovisno o problemu koji imate, možda će Vam trebati samo jedan od njih ili oba.
SPAMfighter
To je prouzročila greška u registracijskoj datoteci Vaše Windows instalacije.Za rješavanje ovog problema slijedite Microsoftov vodič ovdje
U sustavu Windows XP -> Windows 7:
*Zatvorite svoju aplikaciju za elektroničku poštu, kao što su Outlook/Express/Windows Mail/Thunderbird
*Idite na: Start -> Postavke -> Kontrolna ploča -> Dodaj/ukloni programe.
*Pronađite SPAMfighter pa kliknite na Promijeni/ukloni i slijedite vodič.
U sustavu Windows 8:
* Zatvorite svoju aplikaciju za elektroničku poštu
* Idite na: charm menu -> Postavke -> Kontrolna ploča -> Dodaj/ukloni programe.
* Pronađite SPAMfighter pa kliknite na Promijeni/ukloni i slijedite vodič.
Za instalaciju softvera SPAMfighter molimo slijedite sljedeće korake:
– S internet preuzmite SPAMfighter ovdje
– Kliknite na gumb “Pokreni preuzimanje sada”
– Spremite datoteku spamfighter.exe itd. na svoju radnu površinu
– Kad završite s preuzimanjem, kliknite dvaput na ikonu SPAMfighter na svojoj radnoj površini i slijedite vodič za instalaciju.
Ako je u Vašoj aplikaciji za elektroničku poštu, kao što su Outlook/Express/Windows Mail/Thunderbird, prikazana SPAMfighter alatna traka i ako su poruke neželjene pošte koje ste zaprimili nakon instalacije prebačene u mapu SPAMfighter, to je znak da SPAMfighter funkcionira.
Ne, SPAMfighter će zaštititi samo Vašu mapu ulazne pošte od neželjene pošte i pokušaja prijevare e-mailom.
Kao učinkovit antivirusni program preporučujemo Vam www.VIRUSfighter.com, a www.spamfighter.com/spywarefighter kao dobar program protiv špijunskih programa.
Potrebna su Vam sva 3 programa da biste se zaštitili od internetskih prijetnji.
Za aktivaciju softvera SPAMfighter PRO molimo postupite na sljedeći način:
* Otiđite na SPAMfighter alatnu traku u svojoj e-mail aplikaciji.
* Odaberite “Više” -> “Opcije”
* S lijeve strane novog prozora odaberite “Račun”.
* Odaberite “Unesi šifru proizvoda” u desnom prozoru.
* Unesite šifru proizvoda – istu ćete naći na računu koji smo Vam poslali.
* Kliknite na “Aktiviraj” kako biste spremili svoju šifru proizvoda.
Ako ispod dijela ili cijele šifre proizvoda stoji crvena crta i ako ne možete kliknuti na gumb “Aktiviraj”, to znači da ste pogrešnu unijeli šifru proizvoda. Molimo ispravite to i pokušajte ponovno!
Restartajte svoju e-mail aplikaciju i imat ćete SPAMfighter Pro.
Za ukidanje pretplate na mailing listu tvrtke SPAMfighter molimo kliknite ovdje.
Molimo zapamtite da ćete, ako se nastavite koristiti softverom SPAMfighter ili ako se ponovno registrirate, ponovno automatski dobivati naše e-mailove.
Za promjenu e-mail adrese postupite na sljedeći način:
* U svojoj e-mail aplikaciji kliknite na logotip “SPAMfighter” na SPAMfighter alatnoj traci
* Otvorit će se nova stranica.
* Kliknite na “Promijeni e-mail adresu” s lijeve strane pod “Vaš izbornik”
* Unesite novu e-mail adresu pa kliknite na “Pošalji”
Molimo imajte na umu da, ako ste već kreirali račun kod tvrtke SPAMfighter s novom e-mail adresom, nećete je moći “promijeniti” na ovaj način. U tom nam se slučaju ponovno obratite za daljnju pomoć.
Kako da povratim SPAMfighter PRO nakon deinstalacije?
S interneta preuzmite i instalirajte najnoviju verziju softvera SPAMfighter ovdje.Kad se to od Vas zatraži, VAŽNO je da unesete e-mail adresu i lozinku s kojima ste se registrirali po prvi put ili Vas nećemo moći prepoznati kao postojećeg korisnika.
Ako se ne sjećate svoje lozinke, dobit ćete je ovdje.
Istekla je Vaša 10-dnevna demo verzija softvera SPAMfighter Pro i spušteni ste na besplatnu verziju SPAMfighter Standard.
Ako se softverom SPAMfighter koristite u poslovanju ili ako želite imati više od 5 e-mail adresa na listi, morate kupiti SPAMfighter Pro.
Istekla je Vaša 10-dnevna demo verzija softvera SPAMfighter i spušteni ste na besplatnu verziju SPAMfighter Standard.
Ako se koristite softverom SPAMfighter u poslovanju ili ako se želite riješiti podnožja, morate kupiti SPAMfighter Pro.
SPAMfighter - Installation
To je prouzročila greška u registracijskoj datoteci Vaše Windows instalacije.Za rješavanje ovog problema slijedite Microsoftov vodič ovdje
U sustavu Windows XP -> Windows 7:
*Zatvorite svoju aplikaciju za elektroničku poštu, kao što su Outlook/Express/Windows Mail/Thunderbird
*Idite na: Start -> Postavke -> Kontrolna ploča -> Dodaj/ukloni programe.
*Pronađite SPAMfighter pa kliknite na Promijeni/ukloni i slijedite vodič.
U sustavu Windows 8:
* Zatvorite svoju aplikaciju za elektroničku poštu
* Idite na: charm menu -> Postavke -> Kontrolna ploča -> Dodaj/ukloni programe.
* Pronađite SPAMfighter pa kliknite na Promijeni/ukloni i slijedite vodič.
Za instalaciju softvera SPAMfighter molimo slijedite sljedeće korake:
– S internet preuzmite SPAMfighter ovdje
– Kliknite na gumb “Pokreni preuzimanje sada”
– Spremite datoteku spamfighter.exe itd. na svoju radnu površinu
– Kad završite s preuzimanjem, kliknite dvaput na ikonu SPAMfighter na svojoj radnoj površini i slijedite vodič za instalaciju.
Ako je u Vašoj aplikaciji za elektroničku poštu, kao što su Outlook/Express/Windows Mail/Thunderbird, prikazana SPAMfighter alatna traka i ako su poruke neželjene pošte koje ste zaprimili nakon instalacije prebačene u mapu SPAMfighter, to je znak da SPAMfighter funkcionira.
Ne, SPAMfighter će zaštititi samo Vašu mapu ulazne pošte od neželjene pošte i pokušaja prijevare e-mailom.
Kao učinkovit antivirusni program preporučujemo Vam www.VIRUSfighter.com, a www.spamfighter.com/spywarefighter kao dobar program protiv špijunskih programa.
Potrebna su Vam sva 3 programa da biste se zaštitili od internetskih prijetnji.
SPAMfighter - Login, Password, etc.
Za aktivaciju softvera SPAMfighter PRO molimo postupite na sljedeći način:
* Otiđite na SPAMfighter alatnu traku u svojoj e-mail aplikaciji.
* Odaberite “Više” -> “Opcije”
* S lijeve strane novog prozora odaberite “Račun”.
* Odaberite “Unesi šifru proizvoda” u desnom prozoru.
* Unesite šifru proizvoda – istu ćete naći na računu koji smo Vam poslali.
* Kliknite na “Aktiviraj” kako biste spremili svoju šifru proizvoda.
Ako ispod dijela ili cijele šifre proizvoda stoji crvena crta i ako ne možete kliknuti na gumb “Aktiviraj”, to znači da ste pogrešnu unijeli šifru proizvoda. Molimo ispravite to i pokušajte ponovno!
Restartajte svoju e-mail aplikaciju i imat ćete SPAMfighter Pro.
Za ukidanje pretplate na mailing listu tvrtke SPAMfighter molimo kliknite ovdje.
Molimo zapamtite da ćete, ako se nastavite koristiti softverom SPAMfighter ili ako se ponovno registrirate, ponovno automatski dobivati naše e-mailove.
Za promjenu e-mail adrese postupite na sljedeći način:
* U svojoj e-mail aplikaciji kliknite na logotip “SPAMfighter” na SPAMfighter alatnoj traci
* Otvorit će se nova stranica.
* Kliknite na “Promijeni e-mail adresu” s lijeve strane pod “Vaš izbornik”
* Unesite novu e-mail adresu pa kliknite na “Pošalji”
Molimo imajte na umu da, ako ste već kreirali račun kod tvrtke SPAMfighter s novom e-mail adresom, nećete je moći “promijeniti” na ovaj način. U tom nam se slučaju ponovno obratite za daljnju pomoć.
Kako da povratim SPAMfighter PRO nakon deinstalacije?
S interneta preuzmite i instalirajte najnoviju verziju softvera SPAMfighter ovdje.Kad se to od Vas zatraži, VAŽNO je da unesete e-mail adresu i lozinku s kojima ste se registrirali po prvi put ili Vas nećemo moći prepoznati kao postojećeg korisnika.
Ako se ne sjećate svoje lozinke, dobit ćete je ovdje.
Istekla je Vaša 10-dnevna demo verzija softvera SPAMfighter Pro i spušteni ste na besplatnu verziju SPAMfighter Standard.
Ako se softverom SPAMfighter koristite u poslovanju ili ako želite imati više od 5 e-mail adresa na listi, morate kupiti SPAMfighter Pro.
Istekla je Vaša 10-dnevna demo verzija softvera SPAMfighter i spušteni ste na besplatnu verziju SPAMfighter Standard.
Ako se koristite softverom SPAMfighter u poslovanju ili ako se želite riješiti podnožja, morate kupiti SPAMfighter Pro.
SPAMfighter Exchange Module
Yes, SPAMfighter Exchange Module version 5 will filter incoming, outgoing and internal e-mails for spam. SEM have invividual filters that can be applied to outgoing mails.
The requirements are that you are using Exchange server 2007 and later versions of Exchange Server.
Read more about filtering of incoming mails by SEM here.
If an email is determined to be spam, SEM moves the message to a folder named SPAMfighter in the users mailbox. If the folder does not exist, it will be recreated automatically. The move process is transactional and will rollback if it fails.
The administrator can change the anti-spam policy to delete spam mails, redirect them to a dedicated mailbox, or use a Quarantine that will keep the spam on the server for a set number of days.
When emails are redirected to another email address directly from Exchange, they are sent to your other email address before they are stored in your Exchange, and thus SPAMfighter does not have the opportunity to filter them.
Please remove the forwarding from Exchange and use instead this method:1) Open the SEM Administration Module on the server and go to “Mailboxes” -> “Mailboxes”
2) Locate the mailbox in cause
3) Click the small configuration icon to the right of the mailbox
4) Choose “POP3” as primary mail protocol
5) Click “Save changes” follow by “Close”
In Outlook, click “Tools” -> “Rules and Alerts” -> “New rule” -> “Start from blank rule” -> “Check messages when they arrive”.Create a new blank rule with the following properties: * Sent to people or distribution list (select your email address)
* Forward it to people… (add your second email address)
* Except if the subject contains specific words (enter these characters: ** SPAM **)
* Stop processing more rulesCreate another blank rule with the following properties: * Check messages when they arrive
* With specific words in the subject (add the characters: ** SPAM **)
* Move it to the specified folder (Choose SPAMfighter)
* Stop processing more rulesIn step two above, please make sure that you select “With specific words in the SUBJECT”, not body. When you select “stop processing more rules”, the rule will run server-side and will be executed when an email is received, even if Outlook is not running. If the rule is marked as “client-side” in the Rules list, then please edit your rule and uncheck the option “on this machine only”. These rules need to run server-side to be effective.
If you receive many emails that appear to have been sent by yourself, then you can help prevent spoofed emails by removing your own domain(s) from the Domain whitelist.
In the Administration module, go to “Configuration” > “Policies”. Click the “Configure policy” button next to your policy. Then click the “Configure filter” button next to “SPAMfighter Sender Filter”. Remove your own domain name from the Domain whitelist, and your own email address from the Email Address whitelist.
If you have questions or need help on doing this, SPAMfighter Support Department are always ready to help – just write an email to semsupport@spamfighter.com
Go to “Configuration” -> “Usergroups” and click the “Edit” button next to your group.
Under “Default state”, uncheck the SPAMfighter and Virusfighter checkbox, so that the filters are not enabled by default for new mailboxes.
Yes – you can redirected spam to a dedicated mailbox. You can configure SEM to redirect spam to another mailbox through the Administration Module (under “Configuration” > “Policies”)
Please use your normal Windows credentials to login (domain/username and password).Alternatively, you can try to access the Administration page through the link marked “Solution Administrator”.
Please check in Active Directory that an account named “SPAMfighterService” is created, and that it a mailbox has been created in Exchange for the account.The user account needs to be member of the following usergroups:Administrators
Exchange Servers
Organization ManagementGo on your server to “Start” -> “All programs” -> “SPAMfighter Exchange Module” -> “Configuration” -> “Exchange Integration Manager”.Click the “Service status” tab. Click the button next to “Stop SPAMfighter Exchange Module service”.Click the “Service account” tab. Make sure that the name of the user account “SPAMfighterService” is written correctly. Enter the password correctly. Make sure that the proper domain is selected. Then click the “Confirm” button.Go back to the “Service status” tab and click the button next to “Start SPAMfighter Exchange Module service”.Then go to the “Integration” tab and click the button next to “Remove integration into Exchange”, then click the button next to “Add integration into Exchange”.If you still have difficulties, please use the support form to contact the support team.
The SPAMfighter Exchange Module uses the following ports:
Anti-spam community: UDP/TCP 2409: servers.backend.spamfighter.com
SEM Administration page (and SEM client toolbar for Outlook): TCP 5000
SEM communication between the Administration page and the server: TCP 5001
License and update: TCP 80 to:
http://login.spamfighter.com
http://update.spamfighter.com
http://download.dk.spamfighter.com
http://download.spamfighter.com
Read all about Microsoft .NET Framework here
SPAMfighter is a Microsoft Gold Certified Partner and SEM is certified by VeriTest® for “Windows 2003”, “SQL Server 2005”, “Web services” and “.net connected” certified.
Yes it can. SEM works with most common Antivirus software. Since SEM is integrated in the Exchange Server, it does not impact on the functionality of any Antivirus software.SEM also integrates fully with VIRUSfighter for Exchange – an addon product for SEM.
Yes, using the administration interface, you can easily disable spam filtering on a single mailbox.
SEM creates a unique irreversible signature for each email and its elements, and sends the signatures to the SPAMfighter Server for processing. The server then returns a score determining if the message is spam or not. The original mail message never leaves the server during SEM filtering.
SEM can support between 5 – 50.000 email accounts.
SEM gives you the highest level of confidentiality. Your email privacy and security are our top priority. Legitimate email on the server is never transmitted or shared with anyone – your legitimate email never leaves your server. Only a few encrypted blocks of data encoded with MD5 (a one way encryption algorithm also called a checksum) and the unique URLs are sent to the SPAMfighter Server.
SPAMfighter Exchange Server Module seamlessly integrates with Microsoft Exchange Server which makes the solution very fast.
As an email arrives and the Exchange Server routes it to its addressees, SEM makes a unique signature for each message and sends it to the SPAMfighter Server for evaluation. If the SPAMfighter Server determines that a message is spam, it notifies SEM and the spam mail is moved to the users’ spam folder.
SPAMfighter Exchange Server Module also offers reporting, so administrators can review statistics on how many messages SEM has filtered, how many users are enabled and more.
In addition, SEM is simple to use for end users as spam is automatically moved to the spam folder. While SEM simplifies administration and keeps software and configuration off the employee’s desktop, it also provides individual control for end users if the administrators decide they want this.
Since SEM utilizes the Exchange server interface, emails are not deleted but only moved. If SEM should unexpectedly fail during the analysis, processing or redirection of a mail item, the transaction will be rolled back and the system remain intact.
If the SEM installation fails, there will have been no interaction with the Exchange Server hence it has no impact on your configuration.
SEM sends installation details at registration, login information when running and email compiled hash values when testing e-mails. SEM never sends information sensitive to the network. Also all information sent and received is validated to avoid tampering.
No, certainly not!
The worst case scenario is that the installation fails (not likely!) and SEM lets spam through to the users. In other words, the users receive the spam they are used to receiving. On top of that, SEM is very easy to uninstall completely, but our guess is that you wont want to after trying it out.
Bottom line, you can safely install the free trial and test it as much as you want without worrying about down time or other complications.
Operating System
Microsoft Windows Server 2000 or newer
Email Server
Microsoft Exchange Server 2000 or newer
Yes we have, take a look here. (PDF document)
Take a look at our price list here.
Yes you can. You can test the full version of SEM for 30 days free of charge at no obligations. Download it here.
SEM supports Microsoft Exchange Server 2000, 2003, 2007, 2010 and 2013.
SPAMfighter Exchange Module - Before Installing SEM
Since SEM utilizes the Exchange server interface, emails are not deleted but only moved. If SEM should unexpectedly fail during the analysis, processing or redirection of a mail item, the transaction will be rolled back and the system remain intact.
SPAMfighter is a Microsoft Gold Certified Partner and SEM is certified by VeriTest® for “Windows 2003”, “SQL Server 2005”, “Web services” and “.net connected” certified.
Yes it can. SEM works with most common Antivirus software. Since SEM is integrated in the Exchange Server, it does not impact on the functionality of any Antivirus software.SEM also integrates fully with VIRUSfighter for Exchange – an addon product for SEM.
Yes, using the administration interface, you can easily disable spam filtering on a single mailbox.
If an email is determined to be spam, SEM moves the message to a folder named SPAMfighter in the users mailbox. If the folder does not exist, it will be recreated automatically. The move process is transactional and will rollback if it fails.
The administrator can change the anti-spam policy to delete spam mails, redirect them to a dedicated mailbox, or use a Quarantine that will keep the spam on the server for a set number of days.
SEM creates a unique irreversible signature for each email and its elements, and sends the signatures to the SPAMfighter Server for processing. The server then returns a score determining if the message is spam or not. The original mail message never leaves the server during SEM filtering.
SEM can support between 5 – 50.000 email accounts.
SEM gives you the highest level of confidentiality. Your email privacy and security are our top priority. Legitimate email on the server is never transmitted or shared with anyone – your legitimate email never leaves your server. Only a few encrypted blocks of data encoded with MD5 (a one way encryption algorithm also called a checksum) and the unique URLs are sent to the SPAMfighter Server.
SPAMfighter Exchange Server Module seamlessly integrates with Microsoft Exchange Server which makes the solution very fast.
As an email arrives and the Exchange Server routes it to its addressees, SEM makes a unique signature for each message and sends it to the SPAMfighter Server for evaluation. If the SPAMfighter Server determines that a message is spam, it notifies SEM and the spam mail is moved to the users’ spam folder.
SPAMfighter Exchange Server Module also offers reporting, so administrators can review statistics on how many messages SEM has filtered, how many users are enabled and more.
In addition, SEM is simple to use for end users as spam is automatically moved to the spam folder. While SEM simplifies administration and keeps software and configuration off the employee’s desktop, it also provides individual control for end users if the administrators decide they want this.
If the SEM installation fails, there will have been no interaction with the Exchange Server hence it has no impact on your configuration.
SEM sends installation details at registration, login information when running and email compiled hash values when testing e-mails. SEM never sends information sensitive to the network. Also all information sent and received is validated to avoid tampering.
No, certainly not!
The worst case scenario is that the installation fails (not likely!) and SEM lets spam through to the users. In other words, the users receive the spam they are used to receiving. On top of that, SEM is very easy to uninstall completely, but our guess is that you wont want to after trying it out.
Bottom line, you can safely install the free trial and test it as much as you want without worrying about down time or other complications.
Operating System
Microsoft Windows Server 2000 or newer
Email Server
Microsoft Exchange Server 2000 or newer
Yes we have, take a look here. (PDF document)
Take a look at our price list here.
Yes you can. You can test the full version of SEM for 30 days free of charge at no obligations. Download it here.
SEM supports Microsoft Exchange Server 2000, 2003, 2007, 2010 and 2013.
SPAMfighter Exchange Module - Installing SEM
Read all about Microsoft .NET Framework here
The SPAMfighter Exchange Module uses the following ports:
Anti-spam community: UDP/TCP 2409: servers.backend.spamfighter.com
SEM Administration page (and SEM client toolbar for Outlook): TCP 5000
SEM communication between the Administration page and the server: TCP 5001
License and update: TCP 80 to:
http://login.spamfighter.com
http://update.spamfighter.com
http://download.dk.spamfighter.com
http://download.spamfighter.com
Please check in Active Directory that an account named “SPAMfighterService” is created, and that it a mailbox has been created in Exchange for the account.The user account needs to be member of the following usergroups:Administrators
Exchange Servers
Organization ManagementGo on your server to “Start” -> “All programs” -> “SPAMfighter Exchange Module” -> “Configuration” -> “Exchange Integration Manager”.Click the “Service status” tab. Click the button next to “Stop SPAMfighter Exchange Module service”.Click the “Service account” tab. Make sure that the name of the user account “SPAMfighterService” is written correctly. Enter the password correctly. Make sure that the proper domain is selected. Then click the “Confirm” button.Go back to the “Service status” tab and click the button next to “Start SPAMfighter Exchange Module service”.Then go to the “Integration” tab and click the button next to “Remove integration into Exchange”, then click the button next to “Add integration into Exchange”.If you still have difficulties, please use the support form to contact the support team.
Please use your normal Windows credentials to login (domain/username and password).Alternatively, you can try to access the Administration page through the link marked “Solution Administrator”.
SPAMfighter Exchange Module - Using SEM
Yes, SPAMfighter Exchange Module version 5 will filter incoming, outgoing and internal e-mails for spam. SEM have invividual filters that can be applied to outgoing mails.
The requirements are that you are using Exchange server 2007 and later versions of Exchange Server.
Read more about filtering of incoming mails by SEM here.
Yes – you can redirected spam to a dedicated mailbox. You can configure SEM to redirect spam to another mailbox through the Administration Module (under “Configuration” > “Policies”)
Go to “Configuration” -> “Usergroups” and click the “Edit” button next to your group.
Under “Default state”, uncheck the SPAMfighter and Virusfighter checkbox, so that the filters are not enabled by default for new mailboxes.
If you receive many emails that appear to have been sent by yourself, then you can help prevent spoofed emails by removing your own domain(s) from the Domain whitelist.
In the Administration module, go to “Configuration” > “Policies”. Click the “Configure policy” button next to your policy. Then click the “Configure filter” button next to “SPAMfighter Sender Filter”. Remove your own domain name from the Domain whitelist, and your own email address from the Email Address whitelist.
If you have questions or need help on doing this, SPAMfighter Support Department are always ready to help – just write an email to semsupport@spamfighter.com
When emails are redirected to another email address directly from Exchange, they are sent to your other email address before they are stored in your Exchange, and thus SPAMfighter does not have the opportunity to filter them.
Please remove the forwarding from Exchange and use instead this method:1) Open the SEM Administration Module on the server and go to “Mailboxes” -> “Mailboxes”
2) Locate the mailbox in cause
3) Click the small configuration icon to the right of the mailbox
4) Choose “POP3” as primary mail protocol
5) Click “Save changes” follow by “Close”
In Outlook, click “Tools” -> “Rules and Alerts” -> “New rule” -> “Start from blank rule” -> “Check messages when they arrive”.Create a new blank rule with the following properties: * Sent to people or distribution list (select your email address)
* Forward it to people… (add your second email address)
* Except if the subject contains specific words (enter these characters: ** SPAM **)
* Stop processing more rulesCreate another blank rule with the following properties: * Check messages when they arrive
* With specific words in the subject (add the characters: ** SPAM **)
* Move it to the specified folder (Choose SPAMfighter)
* Stop processing more rulesIn step two above, please make sure that you select “With specific words in the SUBJECT”, not body. When you select “stop processing more rules”, the rule will run server-side and will be executed when an email is received, even if Outlook is not running. If the rule is marked as “client-side” in the Rules list, then please edit your rule and uncheck the option “on this machine only”. These rules need to run server-side to be effective.
SPAMfighter HMG - General
Yes, you can. As long as you have your own domain name, you can have your mail filtered for spam. This will also filter spam emails received on your mobile phone.
You won”t be able to use the SPAMfighter Hosted Mail Gateway. We recommend that you use instead SPAMfighter PRO
With the SPAMfighter Hosted Mail Gateway, it does not matter what type of mail server you have. As long as you have your own domain name, we can filter your emails.
Then you will have to contact your IT provider. If your domain is hosted in several places, then contact the one responsible for your name servers (DNS).
Our smallest customers use it for 10 accounts and the largest we have worked with is more than 200.000 accounts.
When somebody sends an email to an email address on your domain, it will first reach SPAMfighter. We filter your spam according to the rules that you defined. Then, we redirect your email to your existing mail server. You will download your email normally. There are no changes needed in your Outlook.
Before we set up your SPAMfighter Hosted Mail Gateway account, please confirm that you will be able to modify the MX records for the domains listed, in order to redirect the email traffic through our filter. Once it has been processed by us, it will be forwarded to the original destination.
This is the only change that needs to be done to enable filtering from SPAMfighter. After you sign up for a trial, you will receive a unique address that you need to enter in the control panel where you manage the options for your domain name.
In the control panel for your domain name, you will see information related to the A-record and the MX-record. Do not change the A-record. Instead, change the MX-record. read about the MX Record here. Alternatively, you can ask for help from your IT solution provider.
You can calculate the price here
You can sign up for a 30 days free trial here
SPAMfighter Hosted Mail Gateway
Yes, you can. As long as you have your own domain name, you can have your mail filtered for spam. This will also filter spam emails received on your mobile phone.
You won”t be able to use the SPAMfighter Hosted Mail Gateway. We recommend that you use instead SPAMfighter PRO
With the SPAMfighter Hosted Mail Gateway, it does not matter what type of mail server you have. As long as you have your own domain name, we can filter your emails.
Then you will have to contact your IT provider. If your domain is hosted in several places, then contact the one responsible for your name servers (DNS).
Our smallest customers use it for 10 accounts and the largest we have worked with is more than 200.000 accounts.
When somebody sends an email to an email address on your domain, it will first reach SPAMfighter. We filter your spam according to the rules that you defined. Then, we redirect your email to your existing mail server. You will download your email normally. There are no changes needed in your Outlook.
Before we set up your SPAMfighter Hosted Mail Gateway account, please confirm that you will be able to modify the MX records for the domains listed, in order to redirect the email traffic through our filter. Once it has been processed by us, it will be forwarded to the original destination.
This is the only change that needs to be done to enable filtering from SPAMfighter. After you sign up for a trial, you will receive a unique address that you need to enter in the control panel where you manage the options for your domain name.
In the control panel for your domain name, you will see information related to the A-record and the MX-record. Do not change the A-record. Instead, change the MX-record. read about the MX Record here. Alternatively, you can ask for help from your IT solution provider.
You can calculate the price here
You can sign up for a 30 days free trial here
SPAMfighter Mail Gateway
SPAMfighter Mail Gateway needs to have access to the internet, but SPAMfighter Mail Gateway only needs access to UDP/2409 to servers.backend.spamfighter.com and TCP/2409 to http://login.spamfighter.com. To be able to receive automatic updates access to TCP/80 to http://www.spamfighter.com is needed, but not an absolute requirement. This makes it possible for the system administrator to secure the network by being able to close all other connections other than the ones listed.
SPAMfighter Mail Gateway works with Windows 2000 or newer and in Windows virtual environments (VMWare, Virtual Server, Hyper V etc.)
Yes, with the help of our administration module, it is easy to deactivate the spam filtering on a single mailbox.
Spam mails can automatically be quarantined, deleted, prefixed, marked or for example routed to a special e-mail folder or all of the above.
SPAMfighter Mail Gateway has numerous ways of determining whether or not an e-mail is spam or not. The most significant way is by creating a unique signature for each e-mail and its elements, and sends this signature to the SPAMfighter server for evaluation. Afterwards, the server returns a score with the decision if the message is spam or not. The original e-mail never leaves the server under SPAMfighter Mail Gateway filtering.
SPAMfighter Mail Gateway gives you the hightest degree of confidentiality. Your e-mail security and privacy is our top priority. Legitimate e-mail on the server is never sent further or shared with anyone – your legitimate e-mails will never leave your server. Only a few blocks of encrypted data and the unique web address are sent to the SPAMfighter server.
SPAMfighter Mail Gateway is a “store-and-forward” SMTP server – which means it will accept incoming e-mails instead, scan the e-mail, and route the e-mail on to another SMTP server. During the installation – or on any point in time afterwards – configuration of where to route e-mails can be configured. Due to this “store-and-forward” (i.e. gateway) concept – an existing SMTP server must exist.
SPAMfighter Mail Gateway sends installation details regarding registration, login-information and e-mail compiled hash-values, when e-mails are being tested. SPAMfighter Mail Gateway will never send sensitive information to the net. All information that is sent and received is validated in order to avoid manipulation.
SPAMfighter Mail Gateway - Installation
SPAMfighter Mail Gateway needs to have access to the internet, but SPAMfighter Mail Gateway only needs access to UDP/2409 to servers.backend.spamfighter.com and TCP/2409 to http://login.spamfighter.com. To be able to receive automatic updates access to TCP/80 to http://www.spamfighter.com is needed, but not an absolute requirement. This makes it possible for the system administrator to secure the network by being able to close all other connections other than the ones listed.
SPAMfighter Mail Gateway works with Windows 2000 or newer and in Windows virtual environments (VMWare, Virtual Server, Hyper V etc.)
SPAMfighter Mail Gateway - Login and Security
Yes, with the help of our administration module, it is easy to deactivate the spam filtering on a single mailbox.
Spam mails can automatically be quarantined, deleted, prefixed, marked or for example routed to a special e-mail folder or all of the above.
SPAMfighter Mail Gateway has numerous ways of determining whether or not an e-mail is spam or not. The most significant way is by creating a unique signature for each e-mail and its elements, and sends this signature to the SPAMfighter server for evaluation. Afterwards, the server returns a score with the decision if the message is spam or not. The original e-mail never leaves the server under SPAMfighter Mail Gateway filtering.
SPAMfighter Mail Gateway gives you the hightest degree of confidentiality. Your e-mail security and privacy is our top priority. Legitimate e-mail on the server is never sent further or shared with anyone – your legitimate e-mails will never leave your server. Only a few blocks of encrypted data and the unique web address are sent to the SPAMfighter server.
SPAMfighter Mail Gateway is a “store-and-forward” SMTP server – which means it will accept incoming e-mails instead, scan the e-mail, and route the e-mail on to another SMTP server. During the installation – or on any point in time afterwards – configuration of where to route e-mails can be configured. Due to this “store-and-forward” (i.e. gateway) concept – an existing SMTP server must exist.
SPAMfighter Mail Gateway sends installation details regarding registration, login-information and e-mail compiled hash-values, when e-mails are being tested. SPAMfighter Mail Gateway will never send sensitive information to the net. All information that is sent and received is validated in order to avoid manipulation.
VIRUSfighter
You may want to stop the real-time scanner when you perform system maintenance tasks. When you stop the real-time scanner, it will not start again in the current session unless you do it manually, after a reboot of your computer real-time scanner will be activated again.
You can stop/start the real-time scanner by right clicking the VIRUSfighter icon in the system tray and choose Deactivate real-time scanning, you can activate it here again.You can also deactivate this from your menu in VIRUSfighter, From Start -> All Programs -> Fighters -> VIRUSfighter -> VIRUSfighter -> Settings -> Protection Settings -> Deactivate real-time scanner.
A new and very malicious ransomware virus is spreading on the internet. Previously it was only found on dodgy sites like porn or illegal download pages. Not it has unfortunately also begun to populate on normal sites and on pages with videos being played.
But, luckily with a little work it can be removed
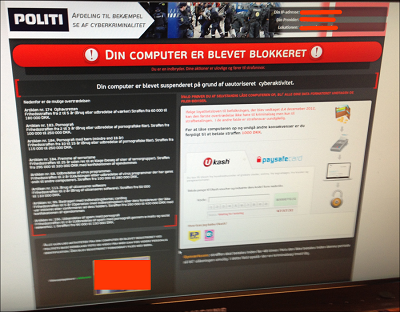
The first thing one notice is that a webcam picture of you has been taken. This is very disturbing to see but fear not this will not be displayed anywhere. This is just a way for the perpetrators to scare you to pay.
Not all sites where the virus is placed are helpful in closing them down. This makes it very difficult for the police, FBI and investigators to shut them down. These scam artists are furthermore almost impossible to find.
Removing the Ukash Virus
Although there are reports of different kinds of Ukash virus, this guide should help most people out there who have been infected by this horrible virus. Please read through the entire guide before starting.
1. Close down your computer with a hard reboot (pressing down on the OFF button).
2. Remove or turn of any wireless or internet cable connection.
3. Startup your computer while pressing down F8 to activate Safe Mode options (a few computers like Medion you might have to press something else).
4. When in the Safe Mode Options menu choose: “Restart in Safe mode with COMMAND PROMPT (very important).
5. You will see a Command Line when your Windows has booted in Safe Mode (there is a chance you have to login with your Windows password first).
6. In the command line window, write: RSTRUI.EXE which will prompt the Windows Restore function to open.
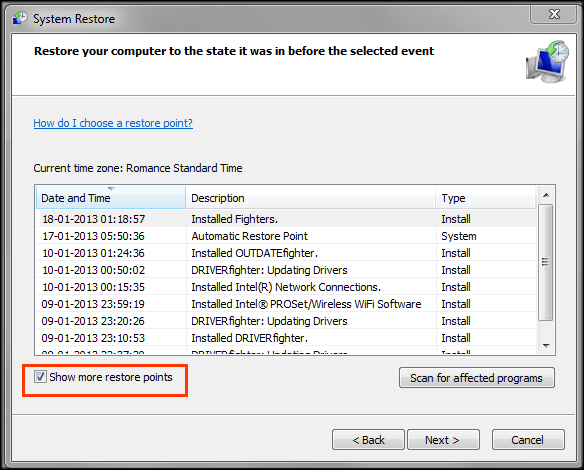
1. Choose a Restore file from a time you know your computer was working properly (to be safe go at least a couple of days back).
2. Windows will not restore itself. This might take up to 20-30 minutes depending on size.
3. Now you have to clean the virus leftovers when your Windows is backed up.
4. Download and install the free ChicaPC-Shield and do a scan to find any leftover threats.
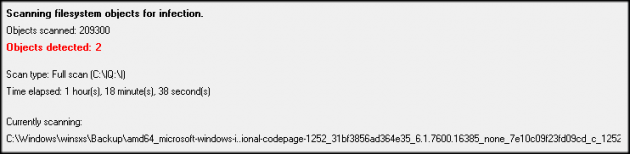
ProgramDataDSGSDGDSGDSGW.PAD (Exploit.Drop.GSA) -> Quarantined and deleted successfully.
Users(yourname)AppDataRoamingMicrosoftWindowsStartMenuProgramsStartup unctf.lnk (Trojan.Ransom.SUGen)
If you are lucky enough there will be no leftovers since the restoration cleared everything. However in most cases there will be files to clean.
1. After your reboot you might experience a popup with a random file name like “wgsdhsagss.exe” or something related, which says “can not be found”. This is nothing to be worried about. You can manually find this reference in the Registry or use SLOW-PCfighter to remove these entries.
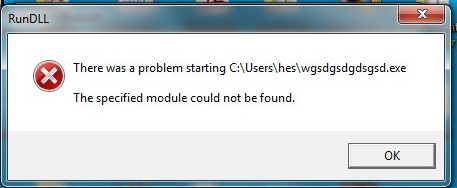
NB. Your antivirus or spyware program might have been turned off and the signature database deleted from the system. Just reinstall the product and you are good to go.
We hope this guide helped you get the best of the virus and cross our fingers you are more careful in the future.
Open your VIRUSfighter menu from “Start -> All Programs -> Fighters -> VIRUSfighter -> VIRUSfighter” Click on “User ID” in the lower right corner of your VIRUSfighter menu. You will get a Popup where you can see your UserID.
SPYWAREfighter only scans for viruses if VIRUSfighter is installed. If VIRUSfighter is installed, then customers are STRONGLY recommended NOT to have another antivirus installed. But, if you are using JUST SPYWAREfighter, then yes, you can install another antivirus software (and are strongly recommended to do so.)
VIRUSfighter only scans for spyware (as an option) when SPYWAREfighter is installed, as part of our “suite” presentation of installed SPAMfighter software, so you need both products to protect you from viruses and spyware.
For stability reasons, SPYWAREfighter and VIRUSfighter are integrated when installed together, so updating one will update both.
This is a known issue: restart VIRUSfighter and select “Scan” from the user interface, and the scan information will be shown. Functionality is not impaired, but the user interface issue will be fixed in the next version of products.
For stability reasons, SPYWAREfighter and VIRUSfighter are integrated when installed together, so during uninstall of one, the other is stopped, however, once the uninstall is completed, the scan will continue.
This means that there is an update for your VIRUSfighter and we recommend that you click it to update VIRUSfighter to the latest version.
You need to download it from our website and install it.
To activate VIRUSfighter, please do this:
Go to Start -> All Programs -> Fighters -> VIRUSfighter -> VIRUSfighter
Click Account -> Renew VIRUSfighter.
Enter the product key shown on your invoice and click the Add Product Key button.
After this please try to update your VIRUSfighter to be sure you have the latest updates.
To install VIRUSfighter:
* Download VIRUSfighter here
* Save it on your e.g. desktop
* When it is done then double click on the .exe file, and follow the installation.
Go to Start -> All Programs -> Fighters -> VIRUSfighter -> VIRUSfighter. This will open the VIRUSfighter program.
Click on Settings -> Scan Settings.
If you want to add any extensions you can do so adding it to the “Add your own filetypes by typing extension here” field and click “Add”.
To update your VIRUSfighter, please do the following:
Go to Start -> All Programs -> Fighters -> VIRUSfighter -> VIRUSfighter.
Your VIRUSfighter program will open.
Click on “Update” in the lower right corner of the program.
You can also right click the VIRUSfighter icon in your system tray and choose Check for the latest updates
VIRUSfighter is free for 30 days. After the 30 day trial, you can choose if you would like to purchase VIRUSfighter PRO or uninstall. If you continue to use VIRUSfighter without purchasing a license, you will no longer be able to receive updates and will not be protected against the latest threats.
Most likely you have installed VIRUSfighter over an existing anti-virus application, which was not automatically removed by the system during the installation. Please uninstall any other antivirus software you may have on your computer.
Manual Activation
*Go to Start -> All Programs -> Fighters -> VIRUSfighter -> VIRUSfighter
This will open your VIRUSfighter program
*Click on “Account” in the left menu
*Enter the product key shown on your invoice and click the Add Product Key button.After this please try to update your VIRUSfighter to be sure you have the latest updates.
To unsubscribe from emails sent from VIRUSfighter please click here.
Please remember, you will resubmit to our emails, if you continue to use or re-register VIRUSfighter.
You should uninstall or deactivate your other anti-virus software before installing VIRUSfighter.
Having two active anti-virus programs could give you problems and even crash your computer.To do this, go to: Start Menu > Control Panel > Add/Remove Programs. Choose your anti-virus software and click on Remove.
Answer
How do I uninstall VIRUSfighter?To uninstall VIRUSfighter, please do the following:
* Go to: Start -> Settings -> Control Panel -> Add/Remove Programs.
* Locate VIRUSfighter and click Change/Remove and follow the guide.
VIRUSfighter - General
You may want to stop the real-time scanner when you perform system maintenance tasks. When you stop the real-time scanner, it will not start again in the current session unless you do it manually, after a reboot of your computer real-time scanner will be activated again.
You can stop/start the real-time scanner by right clicking the VIRUSfighter icon in the system tray and choose Deactivate real-time scanning, you can activate it here again.You can also deactivate this from your menu in VIRUSfighter, From Start -> All Programs -> Fighters -> VIRUSfighter -> VIRUSfighter -> Settings -> Protection Settings -> Deactivate real-time scanner.
You need to download it from our website and install it.
To activate VIRUSfighter, please do this:
Go to Start -> All Programs -> Fighters -> VIRUSfighter -> VIRUSfighter
Click Account -> Renew VIRUSfighter.
Enter the product key shown on your invoice and click the Add Product Key button.
After this please try to update your VIRUSfighter to be sure you have the latest updates.
This means that there is an update for your VIRUSfighter and we recommend that you click it to update VIRUSfighter to the latest version.
For stability reasons, SPYWAREfighter and VIRUSfighter are integrated when installed together, so during uninstall of one, the other is stopped, however, once the uninstall is completed, the scan will continue.
This is a known issue: restart VIRUSfighter and select “Scan” from the user interface, and the scan information will be shown. Functionality is not impaired, but the user interface issue will be fixed in the next version of products.
For stability reasons, SPYWAREfighter and VIRUSfighter are integrated when installed together, so updating one will update both.
VIRUSfighter only scans for spyware (as an option) when SPYWAREfighter is installed, as part of our “suite” presentation of installed SPAMfighter software, so you need both products to protect you from viruses and spyware.
SPYWAREfighter only scans for viruses if VIRUSfighter is installed. If VIRUSfighter is installed, then customers are STRONGLY recommended NOT to have another antivirus installed. But, if you are using JUST SPYWAREfighter, then yes, you can install another antivirus software (and are strongly recommended to do so.)
Open your VIRUSfighter menu from “Start -> All Programs -> Fighters -> VIRUSfighter -> VIRUSfighter” Click on “User ID” in the lower right corner of your VIRUSfighter menu. You will get a Popup where you can see your UserID.
A new and very malicious ransomware virus is spreading on the internet. Previously it was only found on dodgy sites like porn or illegal download pages. Not it has unfortunately also begun to populate on normal sites and on pages with videos being played.
But, luckily with a little work it can be removed
The first thing one notice is that a webcam picture of you has been taken. This is very disturbing to see but fear not this will not be displayed anywhere. This is just a way for the perpetrators to scare you to pay.
Not all sites where the virus is placed are helpful in closing them down. This makes it very difficult for the police, FBI and investigators to shut them down. These scam artists are furthermore almost impossible to find.
Removing the Ukash Virus
Although there are reports of different kinds of Ukash virus, this guide should help most people out there who have been infected by this horrible virus. Please read through the entire guide before starting.
1. Close down your computer with a hard reboot (pressing down on the OFF button).
2. Remove or turn of any wireless or internet cable connection.
3. Startup your computer while pressing down F8 to activate Safe Mode options (a few computers like Medion you might have to press something else).
4. When in the Safe Mode Options menu choose: “Restart in Safe mode with COMMAND PROMPT (very important).
5. You will see a Command Line when your Windows has booted in Safe Mode (there is a chance you have to login with your Windows password first).
6. In the command line window, write: RSTRUI.EXE which will prompt the Windows Restore function to open.
1. Choose a Restore file from a time you know your computer was working properly (to be safe go at least a couple of days back).
2. Windows will not restore itself. This might take up to 20-30 minutes depending on size.
3. Now you have to clean the virus leftovers when your Windows is backed up.
4. Download and install the free ChicaPC-Shield and do a scan to find any leftover threats.
ProgramDataDSGSDGDSGDSGW.PAD (Exploit.Drop.GSA) -> Quarantined and deleted successfully.
Users(yourname)AppDataRoamingMicrosoftWindowsStartMenuProgramsStartup unctf.lnk (Trojan.Ransom.SUGen)
If you are lucky enough there will be no leftovers since the restoration cleared everything. However in most cases there will be files to clean.
1. After your reboot you might experience a popup with a random file name like “wgsdhsagss.exe” or something related, which says “can not be found”. This is nothing to be worried about. You can manually find this reference in the Registry or use SLOW-PCfighter to remove these entries.
NB. Your antivirus or spyware program might have been turned off and the signature database deleted from the system. Just reinstall the product and you are good to go.
We hope this guide helped you get the best of the virus and cross our fingers you are more careful in the future.
To unsubscribe from emails sent from VIRUSfighter please click here.
Please remember, you will resubmit to our emails, if you continue to use or re-register VIRUSfighter.
Manual Activation
*Go to Start -> All Programs -> Fighters -> VIRUSfighter -> VIRUSfighter
This will open your VIRUSfighter program
*Click on “Account” in the left menu
*Enter the product key shown on your invoice and click the Add Product Key button.After this please try to update your VIRUSfighter to be sure you have the latest updates.
Most likely you have installed VIRUSfighter over an existing anti-virus application, which was not automatically removed by the system during the installation. Please uninstall any other antivirus software you may have on your computer.
VIRUSfighter is free for 30 days. After the 30 day trial, you can choose if you would like to purchase VIRUSfighter PRO or uninstall. If you continue to use VIRUSfighter without purchasing a license, you will no longer be able to receive updates and will not be protected against the latest threats.
To update your VIRUSfighter, please do the following:
Go to Start -> All Programs -> Fighters -> VIRUSfighter -> VIRUSfighter.
Your VIRUSfighter program will open.
Click on “Update” in the lower right corner of the program.
You can also right click the VIRUSfighter icon in your system tray and choose Check for the latest updates
Go to Start -> All Programs -> Fighters -> VIRUSfighter -> VIRUSfighter. This will open the VIRUSfighter program.
Click on Settings -> Scan Settings.
If you want to add any extensions you can do so adding it to the “Add your own filetypes by typing extension here” field and click “Add”.
VIRUSfighter - Installation
To install VIRUSfighter:
* Download VIRUSfighter here
* Save it on your e.g. desktop
* When it is done then double click on the .exe file, and follow the installation.
Answer
How do I uninstall VIRUSfighter?To uninstall VIRUSfighter, please do the following:
* Go to: Start -> Settings -> Control Panel -> Add/Remove Programs.
* Locate VIRUSfighter and click Change/Remove and follow the guide.
You should uninstall or deactivate your other anti-virus software before installing VIRUSfighter.
Having two active anti-virus programs could give you problems and even crash your computer.To do this, go to: Start Menu > Control Panel > Add/Remove Programs. Choose your anti-virus software and click on Remove.